Some of the new Joomla! 3.0 features can’t be missed such as the new installation process. It has been completely overhauled for an optimized user experience (UX).
The entire process now takes only 3 steps, which means reductions from 7 steps that occurred in the case of Joomla 2.5. Friend of mine report being able to finish the installation screens in less then 30 seconds. New distribution the Installation Wizard supports all major browsers as long as you’re working with an up-to-date version.
Before we can install anything we have to get the latest Joomla 3.0 version from this URL: http://joomlacode.org/gf/project/joomla/frs/ and unpack the files into your root folder of the web server. Open your favorite browser and enter name of your domain or localhost. You should see the first installation screen.
Step 1: Main Configuration
Joomla! installer tries to detect browser language and selects the appropriate language version.
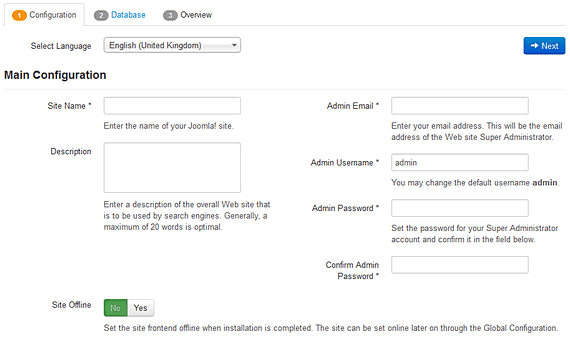
To install Joomla 3.0 you have to enter the following personal information:
- Name Your Site: Any name you want — can be changed in the dashboard later.
- Description: Enter a description of the overall Web site that is to be used by search engines. Generally, a maximum of 20 words is optimal — can be changed in the dashboard later.
- Your Email Address: The admin mail address. Make sure it exists; this is where you’ll receive a link to change the eventually forgotten admin password.
- Admin Username and Admin Password – Joomla use default ‘admin’ as your username. You can change it now or later (which is a good security measure). Rember that super user has maximum control of the site (frontend & backend), so try to use a difficult password.
Step 2: Database Configuration
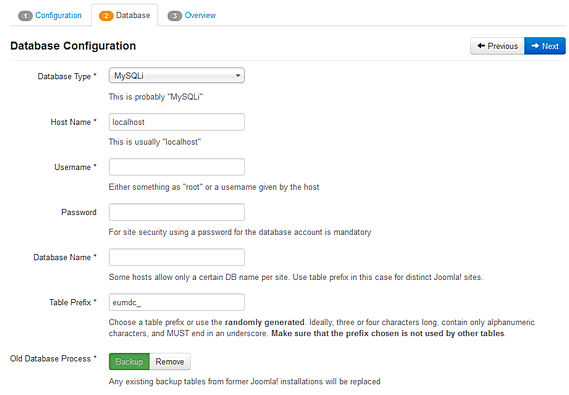
You have to get the database connection right, because if you can’t connect Joomla 3.0 to MySQL, your site isn’t going to run.
Step 3: Sample Data, Overview & Pre-Installation Check
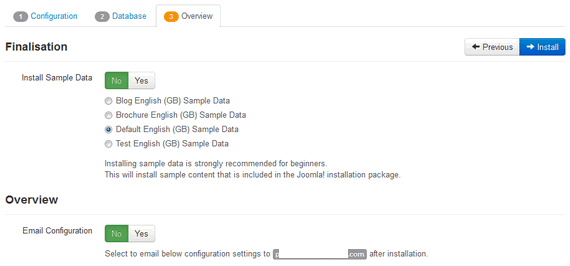
You can optionally email the configuration to archive the settings for later as well as optionally emailing the password (off by default for security reasons).
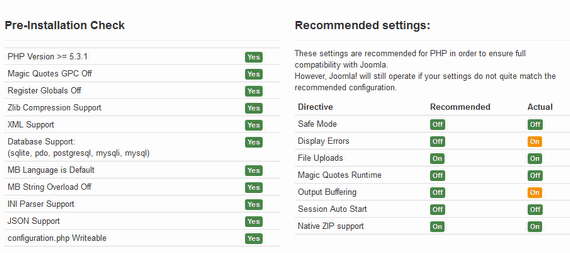
It’s worth noting that you must meet the requirements to begin the installation process. On the bottom there are a few checks to make sure that your web server meets all the requirements of Joomla 3.0. As you see Step 3 checks your server for all the requirements. I admit that it is a very strange move by the creators of Joomla 3.0 and I do not fully understand them. Going forward with CMS installation in spite of the missing requirements will cause the software to not function properly and will create problems.
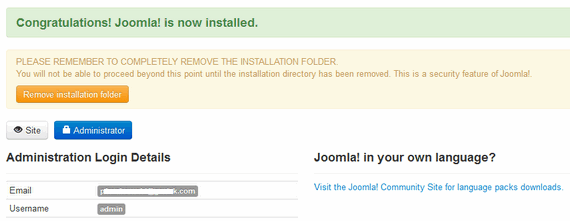
Joomla 3.0 is installed and ready to work with on your computer! Pay attention to this message; you really do need to remove the installation directory before you continue. All Joomla Wizards requires this step for security reasons, but this time just use orange button to do that.
After you’ve successfully installed Joomla! you’ll find a file called configuration.php in the config directory. This is where the installation process has saved the information you’ve entered during the process.