Installation Default Restaurant Ecommerce
Introduction
Quark represents a new evolution in GavickPro's Joomla! templates, offering a powerful base and regularly released new styles to fit multiple uses. In this guide, we'll look at how to install everything you need ready to build your site, whether you're intending to accurately match our demo layout or focus on creating your own content.

Guide Structure
The Quark Installation Guide is split into multiple sections. This core installation guide covers quickstart installation, which allows you to install a new Joomla! installation with all the demo content, modules and extensions of the chosen Quark style ready to go, perfectly matching the demo layout. It also covers the core requirements for manually matching the demo layout, including template package, module, plugin, extension and settings installation. Additional requirements for matching the demo layout with manual installation, including module placement, menus, and additional page configuration, are all covered in separate tabs selectable above, one for each Quark style. For both quickstart and manual installation we'll provide step-by-step guides so you'll find everything easy as pie.
Select Your Preferred Installation Method
The most important decision to make before proceeding is whether you need to install the template manually, or if you can use the Quickstart package, which will install everything for you.
Which installation method you should use depends on the current status of your site. The Quickstart is a full installation of Joomla! that installs Joomla itself, the template, modules, demo content and database data to match our demo layout. However, as this is a full Joomla! installation it may only be used on a clean server; the package cannot be installed in an existing Joomla installation.
Manual installation is more tedious, as you must install the template and modules/plugins, then manually place the modules and configure their settings and content accordingly. Though this installation method takes some time, the benefit is that with it you can install the template and modules, gaining all the features of our demo, without losing any content you already have.
Given the above, it is recommended that you use the quickstart installation wherever possible, as it saves time and perfectly matches our demo layout. You should use this method if you are starting a new website, or if your existing website/Joomla! installation lacks any unique content you wish to preserve. For example, if your host installed Joomla for you, then it's advisable to remove this installation and reinstall using the quickstart, as it is much faster than manual installation.
If you have a lot of existing articles or other content that you do not wish to lose, then the manual installation is the only way to install the template and match the demo settings without losing this content.
Both installation methods will be covered in the following sections, with step-by-step guides to getting everything up and running.
Quickstart Installation
The quickstart installation requires very little input save for your admin and database details, and once the quickstart is uploaded to your server the entire install process takes just a few minutes. In order to complete this install method you will need FTP access to your server and a database name, username and password. A complete step-by-step guide with further information on the requirements may be found in our documentation:
Manual Installation
Manual installation requires that the template and plugins/modules are manually installed, and then other elements such as menus, module instances and content are manually placed. As such, it will take a bit of time to complete, though it must be stressed that this is not a difficult process at any point; placing modules and adding content is very simple thanks to Joomla's functionality.
Since Quark includes multiple styles, you will need to know which style you want to use before beginning this guide, as there are several sections that can have large differences depending on the style you wish to use. Broadly-speaking, manual installation can be split into several steps, some very short, some rather long:
- Download and install the template.
- Download and install additional modules and plugins.
- Import template settings.
- Upload demo images (optional).
- Place and configure modules and create page content.
- Setup menus and additional pages.
This section of the guide will cover steps 1-4; generally these steps are the same regardless of which Quark style you wish to use, but there will be minor differences in terms of settings and required extensions, but these are made clear during the guide. For steps 5 and 6, which covers module placement and menu and additional page configuration, which are very different depending on the chosen style, a separate set of guides have been prepared. Each of these guides, one for each Quark style, is selectable in the tabs at the top of this page and should be followed once you have completed the steps in this install guide.
Let's look more closely at each of the first four steps in turn; once done, you will have all the modules, extensions and plugins installed that you need to begin building your site to match our demo layout.
Before We Start
In order to ensure that your installation runs smoothly you will need to deactivate any existing modules; this is because the install process will involve placing several modules in module positions that are exclusive to Quark; if you do not deactivate your existing modules beforehand there can be some conflict or overlap that will prevent the site from matching the demo. Once installation is complete you can of course republish the modules as needed; just be sure to double-check that they do not affect the template aesthetic or you may need to make some adjustments to the styling.
Deactivating the modules is very easy; simply log-in to your Joomla! backend, then click on Extensions → Module Manager in the top menu. You will now see a list of active modules.
To deactivate modules en masse, click on the tickbox at the top of the second column in the module list to select every module, then click on the Unpublish button at the top of the screen to deactivate. Once done, do the same for any other pages should there be more modules. We can now start installing the template.
Download and Install the Template
Now that you're ready to install, the first thing to do is download and install the template's zip package. Click here to visit the Quark download page (you must be logged-in to do so!). There are three files available:
- gk_quark_ecommerce_quickstart_J!3.zip - This package contains the quickstart package for a full Quark installation with the ecommerce style, components and content. This package can be ignored for manual installation.
- gk_quark_restaurant_quickstart_J!3.zip - This package contains the quickstart package for a new installation of Joomla! that uses the Restaurant style and additional content. If you are installing manually then this may be ignored.
- gk_quark_J!3.zip - This package contains the basic template files and the restyle files for Quark and all its restyles; you should download this package for manual installation.
- gk_quark_quickstart_J!3.zip - This contains the quickstart files for a new installation of Joomla that matches the demo layout exactly; this can be ignored if you are installing manually.
- gk_quark_rest_files_J!3.zip - This package contains the source PSD files for the template as well as additional plugins required to expand the template functionality. Make sure to download this package too if you are installing manually.
Grab the basic template package and the rest files package; both will be needed during this install. Once downloaded, we can install the template package:
- Login to your Joomla! backend and click on Extensions → Extension Manager, the manager's screen will open; now click on the Upload Package File tab at the top of the screen.
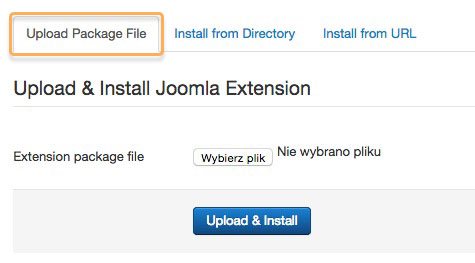
- Click on Choose File to open your file browser; select the recently-downloaded gk_quark_J!3.zip file, then click the Upload & Install button.
- Once installation is complete, click on Extensions → Template Manager to open the list of available templates; you should now see gk_quark in the list.
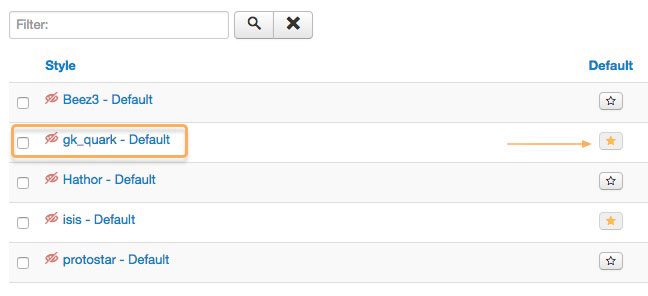
- Click on the star next to gk_quark in the Default column to set it as the default template.
The template is now installed and ready to go; now we need to take care of the plugins and modules.
Install the Plugins and Modules
Quark uses a selection of powerful modules and plugins to provide a range of options and features, all of which need to be installed separately for you to take advantage of what they have to offer.
Installing the Plugins
The plugins used in Quark provide extra functionality for the Gavern Framework that powers our Joomla templates, including support for advanced typography, social media functionality and more. These elements are all included in the gk_quark_rest_files package that you downloaded earlier.
To install the plugins:
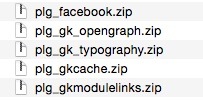
- Extract the gk_quark_rest_files package on your local computer. You will see that it contains three folders; Modules, Plugins and Source.
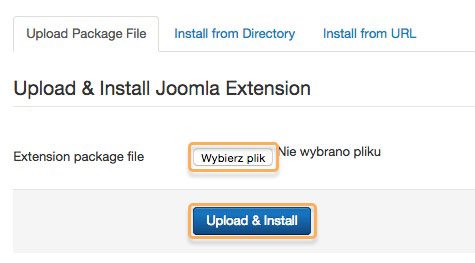
- Log-in to your Joomla! backend and navigate to Extensions → Extension Manager → Upload Package File as you did with the template install.
- Click on the Choose File button to open the file explorer, and navigate to your extracted gk_quark_rest_files → plugins folder; you will see a set of zip packages that each contain a module.
- Double-click on the first plugin in the folder to select it, then click the Upload & Install button. Repeat this install process for all the plugins in the folder.
- Once all the plugins are installed you will need to activate them; navigate to Extensions → Plugin Manager in the top menu to see a list of installed plugins.
-
Find the plugins you have just installed; they will have a red X next to them to show they are not activated. Activate them by either clicking the X, or bulk-activate by adding a check to the tickbox next to each plugin to activate, then click the Enable button at the top of the page.
All your plugins are now ready to use.
Installing the Modules
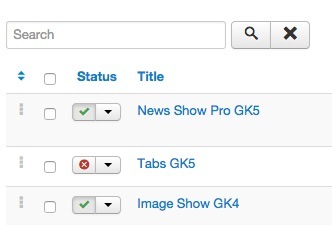
In order to match the demo layout of Quark there are three GavickPro-developed modules that are essential, as they provide core elements of the available Quark styles. These are: News Show Pro GK5, which is used to create product and article previews, the Image Show slideshow tool, and Tabs GK5 tab creation module. Note that not all modules are required for every style; for example, Tabs GK5 is used on the frontpage of the default style but not in the Restaurant style, but it is still recommended that you install every module to ensure full compatibility.
To download these modules:
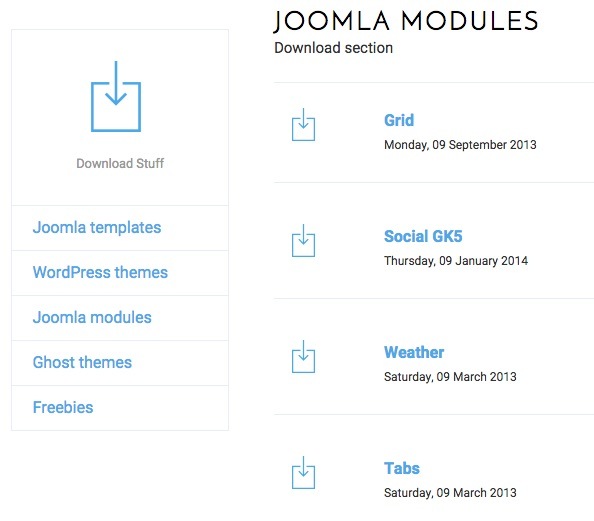
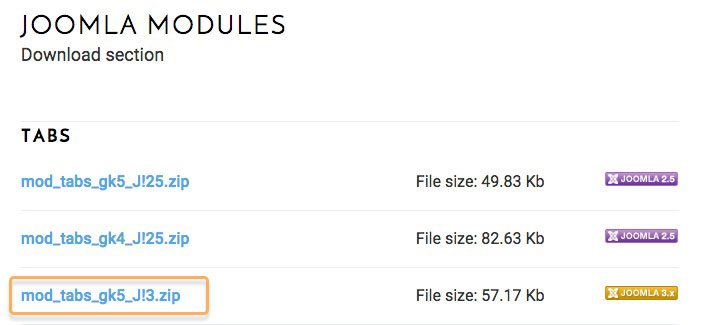
- Head to our Joomla! modules' download section; you'll see a list of the various open-source modules GavickPro has created.
- Click on the Tabs link to be taken to the list of file downloads; you only need to download the Joomla 3 version of Tabs GK5, so click on the bottom file called mod_tabs_gk5_J!3.zip to begin your download.
- Now return to the download section and select News Show Pro from the list. There are several files here; click on the download link for the Joomla 3 version of News Show Pro GK5, called mod_news_pro_gk5_J!3.zip.
- Now do the same for Image Show; there are only two files available for this module, so download the Joomla 3-specific version; mod_image_show_gk4_J!3.zip.
Now that we have all the modules we can move on to installing them into Joomla!. This will be similar to how you installed the plugins in the previous section, but without the extraction:
- Login to your Joomla! backend and click on Extensions → Extension Manager, then click on the Upload Package File tab.
- Click on Choose file to open the file browser, and navigate to your recently downloaded mod_tabs_gk5_J!3.zip and double-click it to select the file, then click the Upload & Install button to begin installation.
- Repeat this install process for your other downloaded module zip packages; mod_news_pro_gk5_J!3.zip and mod_image_show_gk4_J!3.zip.
Once all the modules are installed you can move to the next step.
Installing K2 (necessary for all styles)
K2 offers complex article management options that far surpass those included in the core Joomla article manager; additional styling to K2 items has been added in Quark to ensure that your blog section can match the rest of the site layout.
To install this component:
- Head over to the K2 site and click on the green Download K2 button in the header area to be taken to the download screen.
- Your download will start; wait for it to finish, then login to your Joomla backend and click on Extensions → Extension Manager in the top menu.
- Open the Upload Package File tab and click on Choose File. Select your recently downloaded K2 package and then click Upload & Install.
After a few moments K2 will be installed and you'll be ready to go!
Installing VirtueMart (Necessary for Ecommerce style only)
VirtueMart is a powerful ecommerce component specially-designed for Joomla, and ranks as one of the most popular Joomla extensions currently available. Available completely free, VM is often the first choice for many online stores. If you intend to utilize the Ecommerce style from Quark to sell your products you will need to install this extension.
To install this extension:
- Navigate the the VirtueMart Download Page and click on the Download VM3 Now button; this includes only the VirtueMart 3 component (core and AIO). Do not download any of the other packages.
- You will download a file called comvirtuemart.3.x.xextract_first.zip where "3.x.x" is the VirtueMart version number; once downloaded, right-click on the file and extract it. There will be three more zip packages inside.
- Log-in to your Joomla administration area and click on Extensions → Extension Manager in the top menu to open the Extension Manager: Install page.
- Open the Upload Package File tab and click on Choose File. Select the file you wish to install, then click on the Upload & Install button. The three packages from the VirtueMart zip file should be installed in this order:
- com_virtuemart.3.x.x.zip - This is the core VirtueMart extension, and should be installed first.
- comvirtuemart.3.x.xext_aio.zip - This package contains the VirtueMart-specific modules and other components. Install this package second.
- comtcpdf1.x.x.zip (optional) - This package contains the component needed to create PDF invoices that can be emailed or printed out for your customers. This should be installed last. Advanced users who do not require PDF invoices or have alternative invoicing methods prepared can ignore this package, but all other users should install it.
- Once all three packages are installed, VirtueMart will be ready to use.
Importing Template Settings
The template settings cover a wide range of options, including layouts, fonts, and other special features that allow users to add their own touch to their website. By selecting some preprepared settings you can get everything configured in an instant.
The Quark files already include a prepared configuration for each template style; you only need to load the configuration for your chosen style (i.e. Quark default, Restaurant, Ecommerce etc...). To do so:
- Click on Extensions → Template Manager in your Joomla! backend to be taken to the list of templates, and click on the gk_quark template to open the settings
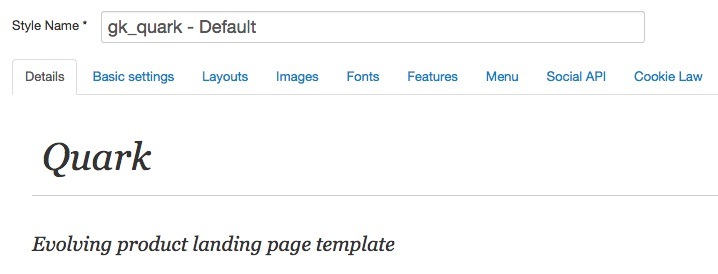
- Open the Basic Settings tab; you'll notice that there is a Load configuration setting as the top option. At this point you'll only have the default.json configuration loaded.
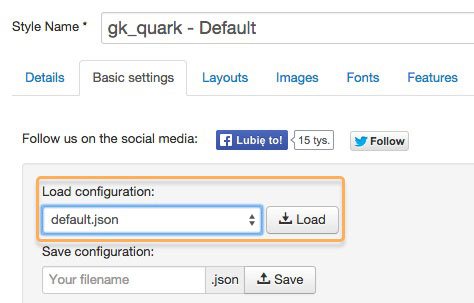
- Click on the Basic Settings tab and click on the Load Configuration drop-down list. You should see three options; select the option according to your chosen style:
- default.json - This is the configuration for the default business landing page layout.
- restaurant.style.json - Choose this configuration if you intend to use the Restaurant layout.
- ecommerce.style.json - Choose this style if you are building an online store with the Ecommerce Quark style.
-
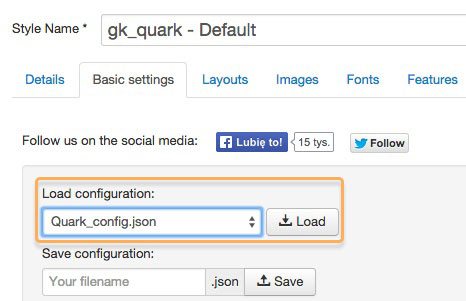
- Once you've chosen your style-specific configuration, click on the Load button next to the list to load the template settings.
The settings from the file will be applied. By default they certain page IDs will be assigned as the frontpage and additional pages; this controls which CSS rules are applied. However, depending on your configuration it is likely that your frontpage will have a different ID to that which is automatically stored in the imported settings. As such, we will also need to specify the frontpage ID. To do so:
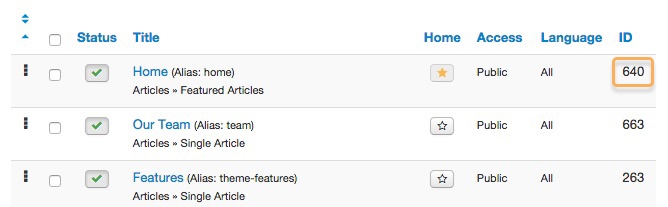
- Click on Menus → Main Menu in the top menu of your Joomla backend. You will see a list of assigned menu items.
- Note down the ID for your Home menu item; this number may be found in the last column as in the below screenshot.
- Now click on Extensions → Template Manager → gk_quark → Features tab; you will see a list of options. We are interested in the Suffixes for pages option at the bottom.
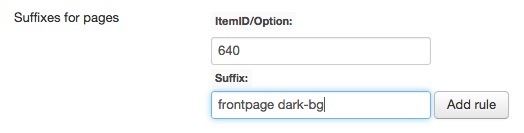
- In the ItemID/Option field, enter the ID number for your Home menu item, then in the Suffix field, type frontpage dark-bg, then click the Add Rule button.
- In the ItemID/Option field, enter the ID number for your Home menu item. Next, type the following classes into the Suffix field depending your chosen style:
- Quark Default Style - Type frontpage in the Suffix field and click the Add Rule button.
- Restaurant Style - Type frontpage dark-bg in the Suffix field and click the Add Rule button.
- Ecommerce Style - Type frontpage fullscreen in the Suffix field and click the Add Rule button.
- The suffix will be added to your Homepage, and the correct CSS rules will be applied. This will also set the LESS file for your chosen style, which will ensure that as you add modules to your frontpage they are styled correctly.
Next, if you intend to accurately match the demo layout you will need to upload the demo images.
Upload the Demo Images (Optional)
The modules that we will setup in this tutorial will include references to images that are part of the demo content in the quickstart package, but are not included in the base template package that is used for manual install. This means that any image references will not be accurate, and the frontpage and other areas may not display properly until you assign your own images to each section.
This isn't a problem if you already have your own images, but it may be that you'd prefer to have a fully-functional site including the pictures so that you can see exactly where each image is used and the effect achieved with it. In these cases, we would need to pull the demo image folder from the quickstart package and upload it to our existing Joomla install.
The module placement guide will assume that you have uploaded the demo images to your server; if you have your own images, simply replace the URL in the image tags accordingly as you reach each section of the guide.
To upload the folder:
- Head to the Quark download page and download the download the quickstart package for your chosen style:
- gk_quark_quickstart_J!3.zip - Download this package if you are using the default Quark style.
- gk_quark_restaurant_quickstart_J!3.zip - Download this package if you are using the Restaurant style.
- gk_quark_ecommerce_quickstart_J!3.zip - Download this package if you are using the Ecommerce style.
- Wait until the download completes, then extract the downloaded package locally. Inside the extracted folder will be an Images folder, and inside that will be a Demo folder that contains the images used in the demo content for Quark.
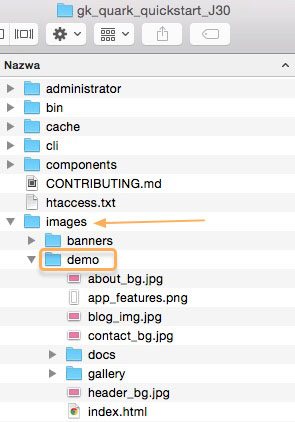
- Connect to your server via FTP, and upload the Demo folder from the extracted quickstart to the Images folder of your server's Joomla! installation.
Once this upload is complete you may disconnect from the server. Now as the modules are configured any images that are assigned may be found in the demo folder; custom HTML references will be correct automatically, but for background and other images you will need to select the appropriate image as per the given file name in the guide.
Module Placement
Modules make up the majority of the frontpage and additional content in Quark, and so it's very important that the modules are assigned and configured correctly to ensure that your site gives the perfect first impression.
The basic steps for placing a module are:
- Login to your Joomla! backend and click on Extensions → Module Manager in the top menu to open the Module Manager, where you can see a list of modules currently assigned to your site (as per our preparation any existing modules in your installation should be disabled, indicated by a red X under the Status column, or deleted if unnecessary to avoid confusion).
- Click on New at the top of the screen to open a list of available Module Types.
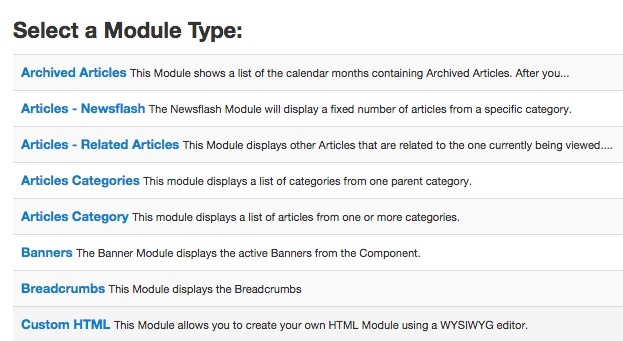
- Select the required Module Type from the list; you will be taken to the settings screen for the module.
- Configure the settings as required; there may be few or many options depending on the type of module. For example, News Show Pro GK5 is a very powerful tool, and thus has many options, whereas a Custom HTML will have very few options.
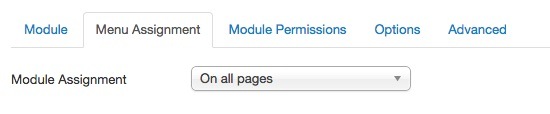
Note: The two most important settings are the Position option, which tells the module which area of a page to appear on, and Menu Assignment, which tells the module which pages to appear on. With these two settings you can decided exactly where each module will appear on your site.
- Save changes to place the module.
These basic steps will be the same for every module placement; it's a good idea to familiarize yourself with this process if you are new to Joomla!, as it is one of the best ways to make your site your own.
Now let's configure the modules for our frontpage.
Next Steps
Your Joomla installation is now ready for the modules to be placed and configured, and for additional pages and menus to be created to match the demo layout. Each style has its own particular modules, pages and menus, so they will be separated into style-specific guides; simply select your chosen style install guide from the tabs at the top of this page to continue setting up your site.