Introduction
TechNews provides a modern, professional magazine portal site that takes advantage of GavickPro's core News Show Pro and Tabs GK5 modules, combining them with stylish CSS animations to create dynamic frontpage article showcases and animated ratings on review pages.
This guide covers the special template-specific features, as well as quickstart and manual installation of the template for new and existing Joomla! installations.

Template Features
TechNews doesn't just look impressive; it also includes some helpful functionalities that will help make your site unique. Let's look at how to use these elements.
News Show Pro GK5
News Show Pro GK5 is our flagship Joomla module that creates stunning article showcases in a variety of layouts; in TechNews, the bulk of the frontpage with its various styles and post highlights are created using this module. In this section, we'll cover some of the additional functionalities included with News Show Pro GK5 specifically for this template, such as multiple header layouts and additional suffixes.
Changing the Header Layout (two available)
For TechNews, two variations on the header portal mode have been created to provide you with up to four different header layout options:
Header I
The first header variation displays 3-5 previews in an accordion-style image gallery, with each preview expanding to take up nearly half of the available header width on hover:
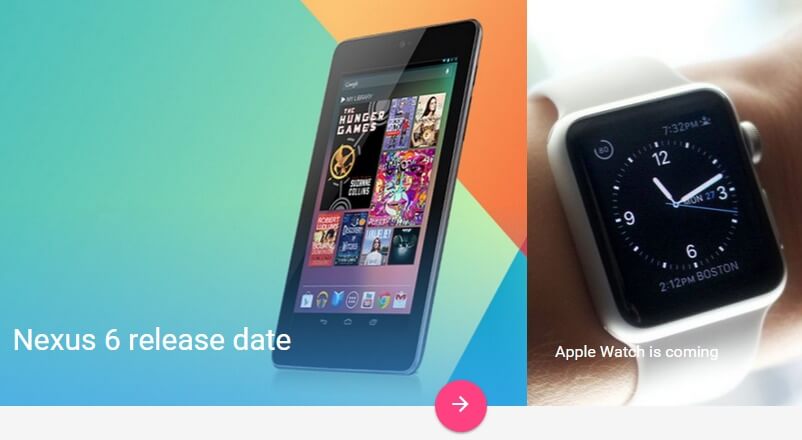
If you have installed the template via the quickstart package then the first header variation is enabled by default; details for setting up this module if you have deleted the module from your quickstart installation or you are installing the template manually may be found in the Frontpage Modules section of this guide.
There is only one layout-specific option for the first header layout; Number of Columns, which defines the number of articles previewed in the header (you may select between 3-5 previews). This option is found on the TechNews Header I - Portal Mode Settings tab of the module options.
Header II
The second header variation creates a grid made up of five article previews; one large preview that uses the full height and 50% of the width of the header, and two columns of two smaller previews, each one quarter the size of the main preview image.

If you installed the template with the quickstart package then switching to the second header is very simple, as the module variation is already available as an unpublished module in the module manager. To enable it, navigate to your Module Manager (Extensions → Module Manager). In the list of modules, unpublish the Header I module by clicking on the green tick in the Status column to the left of the module title, and then publish the Header II module by clicking on the red cross in the Status column. If you have manually installed the template, then you will need to create a new instance of News Show Pro GK5 with the appropriate settings for the second header layout; details of this may be found in the Frontpage Modules section of this guide.

There is only one option specific to the second header layout, Columns Layout. The header is made up of three columns; the large column contains a single large image and article preview, and the two smaller columns contain two smaller images and previews. With this option you can customize the order that these three columns appear in the header, with three variations; Photo - Column - Column, Column - Photo - Column, and Column - Column - Photo. This option may be found in the TechNews Header II - Portal Mode Settings tab of the module options.
Review Scores
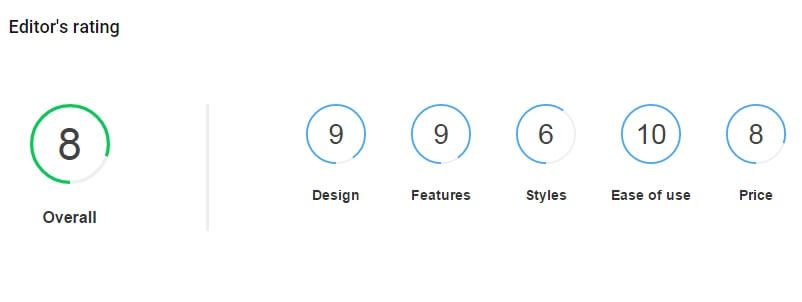
Review scores appear at the end of an article, providing an at-a-glance way of seeing a product rating in multiple areas as well as an overall score:
The review scores block can be added into any part of your Joomla! or K2 article content, though you'll usually want to place them at the end of the review rather than in the middle! To create the review block a shortcode must be added to your article content:
               {REVIEW}
               {/REVIEW}
...and inside this content will be the following attributes (in a "label=value" syntax) that define the settings and scores:
- label - This attribute defines the text that appears under the overall score.
- decimal - Sets the number of decimal places displayed in the overall score.
- max - Sets the maximum value of each rating so you can define your scale (this will also ensure that the score animations fill to the correct point)
And the name and scores for the various areas, which like the attributes above are added in a "label=score" syntax. So, for example, in the demo content the total score has an "Overall" label, there are no decimal places in the total score, the max score is ten, and there are five sections with different scores. With these elements added, the shortcode looks like this:
               {REVIEW}
               label=Overall
               decimal=0
               max=10
               Design=9
               Features=9
               Styles=6
               Ease of use=10
               Price=8
               {/REVIEW}
The overall score's value is taken from the average of the subscores, in the above example the overall score would be eight (42/5=8.4, rounded-down to eight since no decimal places are included). Each attribute must be added on a new line, or alternatively, you may list them on one line using a semi-colon as a delimiter:
{REVIEW}label=Overall;decimal=0;max=10;Design=9;Features=9;Styles=6;Ease of use=10;Price=8{/REVIEW}
Previewing the Review Score on the Frontpage Previews
Several of the frontpage article previews provided by the News Show Pro GK5 module includes a functionality for displaying the review score from an article, such as in the reviews section or the "Most Rated" listings at the bottom of the page. The portal modes used in these sections will automatically search for and display the overall score automatically, so as long as the article is eligible to be displayed (the module can be set to pull articles by date, category etc...). For instances of News Show Pro GK5 that do not use one of these new portal modes the review score will not be displayed.
Note: On occasion you may find that an article does not have its review score displayed in the "Reviews" or "Most Rated" sections. In these cases it may usually be fixed by opening the settings for the News Show Pro instance that creates the review previews, clicking on the K2/com_content additional settings tab and changing the "Text Type" setting to "fulltext" to ensure that the entire article content is evaluated by the module.
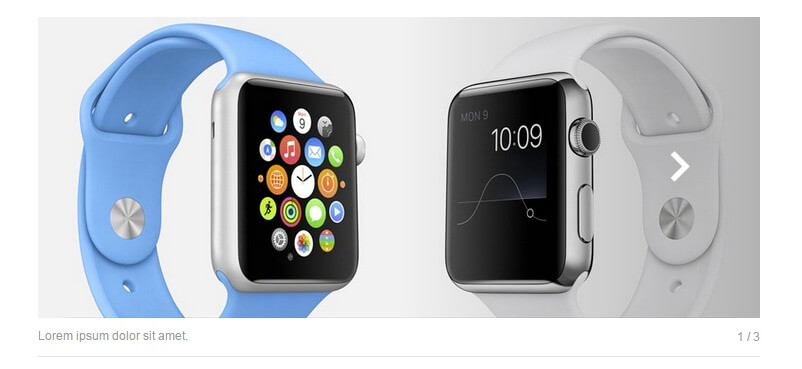
Article Slideshows
As well as review scores, TechNews also allows for simple slideshows to be added into article content, providing an easy way for users to explore images in your post.
Like the review scores, slideshows are added using a shortcode, but some preparation is required:
- First, you should create the images that will be used in the slideshow. The shortcode will not resize these images, so make sure that they each have the same dimensions for smooth transitions.
- Once all your images are prepared, connect to your Joomla server via FTP and navigate to the images folder in your Joomla! installation's root directory. Create a new folder, and give it a name of your choice e.g. images/review1.
- upload your slideshow images into your newly-created folder.
Now that you have the images prepared and uploaded, you can add the slideshow to your article content. The basic shortcode is:
               {SLIDESHOW}
               {/SLIDESHOW}
...and like the review scores, there are some attributes in a "label=value" syntax to be added:
- directory - This attribute defines the directory in the images folder that contains the images for the slideshow. This attribute can be ignored if you wish to use images from multiple sources.
- interval - Sets the interval between the slideshow moving between slides in milliseconds. If preferred this can be set to "0" to disable the autoanimation.
With the core settings defined, you can now start adding images to the slideshow. The syntax for this is "filename=description", with the filename being the name of the image (including the extension), and the description being the text you want to appear underneath the slide. Zs an example, if we've created four jpg files called "slide1-slide4" and uploaded them to a directory called "review1", the slideshow shortcode would look like this:
               {SLIDESHOW}
               directory=review1/
               interval=5000
               slide1.jpg=First Slide description
               slide2.jpg=Second Slide description
               slide3.jpg=Third Slide description
               slide4.jpg=Fourth Slide description
               {/SLIDESHOW}
There is no limit to the number of slides you may add to the slideshow, but bear in mind that having too many slides will severely increase the weight of the page, so it's advisable to keep it down to three or four slides unless absolutely necessary. Each attribute needs to be added to a new line to work correctly, or alternatively you may add all the attributes of the shortcode in one line using a semi-colon as a delimiter:
               {SLIDESHOW}
               directory=review1/;interval=5000;slide1.jpg=First Slide description;slide2.jpg=Second Slide description;slide3.jpg=Third Slide description;slide4.jpg=Fourth Slide description
               {/SLIDESHOW}
Using Images from Multiple Sources
The directory attribute defines the source folder where the images are stored; you can then add images simply by adding their filenames to the shortcode as above. However, it's possible to use images from multiple folders if needed by writing the full path to the image rather than just the image name.
Material Icons
Regular users of our Joomla templates will be familiar with Font Awesome, which provides a multitude of scaleable icons that can be placed in your site content. In TechNews we've added support for another set of icons, Material Icons, which were created by Google to expand on the style guide offered by their Material Design concept.
These icons may be inserted anywhere in your content just like Font Awesome, using the following syntax:
<i class="micon">name</i>
Where "name" is the name of the icon. Please be aware that if the icon's name has two or more words, such as "help outline" or "highlight off", then the individual words will need to be separated by an underscore ("_") rather than a blank space e.g. to use the "help outline" icon, the syntax would be:
<i class="micon">help_outline</i>
A full list of available icons and their respective names may be found on the Material Icons site; simply select your icon from the list, and change the "name" text in the above example to match the icon's name.
Using Material Icons in the Menu
TechNews supports the use of Material Icons in menu items, which can be a great way to make your navigation clearer and more intuitive. To add an icon to a menu item, simply add the following text to the menu item's Title field:
{{iconName}}
Where "iconName" is the icon class taken from the Material Icons documentation. Don't forget that if the icon's name has two words or more the individual words in the name must be separated by an underscore rather than a blank space. For example, by changing the "Home" menu item's title to:
{{home}}
...we can replace the plain text menu item with a house icon. Alternatively, you may use a combination of text and an icon by adding plain text before or after the shortcode that adds the icon:
Home {{home}}
Installing the TechNews Template
The most important decision to make before proceeding with your installation is whether you need to install the template manually, or if you can use the Quickstart package, which will install everything for you.
Which installation method you should use depends on the current status of your site. The Quickstart is a full installation of Joomla! that installs Joomla itself, the template, modules, demo content and database data to match our demo layout. However, as this is a full Joomla! installation it may only be used on a clean server; the package cannot be installed in an existing Joomla installation.
Manual installation is still simple, but it is time-consuming if you wish to match the demo layout completely, since not only must you manually install the template and modules/plugins, but you must also create each module instance and assign the content accordingly to match the demo. It takes time, but if you've got a lot of content that will take you a long time to backup, or if backing up and restoring your content is not an option, then the manual installation is the way to go.
Generally we recommend the quickstart installation whenever possible; this install method provides you with the exact settings and layout needed to match the demo so you can start customizing your site right away. You should use this method if you are starting a new website, or if your existing website/Joomla! installation lacks any unique content you wish to preserve. For example, if your host installed Joomla for you, then it's advisable to remove this installation and reinstall using the quickstart, as it is much faster than manual installation.
If you have a lot of existing articles or other content that you do not wish to lose and do not have access to a backup extension to help you move these items to a new Joomla! instance, then the manual installation is the only way to install the template and match the demo settings without losing this content. However, with manual installation you will be able to take care of some customization as you go; when copying HTML content to a module you can replace it with your own, or when using the News Show Pro module you can define your own data source instead of relying on sample data.
Both installation methods will be covered in the following sections, with step-by-step guides to getting everything up and running.
Quickstart Installation
The quickstart installation requires very little input save for your admin and database details, and once the quickstart is uploaded to your server the entire install process takes just a few minutes. In order to complete this install method you will need FTP access to your server and a database name, username and password. A complete step-by-step guide with further information on the requirements may be found in our documentation:
Manual Installation
Manual installation requires that the template and plugins/modules are manually installed, and then other elements such as menus, module instances and content are manually placed. As such, it will take a bit of time to complete, though it must be stressed that this is not a difficult process at any point; placing modules and adding content is very simple thanks to Joomla's functionality.
Broadly-speaking, manual installation can be split into several steps, some very short, some rather long:
- Download and install the template.
- Download and install additional modules and plugins.
- Import template settings.
- Upload demo images (optional).
- Place and configure modules and create page content.
- Setup menus and additional pages.
Let's look more closely at each step in turn; once done, you will have a nice layout that matches the demo, ready for your own content!
Preparing Your Site for Manual Install
In order to ensure that your installation runs smoothly you will need to deactivate any existing modules as the install process for TechNews will involve placing several modules in module positions that are only used in this template; if you do not deactivate your existing modules beforehand there can be some conflict or overlap that will prevent the site from matching the demo. Once installation is complete you can of course republish the modules as needed; just be sure to double-check that they do not affect the template aesthetic or you may need to make some adjustments to the styling.
Deactivating the modules is very easy; simply log-in to your Joomla! backend, then click on Extensions → Module Manager in the top menu. You will now see a list of active modules.
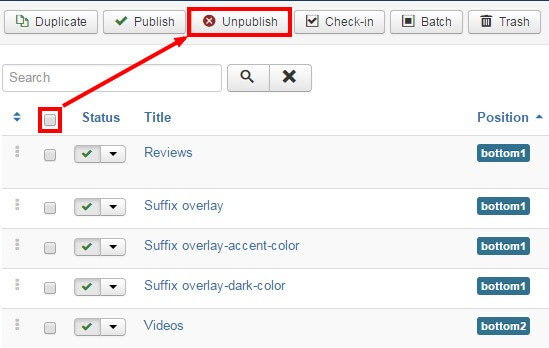
To deactivate modules en masse, click on the tickbox at the top of the second column in the module list to select every module, then click on the Unpublish button at the top of the screen to deactivate. Once done, do the same for any other pages should there be more modules. We can now start installing the template.
Download and Install the Template
Now that you're ready to install, the first thing to do is download and install the template's zip package. Click on the following link to go to the TechNews Download Page (you must be logged-in to do so!). You'll see that there are three different files available:
- gk_technews_J!3.zip - This package contains the basic template files; you should download this package for manual installation.
- gk_technews_quickstart_J!3.zip - This contains the quickstart files for a new installation of Joomla that matches the demo layout exactly; this can be ignored if you are installing manually.
- gk_technews_rest_files_J!3.zip - This package contains the source PSD files for the template as well as additional plugins required to expand the template functionality. Make sure to download this package too if you are installing manually.
Grab the basic template package and the rest files package; both will be needed during this install. You might also want to download the quickstart package if you want to use the demo images as placeholders before you add your own content; we'll discuss how to do this later. Once downloaded, we can install the template package:
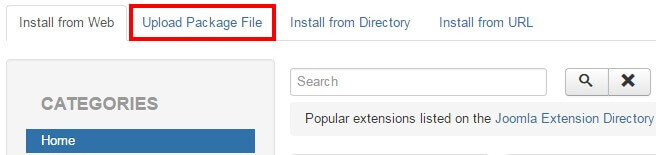
- Login to your Joomla! backend and click on Extensions → Extension Manager, the manager's screen will open; now click on the Upload Package File tab at the top of the screen.
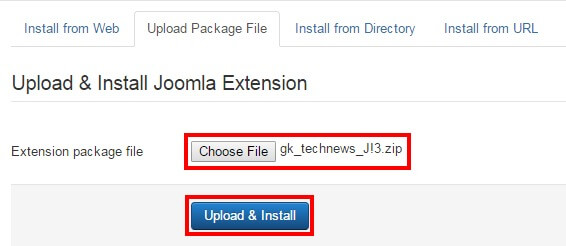
- Click on Choose File to open your file browser; select the recently-downloaded gk_technews_J!3.zip file, then click the Upload & Install button.
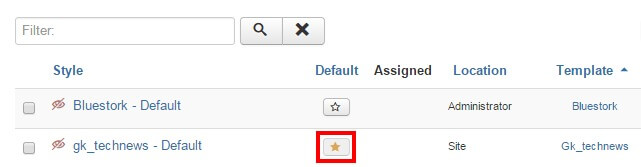
- Once installation is complete, click on Extensions → Template Manager to open the list of available templates; you should now see gk_technews in the list.
- Click on the star next to gk_technews in the Default column to set it as the default template.
The template is now installed and ready to go; next we need to take care of the plugins and modules.
Installing Extras (Plugins & Modules)
TechNews' informative frontpage layout and score functions are provided by a combination of free, open-source modules and plugins, both our own and those provided by trusted third-party developers. To match the demo layout we will need to install these plugins and modules, then manually place and/or configure them as needed. These will need to be installed individually if you want to match the demo layout exactly; this is especially true of the News Show Pro module as this is the basis of all of the frontpage elements in the template. As well as the selection of our own open-source modules and plugins there is one third-party extension used in the template; K2, an alternative article manager which offers more complex layouts and settings compared to the standard Joomla! content manager, which you may use if preferred.
Installing the Plugins
The plugins in TechNews are core elements of our Gavern Framework that powers our Joomla templates. This framework is designed to be modular, with plugins providing additional functions that can be optionally removed if no longer needed, including support for advanced typography, social media functionality and more. These elements are all included in the gk_technews_rest_files package that you downloaded earlier. To install the plugins, extract the gk_technews_rest_files package on your local computer. You will see that it contains three folders; Modules, Plugins and Source. Log-in to your Joomla! backend and navigate to Extensions → Extension Manager → Upload Package File as you did with the template install.
Now click on the Choose File button to open the file explorer, and navigate to your extracted gk_technews_rest_files → plugins folder; you will see a set of zip packages that each contain a plugin. These are all the plugins that are recommended for the template; double-click on the first plugin in the folder to select it, then click the Upload & Install button. The install process will run. Once finished, repeat this install process for all the plugins in the folder in whichever order you prefer. Once all the plugins are installed you will need to activate them; navigate to Extensions → Plugin Manager in the top menu to see a list of installed plugins.
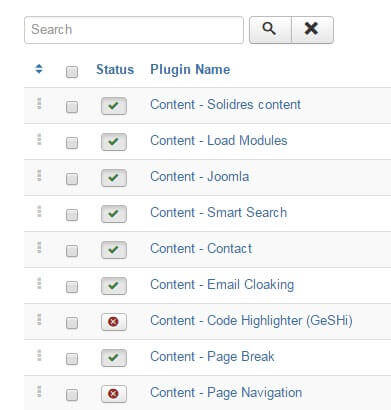
Find the plugins you have just installed; they will have a red X next to them to show they are not activated. Activate them by either clicking the X, or bulk-activate by adding a check to the tickbox next to each plugin to activate, then click the Enable button at the top of the page.
Installing the Modules
There are two very important modules that must be installed if you are to use the full potential of TechNews; News Show Pro GK5 and Tabs GK5, which together create the frontpage and sidebar content seen in the demo layout. To download these modules navigate to our Joomla! modules' download section; you'll see a list of the various open-source modules GavickPro has created; there's quite a few! To start with we'll get the News Show Pro module, so click on the News Show Pro GK5 link to be taken to the download page for the module, and get the Joomla 3 version of NSP, called mod_news_pro_gk5_J!3.zip.
Now do the same for Tabs GK5; again there'll be three files available, two of which are for Joomla! 2.5, so download the Joomla 3-specific version; mod_tabs_gk5_J!3.zip. With both of the modules we need downloaded we can start installing; this is functionally the same install process as with the plugins, but without the need to extract first. Login to your Joomla! backend and open the Extension Manager and click on the Upload Package File tab. Click Choose file and find your downloaded News Show Pro package and double-click it, then click the Upload & Install button to begin installation. Repeat this install process for the Tabs zip package too.
Once the modules are installed we can install the one third-party extension used in the demo; K2.
Installing K2
K2 offers complex article management options that far surpass those included in the core Joomla article manager, so it's a useful alternative if producing unique written content is a core part of your online product. To install this component, open the K2 site and click on the green Download K2 button in the header area to be taken to the download screen to start the download. Once done, login to your Joomla backend and open the Extension Manager via the top menu, then click on the Upload Package File tab. Now click Choose File and select your recently downloaded K2 package and then click Upload & Install. After a few moments K2 will be installed and you'll be ready to go!
Importing Template Settings
The template settings cover a wide range of options, including layouts, fonts, and other special features that allow users to add their own touch to their website. By importing settings, you can achieve the recommended style based on our demo example without manually configuring each setting.
To import these settings, we first need to get the json file that stores them; this may be found at this download link.
If you just click on the link you'll probably run into a little issue; instead of downloading the file your browser will instead try to open and display the file contents in the viewport. It won't break anything, but you don't want to waste time copying and pasting the data into a new file, right? So to get around this, we'll need to tell the browser that we want to download, rather than display the file. The process is essentially the same for every browser, but for some reason each of them decide to name the command you need to use differently:
- In Safari - Right or control-click on the link and select ‘Download linked file’. This will download a file called Technews_config.json.
- In Chrome - Right-click on the link and select ‘Download link as…’. A dialogue box will open to specify where the download should be saved. The name will default to Technews_config.json, so just leave this as default and save the file.
- In Firefox - Right-click on the link and select ‘Save link as…’. A dialogue box will open where you can specify the save location; as with the other browsers the name will default to Technews_config.json so leave this as it is.
- In Internet Explorer - Right-click on the link and choose 'Save Target as'. A dialogue box will open so you can decide where to download the file to. The file name will default to Technews_config.json, so leave this as it is.
Once downloaded, you need to import the settings into your Joomla installation. Connect to your server via FTP and navigate to the templates → gk_technews → config folder; here is where the json configuration files are stored. Upload your recently-downloaded Technews_config.json to this folder so that it can be found by Joomla. Now you can close your FTP program and login to your Joomla! backend as normal.
Click on Extensions → Template Manager to open the list of installed templates, and find the gk_technews template in the list; click on it to open the template options panel. At the top of the screen is a set of tabs for each section of the settings. Open the Basic Settings tab; you'll notice that there is a Load configuration setting as the top option. At this point you'll only have the default.json configuration loaded, but if you click on the drop-down list under Load configuration you'll see the Technews_config.json file you uploaded before select this from the list and then click on Load to apply the settings from the file.
Assigning the Frontpage ID
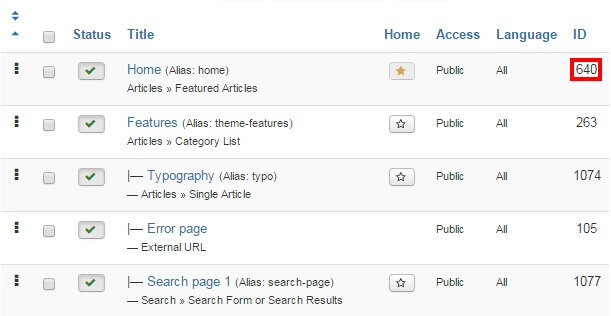
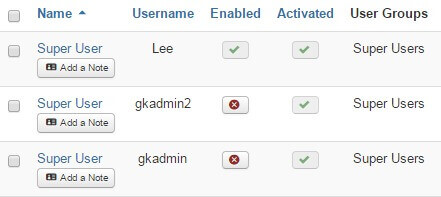
By default they certain page IDs will be assigned as the frontpage and additional pages; this controls which CSS rules are applied. However, depending on your configuration it is likely that your frontpage will have a different ID to that which is automatically stored in the imported settings. As such, we will also need to specify the frontpage ID. To do so, click on Menus → Main Menu in the top menu of your Joomla backend to see a list of assigned menu items. Make a note of the ID for your Home menu item; this number is located in the last column of attributes as in the screenshot below:
Click on Extensions → Template Manager → gk_technews → Features tab to see the list of special features options included in the TechNews template. We're interested in the Suffixes for pages option at the bottom. In the ItemID/Option field, enter the ID number for your Home menu item, then in the Suffix field, type frontpage, then click the Add Rule button.
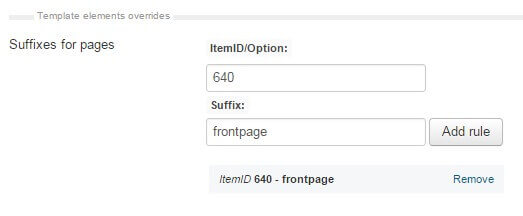
The frontpage suffix will be added to your Homepage, and the correct CSS rules will be applied.
Now we can start creating the content for the site; at this point you may choose to upload the placeholder demo images if you do not have any of your own ready on your site, or jump straight to installing the modules for the frontpage.
Upload the Demo Images (Optional)
The modules that we will setup in this tutorial will include references to images that are part of the demo content in the quickstart package, but are not included in the base template package that is used for manual install. This means that any image references will not be accurate, and the frontpage and other areas may not display properly until you assign your own images to each section, which you can do as we create each module.
However, if you haven't prepared your own frontpage images yet then you might want to consider uploading the demo images; this way you can just follow the basic module setup and any images referenced in the modules will be available, so you can see the layout on your site and replace the images with your own later. Uploading the demo images is very easy; we can simply take the folder from the quickstart package and upload it to our site via FTP.
The module placement guide assumes that you have uploaded the demo images to your server in certain situations, such as when images are defined in the HTML code; if you have your own images, simply replace the src attribute accordingly as you reach each section of the guide.
To upload the folder, firs you'll need to get the quickstart package from the TechNews download page; click on the gk_technews_quickstart_J!3.zip package. Once the download finishes, then extract the package on your local machine.
When the extraction is complete open the extracted quickstart folder; inside you'll find an Images folder, and inside that will be a Demo folder; this contains the demo-specific images for TechNews. Connect to your server using the FTP program of your choice and upload the Demo folder to the Images folder of your Joomla installation (this is in the root of your Joomla install).
With this folder uploaded the references included in the custom HTML of the frontpage modules (such as the advertisement banners) will point to the demo images as placeholders until you're ready to add your own content.
Module Placement
Modules are the key to TechNews' dynamic frontpage, utilizing the various portal modes included in News Show Pro to craft unique layouts that stand out from the crowd, so it's very important that the modules are assigned and configured correctly to ensure that your site gives the perfect first impression. In each module you will find some standard options that appear in every module regardless of type, and module-specific options that control the finer details.
The basic steps for placing a module are:
- Login to your Joomla! backend and click on Extensions → Module Manager in the top menu to open the Module Manager, where you can see a list of modules currently assigned to your site (as per our preparation any existing modules in your installation should be disabled, indicated by a red X under the Status column, or deleted if unnecessary to avoid confusion).
- Click on New at the top of the screen to open a list of available Module Types.
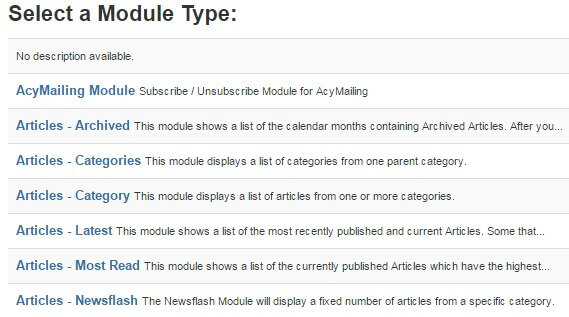
- Select the required Module Type from the list; you will be taken to the settings screen for the module.
- In the Module tab (the first options tab you see when creating a new module of any type), add a title to the Title field; this is required before the module can be saved.
- Set the Show Title option to Show or Hide, depending on the required module settings; some modules use the title text, while others will not.
- In the Position field, set the module position. This tells Joomla where the module should be displayed on your site. You may either select the required position from the drop-down list, or manually type the (case-sensitive) module position into the position field.
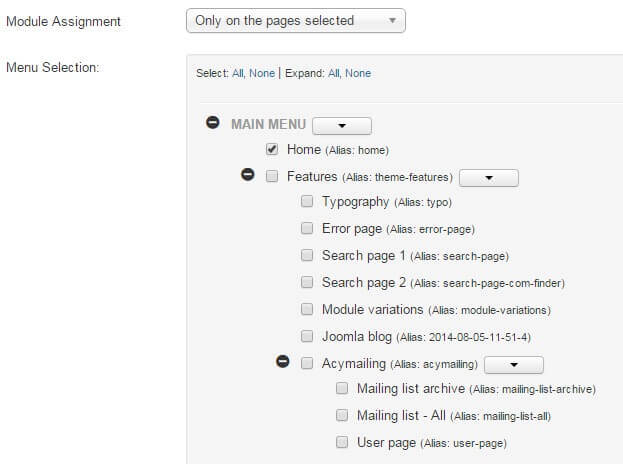
- Open the Menu Assignment tab. Here, there is a Module Assignment drop-down list where you can define on what pages/menu items a module should appear on. In TechNews there are two settings used here; either the module is left at the default On All Pages, so it will appear everywhere on your site (such as with the newsletter popup) or the option is set to Only on the pages selected. When this option is set, a list of available pages/menu items will appear, and you can add a checkmark next to the relevant item. Usually, this option is used to display a module on the frontpage only.
- Configure the module-specific settings. Each module will have its unique settings, some more than others. For example, our robust News Show Pro module has multiple tabs of options, whereas a Custom HTML module will just have a space for adding HTML content.
- Save changes to place the module.
These basic steps will be the same for every module placement; it's a good idea to familiarize yourself with this process if you are new to Joomla!, as it is one of the best ways to make your site your own.
Now let's configure the modules for our frontpage.
Frontpage Modules
The frontpage modules provide the core functionality that your frontpage offers, with article highlights, video links, review slides and more that make your content easy to find for your visitors, so it's important that they are configured correctly. We will cover each module position of the frontpage in turn until the frontpage layout is complete.
Before starting module placement it is advisable that you disable the TinyMCE or other WYSIWYG editors. This is because these editors automatically cleans up empty HTML tags, but sometimes the modules used in our templates include custom HTML modules that use blank tags to create icons or for additional CSS purposes, so these empty tags shouldn't be removed. Since the clean-up cannot be disabled it is instead necessary to disable the editors.
In order to disable the WYSIWYG editor:
- Click on Users → User Manager in the top menu of your Joomla backend to be taken to a list of your registered users.
- Click on the username you will be logged in as when placing the modules to be taken to the Edit Profile screen.
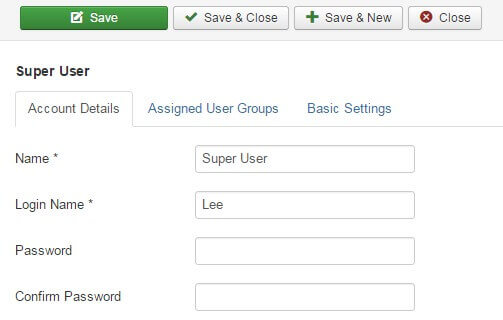
- Click on the Basic Settings tab and change the Editor option from Use Default to Editor - None.

- Click on Save & Close at the top of the screen to save changes.
Now when you open the editor in an article or Custom HTML module you will see just the plain text editor, and empty tags will not be automatically removed. Once you have finished module placement you may wish to reactivate the editor for the user should you intend to use it to write articles.
Though each type of module will offer a range of differing options, there are two basic but important options tabs to be found in every module; Module and Menu Assignment, which offer four core options; title, show/hide title, position, and menu assignment. The basic options for each frontpage module will be provided at the beginning of each module's relevant section, with the more complex module-specific settings following.
Each module covered in this section will include the following information:
- Module Desciption - A short description of the the module and how it is used on the frontpage, along with a link to a screenshot of the complete module settings should you prefer to match the configuration by sight rather than by following the guide. Note that in the case of custom HTML modules the HTML code that needs to be added to the module will be included in the Main Configuration section described below.
- Basic Settings - Provides the basic configuration details, including the module type that should be selected from the list of available modules when creating a new module, and the title, show/hide title, position and menu assignment settings as used in the demo.
- Main Configuration - Covers the module-specific settings, such as configuring the News Show Pro layouts, or providing the code to be added to a Custom HTML module.
With these sections you will be able to accurately match the demo layout. Now on to the modules!
The Header
The header is the first impression of your site, and TechNews offers two major variations; an accordion-style header that can display 3-5 article showcases, or a three-column layout that highlights five different articles in a grid of previews. Since each of these variations requires a separate configuration we will look at them individually, and you may decide which variation you wish to use in your installation.
First Header Variation
The first header variation is an accordion layout that can display between 3-5 article showcases that expand on hover:
If needed, click on the following link for this module's Configuration Screenshot.
Basic Settings
- Module Type: News Show Pro GK5 module.
- Module Title: Header I
- Show/Hide Title?:> Hide
- Module Position: header
- Module Assignment: Only on the pages selected.
- Selected Pages: Homepage only.
Main Configuration
News Show Pro GK5 is a powerful tool, so there's a lot of tabs each containing several options for this module. Usually this means that there are several options to be configured, but in the case of the TechNews headers they utilize some brand-new portal modes that ignore the core settings, so in fact there are very few changes to be made. We'll look at each option tab that requires changes from the default for easy setup:
Basic Settings Tab
Only one option needs to be changed here; the Module mode option should be set to TechNews - Header 1.
Data Source Tab
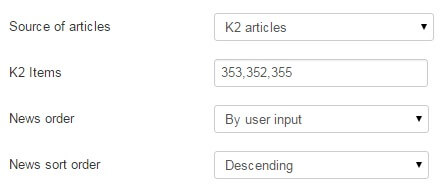
Only one thing needs to be changed from the default on this tab, but it's the most important option; Source of Articles. This defines where News Show Pro should pull its preview data from, so exactly where this is depends on which article manager you are using for your content, and how you have it laid out. By default, the Source of Articles option is set to pull from all Joomla! articles, but you can change this to only pull specific articles, or to pull latest articles from a particular category/categories only. You may also use these same filters with K2 items rather than the Joomla! article manager, so it's entirely up to you which settings to use for this section. As an example, in the demo layout provided in the quickstart package the Source of Articles option is set to K2 Items, and three specific articles are defined in the K2 Items field.
TechNews Header I - Portal Mode Settings
This tab contains only one option, Number of Columns, which defines the number of columns and thus the number of article previews should appear in the accordion layout (each column corresponds to one article preview). In the demo content this is set to 3, but you can choose between 3-5 columns; this choice is entirely up to you.
Thumbnails Tab
Again, only one option to change in this section; set the Thumbnail dimensions option to 800 x 560px.
And that's the header configured; you can now move on to the What's New section, ignoring the Second Header Variation section below.
Second Header Variation
The second header variation is a grid layout that displays five article previews in three differents layouts. The section is made up of three columns, with one larger column displaying a single preview, and two smaller columns of two previews each:
Basic Settings
- Module Type: News Show Pro GK5 module.
- Module Title: Header II
- Show/Hide Title?:> Show
- Module Position: header
- Module Assignment: Only on the pages selected.
- Selected Pages: Homepage only.
Main Configuration
News Show Pro GK5 is a powerful tool, so there's a lot of tabs each containing several options for this module. Usually this means that there are several options to be configured, but in the case of the TechNews headers they utilize some brand-new portal modes that ignore the core settings, so in fact there are very few changes to be made. We'll look at each option tab that requires changes from the default for easy setup:
Basic Settings Tab
Only one option needs to be changed here; the Module mode option should be set to TechNews - Header II.
Data Source Tab
Only one thing needs to be changed from the default on this tab, but it's the most important option; Source of Articles. This defines where News Show Pro should pull its preview data from, so exactly where this is depends on which article manager you are using for your content, and how you have it laid out. By default, the Source of Articles option is set to pull from all Joomla! articles, but you can change this to only pull specific articles, or to pull latest articles from a particular category/categories only. You may also use these same filters with K2 items rather than the Joomla! article manager, so it's entirely up to you which settings to use for this section. As an example, in the demo layout provided in the quickstart package the Source of Articles option is set to All K2 Articles.
TechNews Header II - Portal Mode Settings
This tab contains only one option, Columns Layout, which sets the order of the large and small columns. The header is made up of three columns; the large column contains a single large image and article preview, and the two smaller columns contain two smaller images and previews. With this option you can customize the order that these three columns appear in the header, with three variations; Photo - Column - Column, Column - Photo - Column, and Column - Column - Photo.
And that's the header configured; you can now move on to the What's New section.
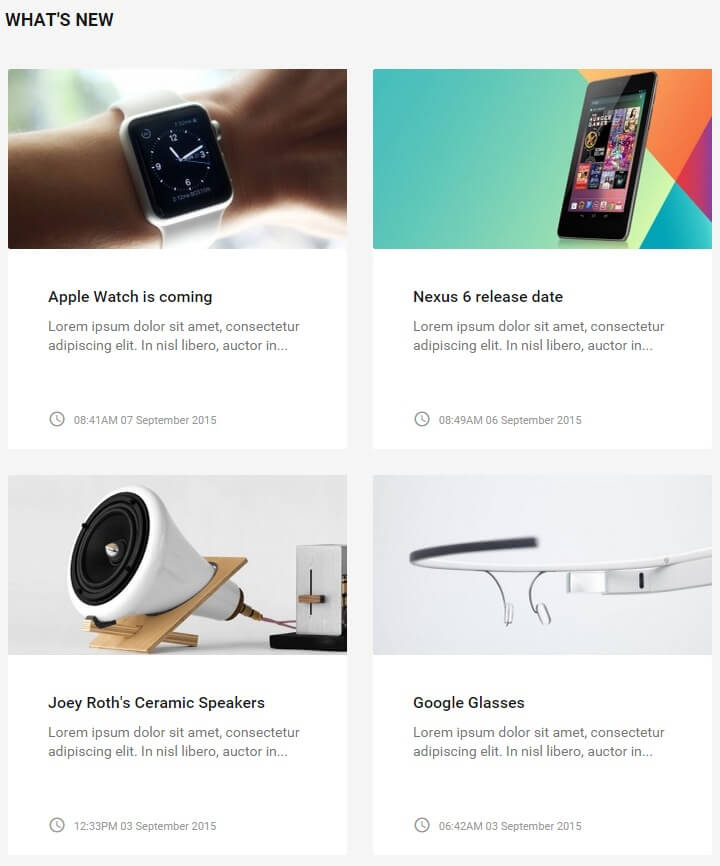
The What's New Section
This section provides the meat of your latest articles, with the ability for users to switch between a polaroid-style four-column layout or a two-column layout with wider previews:
If needed, click on the following link for this module's Configuration Screenshot.
Basic Settings
- Module Type: News Show Pro GK5
- Module Title: What's New
- Show/Hide Title?:> Show
- Module Position: mainbody
- Module Assignment: Only on the pages selected.
- Selected Pages: Homepage only.
Main Configuration
This section takes full advantage of the complex options available in News Show Pro, so as before we will move through each option tab step-by-step covering which options should be changed from the default.
Basic Settings Tab
In the Module Suffix field, add the following text:
nsp-switch
Now in the Pre-text field, add the following HTML code:
                              <div class="nsp-switch-ui">
                              <i class="micon" data-cols="4">view_module</i>
                              <i class="micon" data-cols="2">reorder</i>
                              </div>
These two elements provide the layout switch for visitors on the frontpage.
Data Source
As with the header elements it is your choice where News Show Pro should pull the articles to display in this section from via the Source of Articles option. In the demo content, this option is set to All K2 Articles.
Article Layout
There's a number of options under different subheadings in this section, but we only need to change a few of them. Let's look at each section of this tab's changes:
Under the Article Pagination section:
- Amount of pages with arts - Change to 1.
- Amount of columns - Change to 4.
- Amount of rows - Change to 2.
- Pagination - Change to "none".
Under the Text section:
- Text limit value - Change to 13.
Under the Information Block section:
-
Info format - Change to the following text:
<i class="micon">access_time</i> %DATE -
Date format - Change to the following text:
h:iA d F Y
Under the Article Layout section:
- Article block padding - Change to 13px.
- Header order - Change to 2.
- Image order - Change to 1.
- Text order - Change to 3.
- Information order - Change to 4.
- Second info enabled - Change to Off.
- Read more enabled - Change to Off.
The Article Layout section is finished, so we can move on to the Links Layout tab.
Links Layout
Change the Amount of pages with links, Amount of links and Amount of links columns options to 0.
Thumbnails
Change the Wrap content and Create thumbnails options to On.
Set the Thumbnail dimensions option to 340px by 180px, and set the Image margin option to 0>
The section is now configured, so you can save the changes and move on to the next section.
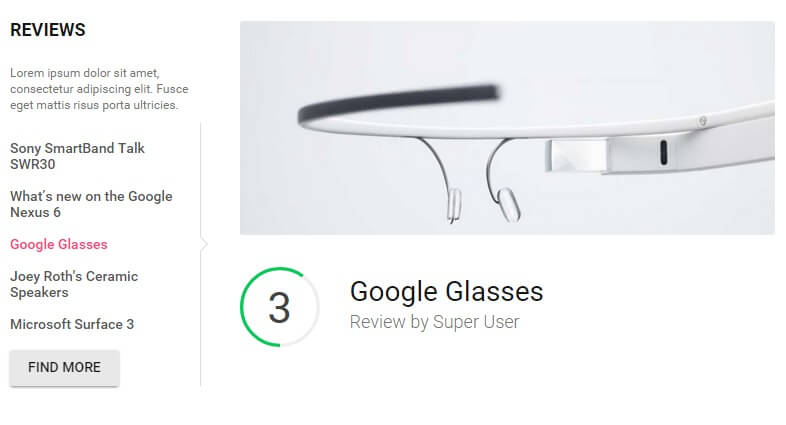
The Reviews Section
This section displays showcases of your latest reviews and their respective scores:
If needed, click on the following link for this module's Configuration Screenshot.
Basic Settings
- Module Type: News Show Pro GK5 module.
- Module Title: Reviews
- Show/Hide Title?:> Show
- Module Position: bottom1
- Module Assignment: Only on the pages selected.
- Selected Pages: Homepage only.
Main Configuration
Since this section is created with News Show Pro there'll be some options that need to be switched around from the default, but it's not as many as the What's New section due to the reviews showcase using one of the TechNews-specific portal modes, just like the header.
Basic Settings Tab
Change the Module mode to TechNews - Reviews
Data Source Tab
As always, the Source of Articles option may be set as you require. It's recommended that you create a separate category specifically for review articles that will include the review scores, and set the option to K2 Categories and set your review category as the only source; this way all your new reviews will automatically be displayed in this section.
TechNews Reviews - Portal Mode Settings
This tab contains the specific options for the portal mode. Add this text to the Intro text field:
Lorem ipsum dolor sit amet, consectetur adipiscing elit. Fusce eget mattis risus porta ultricies.
You may also add a link to your reviews category in the Button URL field if needed.
Thumbnails Tab
- Create thumbnails - Set to On.
- Thumbnail dimensions - Set to 900 x 360px
- Thumbnail quality - Change to 60%.
That's the last of the options for News Show Pro, so click on the Save & Close button to save the module.
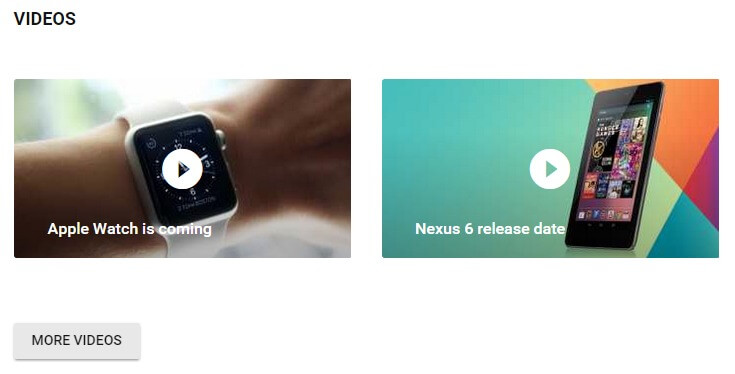
The Videos Section
The videos section provides a preview of articles just like the other News Show Pro-powered sections, but with an additional twist; if an article previewed in this section has a video displayed anywhere in its content, then users will have the option of clicking the title of the post to go to the article, or clicking on the image to open a lightbox that plays the video independently without opening the article.
If needed, click on the following link for this module's Configuration Screenshot.
Basic Settings
- Module Type: News Show Pro GK5 module.
- Module Title: Videos
- Show/Hide Title?:> Show
- Module Position: bottom2
- Module Assignment: Only on the pages selected.
- Selected Pages: Homepage only.
Main Configuration
As with the other sections, there are several tabs where the NSP options will need to be changed from the default for this layout to work; we'll look at each option tab that has changes in order.
Basic Settings Tab
Set the Module mode option to Video List, and add the following text to the Post Text field:
<a href="#" class="btn btn-gray">More videos</a>
Data Source
You may set the data source as you see fit, but it is advisable to create a new category specifically for videos; then any new articles you create with video can be attached to their main category (such as Reviews) and the video category also, ensuring that users interested in video content will be able to see it on the frontpage without it being removed from rotation in the other showcase areas.
K2 Additional Settings
Set the Text type option to Fulltext; this will ensure the entire article being previewed is evaluated to find any videos in the content.
Video List - Portal Mode Settings
This section contains options specific to the video list portal mode. Change the Number of pages option to 1, and the Articles per page option to 4. Finally, change the Show date option to Off.
Thumbnails Tab
Only three changes need to be made in this section; change the Create thumbnails option to On, set the Thumbnail dimensions to 340 x 180px, and set the Image margin to 0.
External Files Tab
Only one option to change here; set the Use default CSS option to Off.
Now the videos section is configured, so you can save the module and move on to the next section.
The Most Commented Section
The most commented section is the first of two tabs that display listing-style NSP instances that appear at the bottom of the page. The tabs are created by our Tabs GK5 module, and the tab content is provided by News Show Pro. In this instance, NSP displays a list of popular articles, ordered by the total number of comments with a small circle overlay displaying the total number of comments.
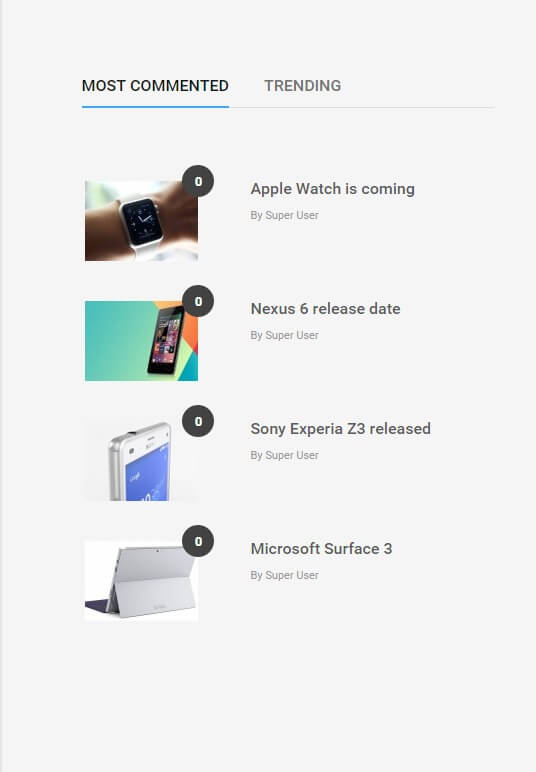
In this section we will be configuring the content for the list and adding it to a tab module position; later, we will configure the Tabs GK5 module to display this content in a tabbed area like in the demo layout.
If needed, click on the following link for this module's Configuration Screenshot.
Basic Settings
- Module Type: News Show Pro GK5 module.
- Module Title: Most commented
- Show/Hide Title?:> Show
- Module Position: tab1
- Module Assignment: On all pages.
Main Configuration
This instance of News Show doesn't use any special portal mode, so this means that there are several options that must be changed from the default. As always, we'll look at each option tab that requires changes from the default one-by-one.
Basic Settings Tab
Only one thing to change here; in the Module Suffix field, add the following text:
vertical-list
Data Source
The data source tab may be set up as you see fit, to point to your preferred data source, such as K2 or Joomla articles. In the demo content this is set to point to All K2 articles.
Article Layout
There's a number of options under different subheadings in this section, but we only need to change a few of them. Let's look at each section of this tab's changes:
Under the Article Pagination section:
- Amount of pages with arts - Change to 1.
- Amount of columns - Change to 1.
- Amount of rows - Change to 4.
Under the Information Block section:
-
Info format - Change to the following text:
<sup>%COMMENTS_SHORT</sup> -
Second info format - Change to the following text:
By %AUTHOR_NAME
Under the Article Layout section:
- Article block padding - Change to 20px 0.
- Header order - Change to 2.
- Image order - Change to 1.
- Text order - Change to 3.
- Text enabled - Change to Off.
- Information order - Change to 4.
- Read more enabled - Change to Off.
The Article Layout section is finished, so we can move on to the Links Layout tab.
Links Layout Tab
Only one change; change the Amount of pages with links option to 0.
Thumbnails Tab
Four changes are needed in this tab; change the Wrap content and Create thumbnails options to On. Now set the Thumbnail dimensions option to 120 x 80px, and set the Image margin option to 0.
External Files
Change the Use default CSS option to Off
This section is now configured; next, we'll configure the content for the second tab, which creates the Trending listing.
The Trending Section
This is the second of two tabs that display listing-style NSP instances that appear at the bottom of the page. The tabs are created by our Tabs GK5 module, and the tab content is provided by News Show Pro. In this instance, NSP displays a list of popular articles.
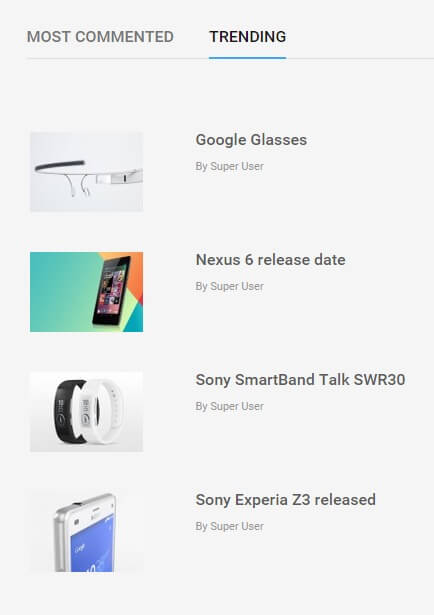
In this section we will be configuring the content for the list and adding it to a tab module position; later, we will configure the Tabs GK5 module to display this content in a tabbed area like in the demo layout.
If needed, click on the following link for this module's Configuration Screenshot.
Basic Settings
- Module Type: News Show Pro GK5 module.
- Module Title: Trending
- Show/Hide Title?:> Show
- Module Position: tab2
- Module Assignment: On all pages.
Main Configuration
This instance of News Show doesn't use any special portal mode, so this means that there are several options that must be changed from the default. As always, we'll look at each option tab that requires changes from the default one-by-one.
Basic Settings Tab
Only one thing to change here; in the Module Suffix field, add the following text:
vertical-list
Data Source
The data source tab may be set up as you see fit, to point to your preferred data source, such as K2 or Joomla articles. In the demo content this is set to point to All K2 articles in a random order.
Article Layout
There's a number of options under different subheadings in this section, but we only need to change a few of them. Let's look at each section of this tab's changes:
Under the Article Pagination section:
- Amount of pages with arts - Change to 1.
- Amount of columns - Change to 1.
- Amount of rows - Change to 4.
Under the Information Block section:
-
Second info format - Change to the following text:
By %AUTHOR_NAME
Under the Article Layout section:
- Article block padding - Change to 20px 0.
- Header order - Change to 2.
- Image order - Change to 1.
- Text order - Change to 3.
- Text enabled - Change to Off.
- Information order - Change to 4.
- Info enabled - Change to Off.
- Read more enabled - Change to Off.
The Article Layout section is finished, so we can move on to the Links Layout tab.
Links Layout Tab
Only one change; change the Amount of pages with links option to 0.
Thumbnails Tab
Four changes are needed in this tab; change the Wrap content and Create thumbnails options to On. Now set the Thumbnail dimensions option to 120 x 80px, and set the Image margin option to 0.
External Files
Change the Use default CSS option to Off
This section is now configured; now we'll create the tabs module that will display the content for the two NSP instance we just created.
The Tabs Section
We've now added content to two tab module positions, but they aren't yet being displayed on the frontpage; to do that, we'll need to add an instance of the Tabs GK5 module, which can be set to display content from these module positions.
If needed, click on the following link for this module's Configuration Screenshot.
Basic Settings
- Module Type: Tabs GK5 module.
- Module Title: Tabs
- Show/Hide Title?:> Hide
- Module Position: bottom3
- Module Assignment: Only on the pages selected.
- Selected Pages: Homepage only.
Main Configuration
Like News Show Pro, Tabs includes multiple options, but they are easily configurable. First we'll look at how to add the tab content to the module, and then we'll cover the additional options that need to be changed from the default.
Adding the Content Tabs
The content for our tabs has already been created, so all we need to do is tell the Tabs module to display them. To do this, click on the Tabs options panel to see a list of the currently assigned tabs, which will be blank since we haven't added anything yet! Click on the Add new tab button; a new set of options will appear for your new tab, ready to configure:
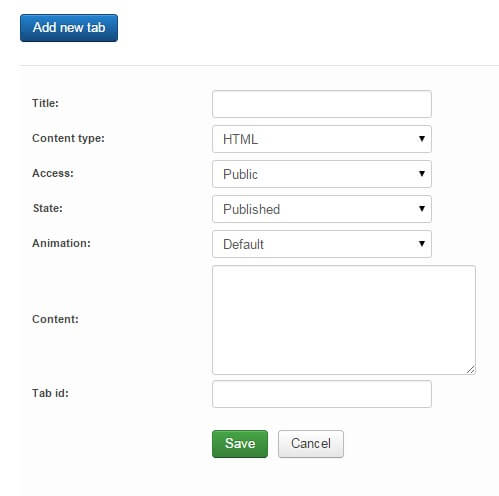
We'll add the Most commented tab first, so type "Most commented" in the title field. Change the Content type to Module, and change the Content option to tab1 (this tells Tabs GK5 to display the module from the tab1 module position). Now click on the Save button to save changes and your first tab is ready!
Now repeat the process; click on Add new tab, set the title to "Trending" and the Content type to Module, but this time set the Content option to tab2, which contains the instance of NSP that creates the trending list. Click the Save button and all your tabs are ready.
Additional Options
Your tab content is complete, but there are a few additional options in Tabs GK5 that need to be set to ensure the display on the frontpage matches the demo.
First, open the Animation tab and change the Auto animation option to Disabled. Next, in the Advanced settings tab, change the Used JavaScript framework option to jQuery. That's all the options sorted, so save the module and your tabs are all done!
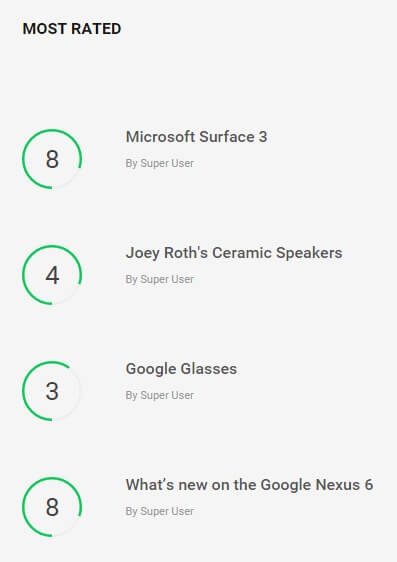
The Most Rated Section
This section provides another list-style instance of News Show Pro as seen in the tabs section, but this time showcasing items with review scores:
If needed, click on the following link for this module's Configuration Screenshot.
Basic Settings
- Module Type: News Show Pro GK5 module.
- Module Title: Most Rated
- Show/Hide Title?:> Show
- Module Position: bottom3
- Module Assignment: Only on the pages selected.
- Selected Pages: Homepage only.
Main Configuration
This instance of News Show Pro uses a special portal mode to deliver its content, so there are fewer options that need changing from the default. Let's go through each option tab in turn.
Basic Settings Tab
Only one thing to change here; change the Module mode option to TechNews - Rating.
Data Source
The data source tab may be set up as you see fit, to point to your preferred data source, such as K2 or Joomla articles. In the demo content this is set to point to K2 categories, with the reviews category being the target.
K2/Joomla! Content Additional Settings
Whether you are using K2 or Joomla! items for your reviews, in this tab the Text type option should be set to Fulltext.
TechNews Rating - Portal Mode Settings
This section contains a single option, Number of rows, which defines the number of items in the listing. In the demo content this is set to 4.
That covers all of the options for this section, so you can save the module.
The Advertisement Banners
There are two advertising banners that are used on the frontpage; one that appears to the right of the Most Rated listing and one that appears under it. These elements are just placeholders ready for you to add your own advertising solutions, but you may want to add them purely for aesthetics as you prepare your site for launch. We'll look at each one individually.
The Large Advertising Banner
This banner is placed to the right of the Most Rated list that we created in the previous section, and offers a large rectangular banner space:

If needed, click on the following link for this module's Configuration Screenshot.
Basic Settings
- Module Type: Custom HTML
- Module Title: Banner
- Show/Hide Title?:> Hide
- Module Position: bottom3
- Module Assignment: Only on the pages selected.
- Selected Pages: Homepage only.
Main Configuration
The best thing about custom HTML modules is there isn't much that needs to be done in order to match the demo layout. Simply copy the following HTML code and paste it into the editor of your module; if preferred you can replace the image with your own:
<p><img class="pull-right" src="/images/demo/banner-2.jpg" alt="" /></p>
One other option needs to be changed; click on the Advanced options tab, and in the Module class suffix field add the following text:
clear gray-bg
No other options need to be changed, so you can save the module.
The Standard Advertising Banner
This banner is placed under the Most Rated list, above the footer menu:

If needed, click on the following link for this module's Configuration Screenshot.
Basic Settings
- Module Type: Custom HTML
- Module Title: Banner bottom
- Show/Hide Title?:> Hide
- Module Position: bottom4
- Module Assignment: Only on the pages selected.
- Selected Pages: Homepage only.
Main Configuration
It's another Custom HTML module, so super-easy to configure. Simply copy the following HTML code and paste it into the editor of your module; if preferred you can replace the image with your own:
<p><a href="#"><img src="/images/demo/banner.jpg" alt="" /></a></p>
One other option needs to be changed; click on the Advanced options tab, and in the Module class suffix field add the following text:
banner
No other options need to be changed, so you can save the module.
And that's your frontpage configured! Now there are a few additional modules to configure that provide extras like the newsletter popup and sidebar items on category and article pages, which we'll cover now.
Additional Modules
In addition to the frontpage modules there are some additional modules that provide extra functionality, such as the newsletter popup or sidebar modules on post pages. We'll cover the configuration of these modules here. These modules are not necessarily required for your site, but they can add some extra flair and functionality. We encourage you to examine each additional module and decide which ones you would like to use on your site as needed.
Newsletter Popup
The newsletter popup is a great way to encourage more sign-ups for your newsletter, with an automatic popup with sign-up field on every page:

If needed, click on the following link for this module's Configuration Screenshot.
Basic Settings
- Module Type: Custom HTML module.
- Module Title: Newsletter popup
- Show/Hide Title?:> Show
- Module Position: newsletter
- Module Assignment: On all pages.
Main Configuration
It's a custom HTML module, so you can guess what the next step is! That's right; copy this HTML content into the editor:
<h3>
Sign up to keep in touch!
</h3>
<p>
Be the first to hear about special offers and exclusive deals from TechNews and our partners.
</p>
<form action="index.php?option=com_acymailing&ctrl=sub" method="post">
<input type="email" required id="user_email" name="user[email]" placeholder="enter email address">
<input type="submit" value="Submit" id="gk-newsletter-submit">
<input type="hidden" name="acyformname" value="formAcymailing1" />
<input type="hidden" name="ctrl" value="sub"/>
<input type="hidden" name="task" value="optin"/>
<input type="hidden" name="option" value="com_acymailing"/>
<input type="hidden" name="visiblelists" value=""/>
<input type="hidden" name="hiddenlists" value="1"/>
<input type="hidden" name="user[html]" value="1"/>
</form>
<!-- Configuration details: https://www.acyba.com/acymailing/248-acymailing-external-subscription-form.html -->
<small> Check out our <a href="#">Privacy Policy</a> & <a href="#">Terms of use</a><br />
You can unsubscribe from email list at any time </small>
No more changes are needed, so click on the Save & Close button to save.
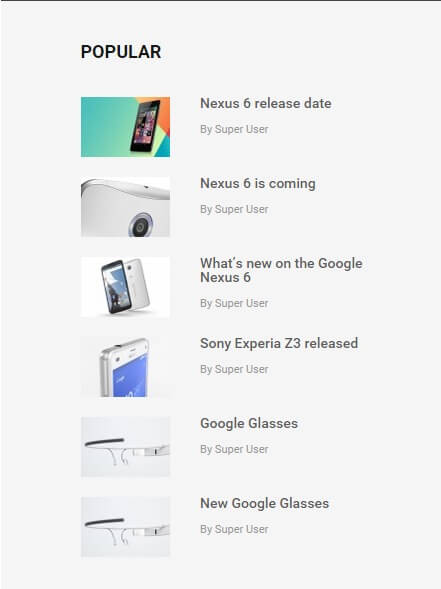
The Popular Section
This section is a listing of popular articles much like what you can see in the bottom area of the frontpage:
If needed, click on the following link for this module's Configuration Screenshot.
Basic Settings
- Module Type: News Show Pro GK5 module.
- Module Title: Popular
- Show/Hide Title?:> Show
- Module Position: sidebar
- Module Assignment: Only on pages selected.
- Menu Selection: Joomla blog (this should be attached to your own blog section if used).
Main Configuration
This instance of News Show doesn't use any special portal mode, so this means that there are several options that must be changed from the default. As always, we'll look at each option tab that requires changes from the default one-by-one.
Basic Settings Tab
Only one thing to change here; in the Module Suffix field, add the following text:
vertical-list
Data Source
The data source tab may be set up as you see fit, to point to your preferred data source, such as K2 or Joomla articles. In the demo content this is set to point to All K2 articles in a random order.
Article Layout
There's a number of options under different subheadings in this section, but we only need to change a few of them. Let's look at each section of this tab's changes:
Under the Article Pagination section:
- Amount of pages with arts - Change to 1.
- Amount of columns - Change to 1.
- Amount of rows - Change to 6.
Under the Information Block section:
-
Second info format - Change to the following text:
By %AUTHOR_NAME
Under the Article Layout section:
- Article block padding - Change to 20px 0 0 0.
- Header order - Change to 2.
- Image order - Change to 1.
- Text order - Change to 3.
- Text enabled - Change to Off.
- Information order - Change to 4.
- Info enabled - Change to Off.
- Read more enabled - Change to Off.
The Article Layout section is finished, so we can move on to the Links Layout tab.
Links Layout Tab
Only one change; change the Amount of pages with links option to 0.
Thumbnails Tab
Four changes are needed in this tab; change the Wrap content and Create thumbnails options to On. Now set the Thumbnail dimensions option to 90 x 60px, and set the Image margin option to 0.
External Files
Change the Use default CSS option to Off
This section is now configured so you can save the module.
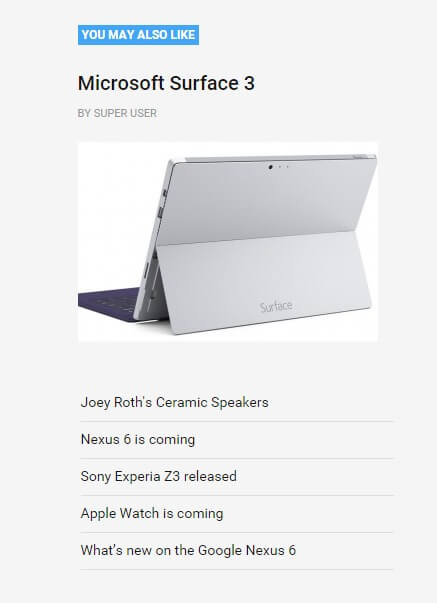
The You May Also Like Section
This section provides a different style layout for highlighting articles in the sidebar:
If needed, click on the following link for this module's Configuration Screenshot.
Basic Settings
- Module Type: News Show Pro GK5 module.
- Module Title: You may also like
- Show/Hide Title?:> Show
- Module Position: sidebar
- Module Assignment: Only on pages selected.
- Menu Selection: Joomla blog (this should be attached to your own blog section if used).
Main Configuration
This instance of News Show doesn't use any special portal mode, so this means that there are several options that must be changed from the default. As always, we'll look at each option tab that requires changes from the default one-by-one.
Basic Settings Tab
Only one thing to change here; in the Module Suffix field, add the following text:
nsp-links
Data Source
The data source tab may be set up as you see fit, to point to your preferred data source, such as K2 or Joomla articles. In the demo content this is set to point to All K2 articles in a random order.
Article Layout
There's a number of options under different subheadings in this section, but we only need to change a few of them. Let's look at each section of this tab's changes:
Under the Article Pagination section:
- Amount of pages with arts - Change to 1.
- Article pagination - Change to "None".
Under the Header section:
- Header floating: - Change to "No use float".
Under the Image section:
- Image position: - Change to "text-align:left".
- Image floating: - Change to "No use float".
Under the Text section:
- Text floating: - Change to "No use float".
Under the Information Block section:
- Information floating: - Change to "No use float".
- Second information floating: - Change to "No use float".
-
Second info format - Change to the following text:
By %AUTHOR_NAME
Under the Article Layout section:
- Article block padding - Change to 0.
- Image order - Change to 4.
- Text order - Change to 3.
- Text enabled - Change to Off.
- Information order - Change to 5.
- Info enabled - Change to Off.
- Second information order - Change to 2.
- Read more enabled - Change to Off.
The Article Layout section is finished, so we can move on to the Links Layout tab.
Links Layout Tab
A few changes to be made in this tab:
- Amount of pages with links - Change to 1.
- Amount of links - Change to 5.
- Pagination - Change to "None".
- Links block margin - Change to 40px 0 0.
- List text limit value - Change to 0.
Thumbnails Tab
Four changes are needed in this tab; change the Wrap content and Create thumbnails options to On. Now set the Thumbnail dimensions option to 300 x 200px, and set the Image margin option to 0.
External Files
Change the Use default CSS option to Off
This section is now configured so you can save the module.
Topbar Modules
The topbar contains two useful modules; a login module so users can login to your site, and a search module for hunting down those hard-to-find articles!
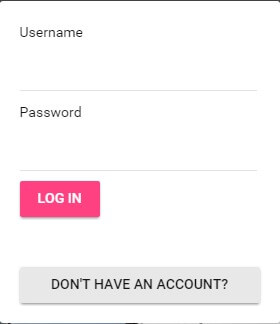
The Login Module
The login module is represented by a simple icon, and when clicked the username and password fields will appear without the need to load a new page:
If needed, click on the following link for this module's Configuration Screenshot.
Basic Settings
- Module Type: Login module.
- Module Title: Log In
- Show/Hide Title?:> Hide
- Module Position: login
- Module Assignment: On all pages.
Main Configuration
Once you've set the basic settings no further configuration is required, so you can save the module and move on!
The Search Module
The search module adds a search bar to the menu area that expand when clicked for users to search.

If needed, click on the following link for this module's Configuration Screenshot.
Basic Settings
- Module Type: Search module.
- Module Title: Search
- Show/Hide Title?:> Show
- Module Position: search
- Module Assignment: On all pages.
Main Configuration
Like the login module once the basic settings are sorted there's no other changes needed, so just save the module and you're good to go!
User Menu
Ghere is a user menu in TechNews for logged-in users to manage their accounts. This isn't necessary if you're not allowing logins on your site, but if you are then you'll need this basic functionality since the user menu provides all the options for users to manage their profile when logged-in. To create this menu:
In your Joomla backend, click on Menus → Menu Manager → Add New Menu to be taken to the Menu Details screen. Enter a title and menu type in the respective fields; in the demo content we use User Menu as the title, and mainmemu as the Menu Type. Then click on Save & Close to save the changes. You will be taken back to Menu list where you'll need to add some items.
Click on Menus → User menu → Add New Menu Item to go to the Edit Menu Item screen; in the Title field, type Your Profile. Click on the Select button in the Menu Item Type field and select Users Manager → User Profile. Change the Access option on the right-hand side to Registered, then click Save & Close to save changes.
Repeat this process of adding a new menu item, but this time name the menu item Edit Profile, and in the Menu Item Type field select Users Manager → Edit User Profile. Add yet another new menu item, then type Create Article in the title field and select the Articles → Create Article menu item type before saving.
One more time; go through the steps to create a new item; type Submit a Web Link in the title field and select the Weblinks → Submit a Web Link menu item type before saving. Make sure that each of these menu items are limited to access from registered users only to prevent issues. The User menu is now ready, and we can assign it to its position.
Assigning the Menu
This is very simple; just open your Module Manager, click on the green New button, and in the list of available modules click on the Menu option. Add a title to the title field; in the demo we use User area. Select the usermenu position in the Position field's drop-down list, or write the position into the field manually. Now, in the Select Menu field, select your new User Menu. Leave all other options as default and click on the Save & Close button to save changes. Your menu is now set-up.
Footer Menu
As well as the main menu area, there is also a footer menu area prepared in the demo layout. This is used just as a placeholder ready for your links to be added, but you may wish to create it before beginning customization just so you can see the full frontpage layout.
Click on Menus → Menu Manager → Add New Menu to go to the Menu Details screen. Enter a title and menu type in the respective fields; in the demo content we use Footer Menu as the title, and footermenu as the Menu Type. Then click on Save & Close to save the changes. You will be taken back to Menu list where you'll need to add some items.
Click on Menus → User menu → Add New Menu Item to go to the Edit Menu Item screen; in the Title field, type Subscribe. Click on the Select button in the Menu Item Type field and select System Links → External URL, then click Save & Close to save changes. Repeat this process to add eight more links, as follows:
- Advertise
- Site Map
- Press Center
- FAQ
- Contact Us
- Newsletter
- Jobs
- RSS
Once done, open your Module Manager, click on the green New button, and in the list of available modules click on the Menu option. Add a title to the title field; in the demo we use Footer menu. Select the footer_nav position in the Position field's drop-down list, or write the position into the field manually. Now, in the Select Menu field, select your new Footer Menu. Leave all other options as default and click on the Save & Close button to save changes, and the placeholder footer menu is ready!