Guide to manually install Joomla 3
Joomla! is a Content Management System based on PHP 5.3+ and MySQL or PostgreSQL database. If you want to test Joomla! and you haven’t purchased a domain and server yet, you can install Joomla! on your own computer (without your site appearing on the Internet), using the standalone server environment, for example: JAMP, JOOMLAS2GO! (J2G) or XAMPP.
If you want your Joomla! site to be available on the Internet, make sure that you have access to an account on a web server.
There are three ways to install Joomla! 3.x:
- Manually
- Using an installation software such as Fantastico or C-panel, which are installed in the host’s server and offer an user friendly interface for the management of the site and the installation of software.
- Or you can also create a working website at demo.joomla.org should you wish to gain some experience, which is easy and well-supported.
A step by step guide to installing Joomla!
- Download the Joomla! 3.x current release of Joomla! 3.x. (www.joomla.org/download.html). Make sure to download the Full Package (the other versions are upgrades for existing Joomla! installations). Download this ZIP package to your hard drive or pendrive, then unpack the compressed file to a folder on your local disk.
- In your FTP program, select all the files & folders in the Joomla! folder and copy them to your web server. If you don’t already have an FTP/SSH client yet, we recommend Filezilla.
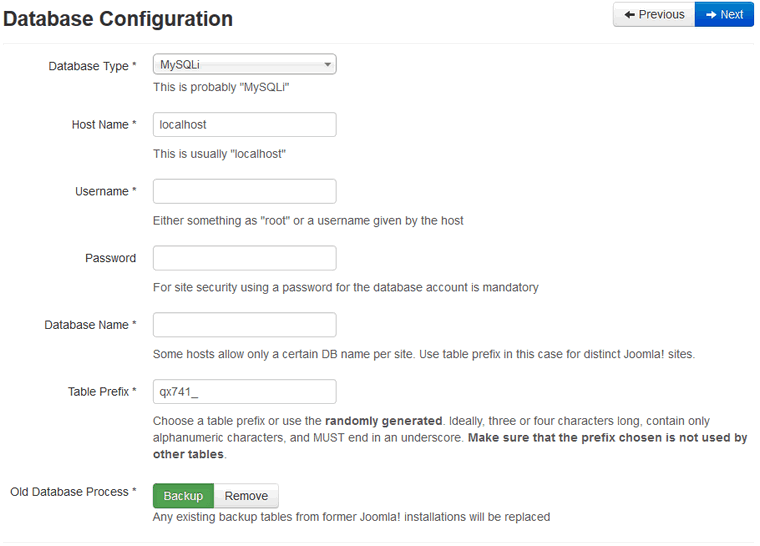
- Because Joomla is a database-driven system, it requires an SQL database to run. That’s where it will install its tables and store information you add to it from back-end and front-end. Thus, your second step is to create a database for use by the Joomla! 3.x installation process, most web-hosting companies allow you to create databases using their administration panel. You will need to note down all the basic database information. If you have only one database and it is already in use, you can install Joomla! in it – just make sure to have a distinctive prefix for your tables to avoid over-writing any existing database table. Do not use this same database for more then two/three websites for security reasons.
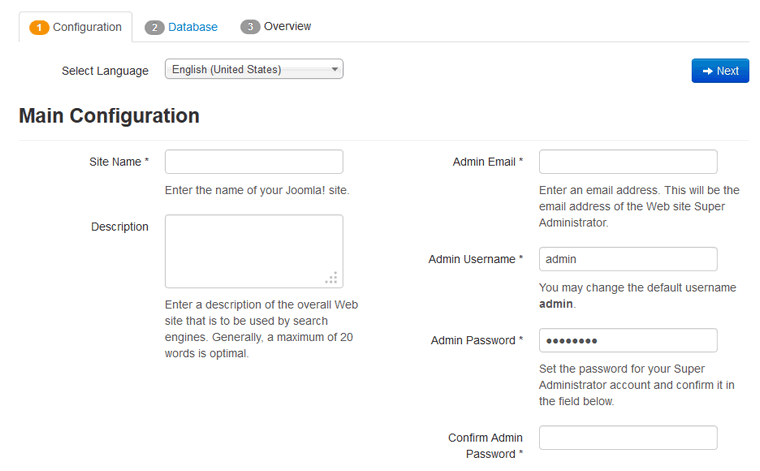
- Run the Joomla! installation wizard. Enter the URL for your site (for example, http://www.your-page.com) in your browser. Or if you uploaded it to a sub-folder, go to: http://yoursite.com/JoomlaFolder/
The installation screen will (should) come up. From that point on, follow the install wizard. You have to fill all fields marked with * and also a database password.
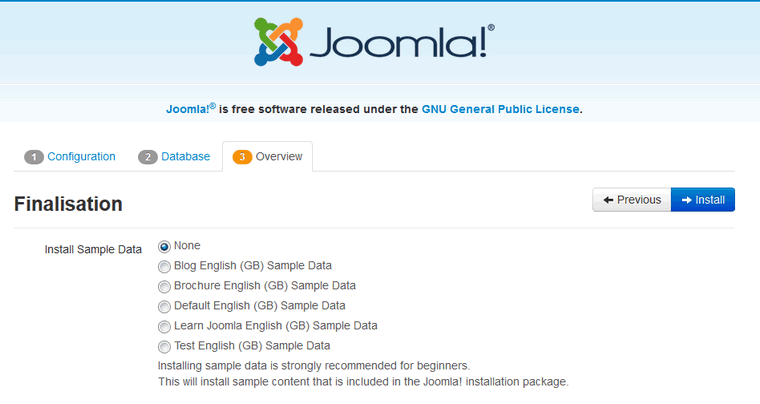

Now you must delete the Installation Folder. Click on the orange Remove Installation folder button and a success message will appear.
Joomla! is available in numerous languages including the most common. You can even have your CMS site in multiple languages. After installation, login to your back-end (http://www.your-page.com/administrator) and in the Menu choose Extensions -> Language Manager to install your own native language.

Over 50 language packs are currently available. Click on the box next to the language name then press the Install button to download the right pack for your language. Then in Language Manager set your language as the default (both for Site and Administrator).
After you have Joomla! installed on your web server , you can start using it and share with your friends and clients.
This article was first published
