Installing required and recommended plugins in a theme
This is part 2 of a 4-part guide to installing a theme and preparing it to match our live demo layout. Links to the other parts of this guide are provided at the end of this article
Why do I need plugins?
The basic WordPress theme package installed in part 1 of this guide contains the core PHP and CSS code for the theme, which includes the logo and built-in plugins. However, each theme’s demo also uses external plugins that are required if you’re going to match the demo layout and get the most from your theme.
What plugins are required?
Each theme is different, and the plugins you need to install will change depending on the theme’s focus. For example, a News-focused theme will certainly need our News Show Pro article-display plugin, but it’s not going to have much use of an ecommerce solution like WooCommerce.
Similarly, an ecommerce site will need WooCommerce, but it won’t have much use for BuddyPress, which is a social network plugin.
How do I install the plugins?
Our developers have worked hard to simplify the installation process, so they take advantage of WordPress functionality to include an easy install option for all of a theme’s required plugins. This option advises which plugins need to be installed, and provides an automated way to achieve it with just a few clicks.
To install the required plugins for your theme, follow these steps:
- Install the theme package as per part 1 of this guide.
- Once the theme is installed and activated you will see a message at the top of the screen that advises which plugins are required and which are recommended for the theme:
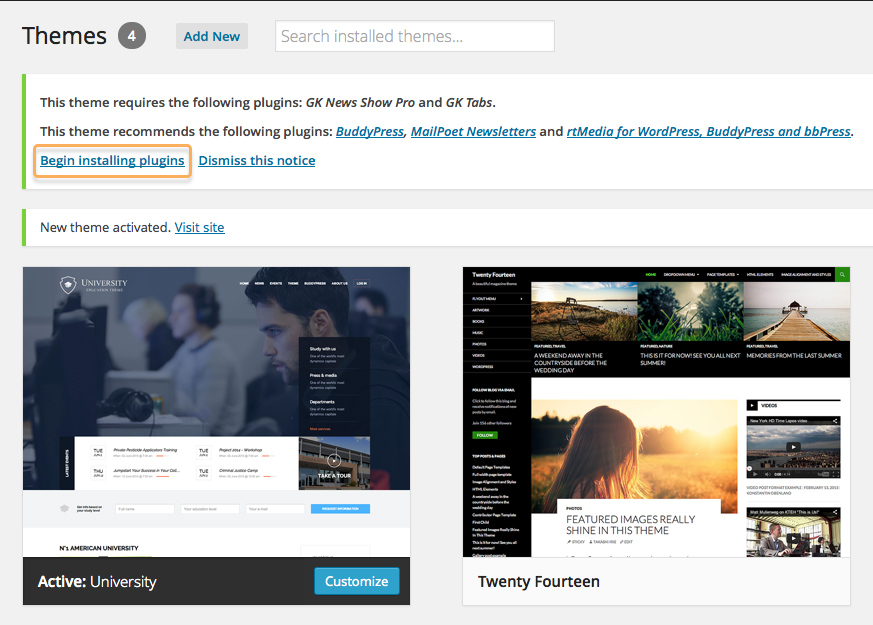
- Click on the “Begin installing plugins” link under this message; you will be taken to the “Install Required Plugins” screen.
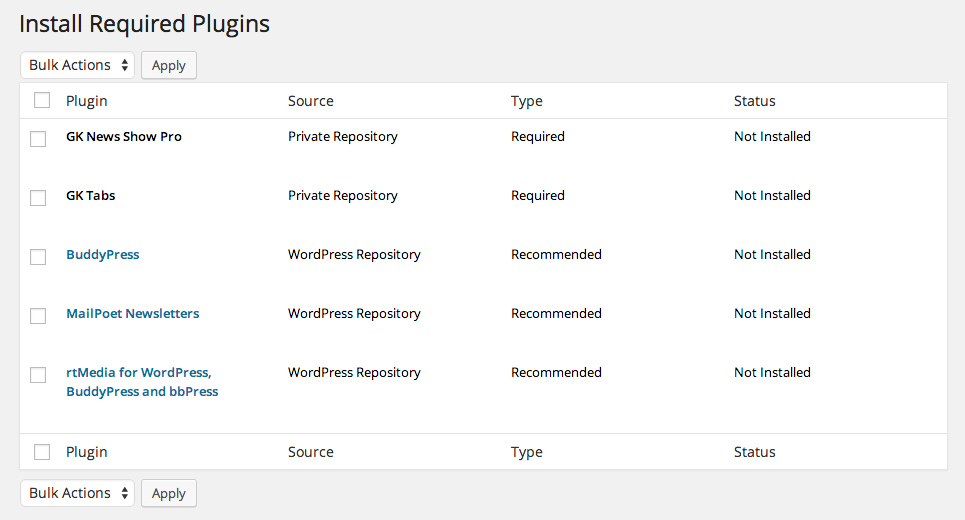
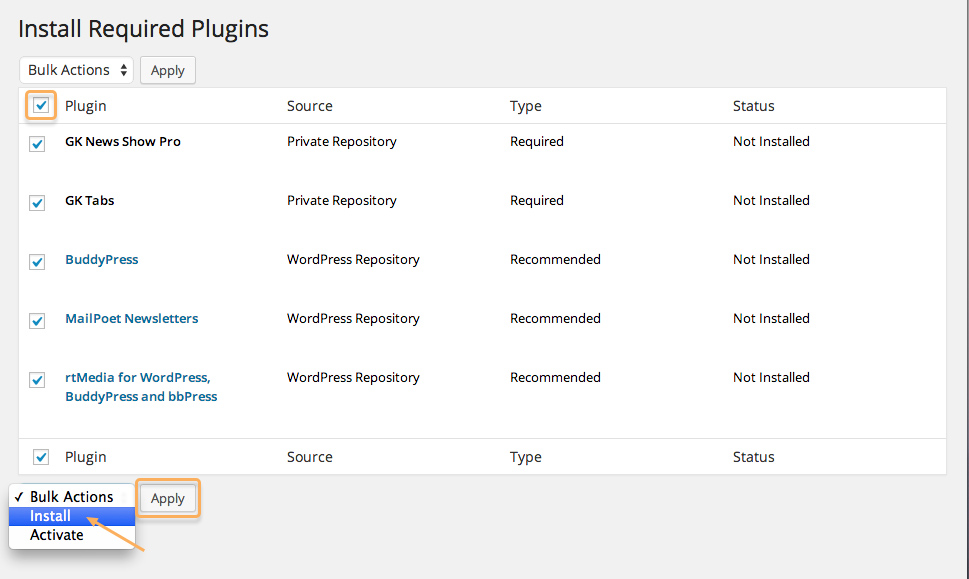
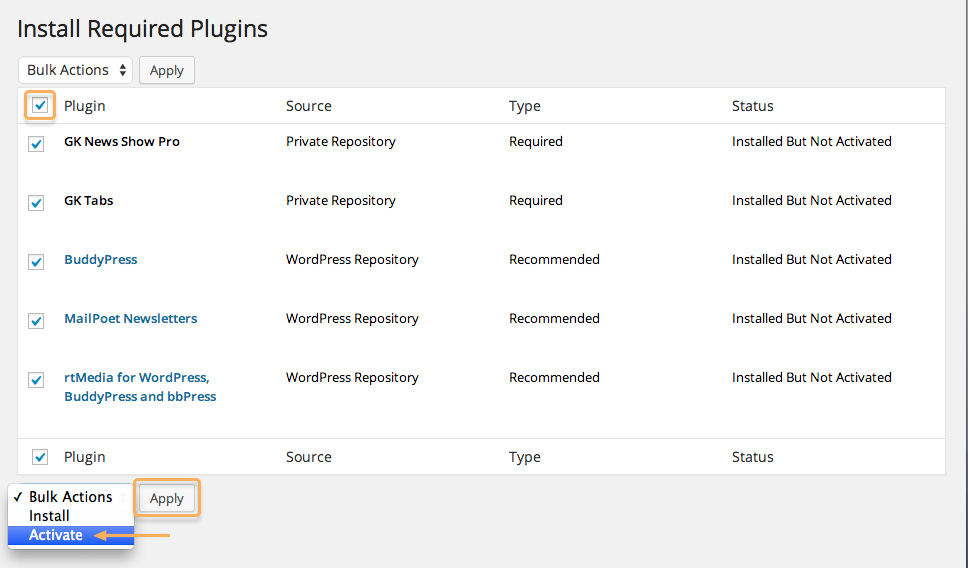
- Here you will see a list of the plugins that need to be installed and activated. Click in the tickbox to the left of the “Plugin” title to add a tick to every plugin, then in the “Bulk Actions” drop-down list, select “Install” and click Apply.
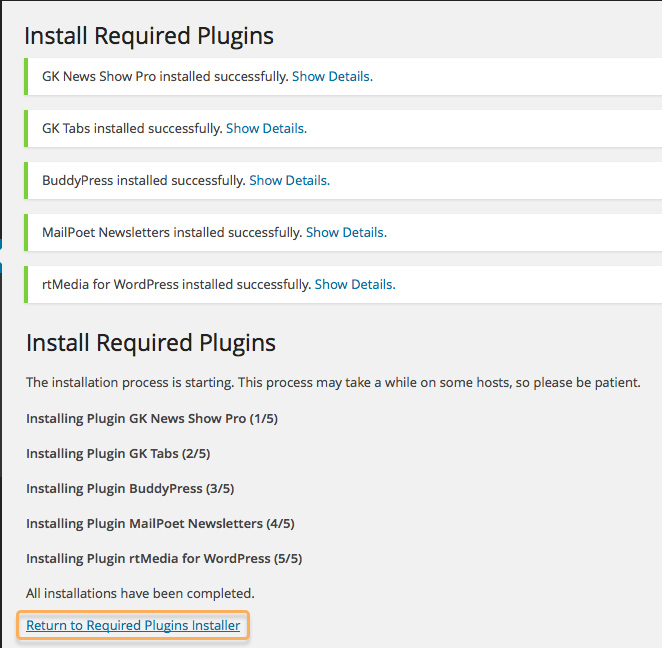
- WordPress will go through the installation process for each plugin; let it run through. Once it finishes, you will see the option to “Return to Required Plugins Installer”; click on this.
- Now you’re back on the “Install Require Plugins” page we need to activate all your newly-installed plugins. Click on the tickbox next to the “Plugin” title to add a tick to all items again, and change the “Bulk Actions” drop-down list option to “Activate”. then click “Apply”.
- After a few seconds the page will update and you’ll see a message that the plugins were activated successfully:
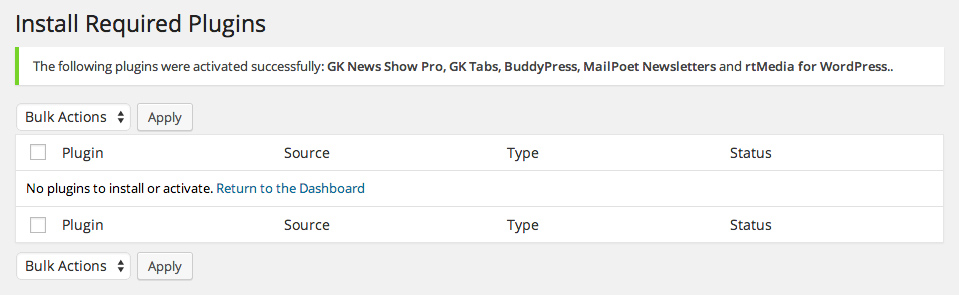
And that’s it; all the required plugins are now installed and activated. If you’re following our manual install guide, you’ll want to move on to part 3; importing demo content:
Manual install guide links
- Part 1 – Installing the basic theme package
- Part 2 – Installing the required plugins – You are here!
- Part 3 – Importing demo content
- Part 4 – Importing theme settings
This article was first published
