Installation Default Restaurant Ecommerce
Introduction
If you've already completed the steps in the Quark Core Installation Guide, you now have a Joomla installation with the Quark template and all modules and extensions installed, ready to use. In this guide, we'll cover three additional steps needed to create your content and match the demo layout:
- Placing and configuring the Frontpage Modules.
- Creating and configuring Additional Pages
- Setting-up Menus.
Once you've followed this guide your site will be ready to customize. If you have yet to complete the Core Installation Guide, make sure to go back and follow its steps before proceeding with this guide.

Frontpage Modules
The frontpage modules will provide the first impression for your site, so it is imperative that they are placed and configured correctly. We will cover each module position of the frontpage in turn, starting from the header position and working down to the footer_nav position.
Before starting module placement it is advisable that you disable the TinyMCE or other WYSIWYG editors. This is because these editors automatically cleans up empty HTML tags, but many of the modules in Quark are custom HTML modules that use blank tags to create icons or for additional CSS purposes, so these empty tags shouldn't be removed. Since the clean-up cannot be disabled it is instead necessary to disable the editors.
In order to disable the WYSIWYG editor:
- Click on Users → User Manager in the top menu of your Joomla backend to be taken to a list of your registered users.
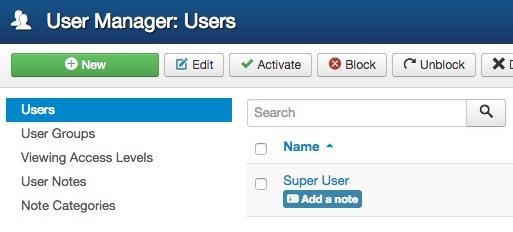
- Click on the username you will be logged in as when placing the modules to be taken to the Edit Profile screen.

- Click on the Basic Settings tab and change the Editor option from Use Default to Editor - None.
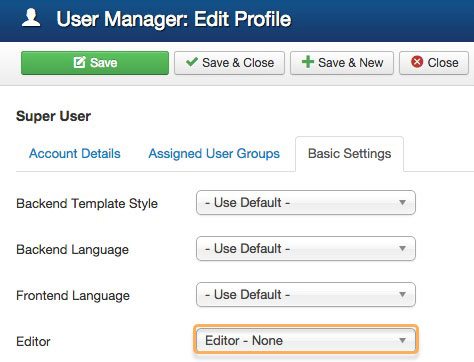
- Click on Save & Close at the top of the screen to save changes.
Now when you open the editor in an article or Custom HTML module you will see just the plain text editor, and empty tags will not be automatically removed. Once you have finished module placement you may wish to reactivate the editor for the user should you intend to use it to write articles.
The Frontpage Header
The header provides a simple but effective full-width block with animated elements and text for that extra sophisticated touch. To configure the frontpage header:

- Open your Module Manager as per the instructions above in the Module Placement section, and click on New.
- Select a Custom HTML module from the list of available module types; you will be taken to the main screen for the module.
- Enter a title of your choice; this will not be shown on the actual frontpage for visitors to see, so give it a name that will help you identify the module, such as Frontpage Header.
- Copy and paste the following HTML code into the body of the custom HTML module:
<p><img class="parallax-img" src="/images/docs/quark/joomla/install/demo/header_bg.jpg" alt="" /></p>
<div class="gkPage">
<h1 data-sr="enter bottom and move 50px">Product Landing Page theme</h1>
<h2 data-sr="enter bottom and move 50px and wait .2s">Advanced, unique and powerful premium theme</h2>
<a class="dark btn-border" href="#" data-sr="enter bottom and move 50px and wait .3s">Learn more</a></div>
- Click on the Position drop-down list and select the Header position under the gk_quark module positions.
- Click on the Menu Assignment tab at the top of the screen. You will see an option called Module Assignment with a drop-down list. Click on the drop-down list and select Only on the pages selected. You will see a list of available pages to assign the module to.
- If it isn't already marked, add a tick to the Main Menu → Home option, which points to the homepage. All other pages should be left unticked.
- Click Save & Close at the top of the screen to save the module. Your header is now configured.
Frontpage Mainbody

The Mainbody section of the frontpage contains an image with formatted text along with a Learn More button. You may place whatever text content you desire here, but it works brilliantly as an introduction to your company.
To setup this section:
- Open your Module Manager and click on New.
- Select a Custom HTML module from the list of available module types to be taken to the configuration screen.
- Enter a title of your choice; this will not be shown on the frontpage, so give it a name that will help you identify the module, such as Frontpage Mainbody.
- Copy and paste the following HTML code into the body of the custom HTML module:
<div class="gk-desc"><img src="/images/docs/quark/joomla/install/demo/product_bg.jpg" alt="" data-sr="enter bottom and scale up 50% over .8s" />
<h2>Duis scelerisque consequat magna eget euismod.<br /> Sed vel odio nunc nulla facilisi</h2>
<p>Lorem ipsum dolor sit amet, consectetur adipiscing elit. Proin consectetur dui at tempor elementum. Aenean convallis metus nec nibh varius hendrerit. Ut varius purus lectus, a pharetra mi blandit at. Integer ante leo, iaculis ut odio sit amet, dignissim pretium quam. Ut ac diam egestas, bibendum ex et, pharetra tellus. Proin sagittis est sit amet ipsum aliquam, non dapibus sapien congue. Donec lobortis sed lacus at consectetur. Ut aliquet sapien eget dolor sollicitudin interdum. Duis scelerisque consequat magna eget euismod. Sed vel odio nunc. Nulla facilisi. Aenean a tincidunt leo. Praesent dapibus nibh id mauris sollicitudin, ut auctor lacus interdum. Phasellus volutpat magna a purus elementum, eget gravida tellus feugiat. In id lorem sapien.</p>
<a class="btn-border" href="#">Learn more</a></div>
- Click on the Position drop-down list and select the mainbody position under the gk_quark module positions.
- Click on the Menu Assignment tab at the top of the screen. You will see an option called Module Assignment with a drop-down list. Click on the drop-down list and select Only on the pages selected. You will see a list of available pages to assign the module to.
- If it isn't already marked, add a tick to the Main Menu → Home option, which points to the homepage. All other pages should be left unticked.
- Click Save & Close at the top of the screen to save the module. The mainbody is now configured.
Frontpage Tabs Section

The next frontpage area is more complex; it utilizes our Tabs GK5 module to display a selection of Custom HTML modules with varying content, all reachable with a click of a button.
Before creating this section we will first need to create the content for the tabs.
Tab 1
This first tab contains a stylized text header with subtitle.

To create this tab:
- Open your Module Manager as per the instructions above in the Module Placement section, and click on New.
- Select a Custom HTML module from the list of available module types to be taken to the configuration screen.
- Enter a title of your choice; this will not be shown on the frontpage, so give it a name that will help you identify the module, such as Frontpage - Tab 1 and set the Show Title option on the right to Hide.
- Copy and paste the following HTML code into the body of the custom HTML module:
<h2 class="gk-big-heading">N<span class="gk-number-block">1</span></h2>
<p>Multi award winning ski goggles with <br />the multi lens technology</p>
- Click on the Position drop-down list and select the tab1 position under the gk_quark module positions.
- Click on the Options tab, then click on Select a background image. You may use any image you wish, but for this tutorial we will use the tab1_bg file from the demo image folder.
- Click on the Advanced tab and add the following text to the Module Class Suffix field:
very-big-spaces clear parallax-bg
- Click Save & Close at the top of the screen to save the module. The first tab is now configured.
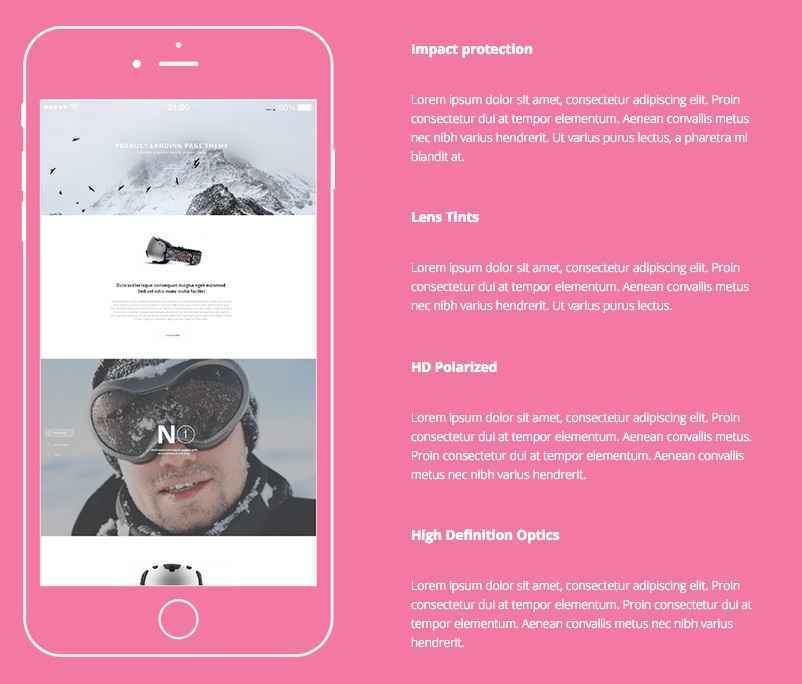
Tab 2
The second tab features a mockup image on the left side of the tab, and features listed on the right.
To create this tab:
- Open your Module Manager as per the instructions above in the Module Placement section, and click on New.
- Select a Custom HTML module from the list of available module types to be taken to the configuration screen.
- Enter a title of your choice; this will not be shown on the frontpage, so give it a name that will help you identify the module, such as Frontpage - Tab 2 and set the Show Title option on the right to Hide.
- Copy and paste the following HTML code into the body of the custom HTML module:
<div class="gkPage">
<div class="gk-cols gk-features" data-cols="2">
<div><img src="/images/docs/quark/joomla/install/demo/app_features.png" alt="Features" /></div>
<div>
<dl>
<dt>Impact protection</dt>
<dd>Lorem ipsum dolor sit amet, consectetur adipiscing elit. Proin consectetur dui at tempor elementum. Aenean convallis metus nec nibh varius hendrerit. Ut varius purus lectus, a pharetra mi blandit at.</dd>
<dt>Lens Tints</dt>
<dd>Lorem ipsum dolor sit amet, consectetur adipiscing elit. Proin consectetur dui at tempor elementum. Aenean convallis metus nec nibh varius hendrerit. Ut varius purus lectus.</dd>
<dt>HD Polarized</dt>
<dd>Lorem ipsum dolor sit amet, consectetur adipiscing elit. Proin consectetur dui at tempor elementum. Aenean convallis metus. Proin consectetur dui at tempor elementum. Aenean convallis metus nec nibh varius hendrerit.</dd>
<dt>High Definition Optics</dt>
<dd>Lorem ipsum dolor sit amet, consectetur adipiscing elit. Proin consectetur dui at tempor elementum. Proin consectetur dui at tempor elementum. Aenean convallis metus nec nibh varius hendrerit.</dd>
</dl>
</div>
</div>
</div>
- Click on the Position drop-down list and select the tab2 position under the gk_quark module positions.
- Click on the Advanced tab and add the following text to the Module Class Suffix field:
big-spaces clear color-bg
- Click Save & Close at the top of the screen to save the module. The second tab is now configured.
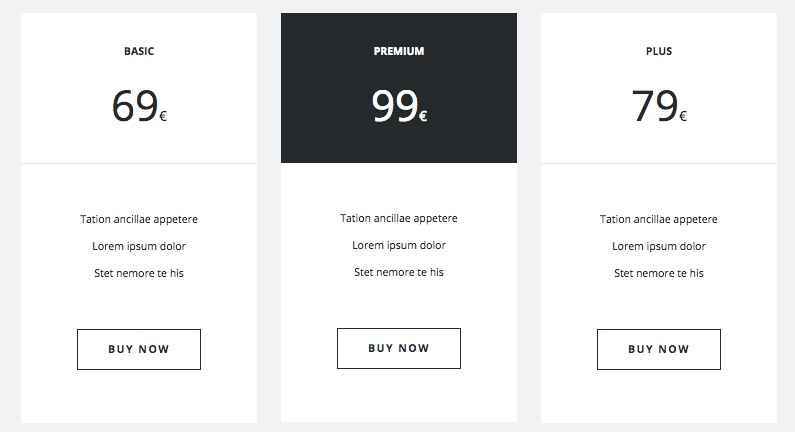
Tab 3
The third tab displays a specially-designed price table; great for providing instant information to your potential customers about your pricing model.
To create this tab:
- Open your Module Manager as per the instructions above in the Module Placement section, and click on New.
- Select a Custom HTML module from the list of available module types to be taken to the configuration screen.
- Enter a title of your choice; this will not be shown on the frontpage, so give it a name that will help you identify the module, such as Frontpage - Tab 3 and set the Show Title option on the right to Hide.
- Copy and paste the following HTML code into the body of the custom HTML module:
<div class="gkPage">
<div class="gk-price-table" data-cols="3">
<dl>
<dt><strong>Basic</strong>69<sub>€</sub></dt>
<dd>
<ul>
<li>Tation ancillae appetere</li>
<li>Lorem ipsum dolor</li>
<li>Stet nemore te his</li>
</ul>
</dd>
<dd><a href="#">Buy now</a></dd>
</dl>
<dl class="gk-premium">
<dt><strong>Premium</strong>99<sub>€</sub></dt>
<dd>
<ul>
<li>Tation ancillae appetere</li>
<li>Lorem ipsum dolor</li>
<li>Stet nemore te his</li>
</ul>
</dd>
<dd><a href="#">Buy now</a></dd>
</dl>
<dl>
<dt><strong>Plus</strong>79<sub>€</sub></dt>
<dd>
<ul>
<li>Tation ancillae appetere</li>
<li>Lorem ipsum dolor</li>
<li>Stet nemore te his</li>
</ul>
</dd>
<dd><a href="#">Buy now</a></dd>
</dl>
</div>
</div>
- Click on the Position drop-down list and select the tab3 position under the gk_quark module positions.
- Click on the Advanced tab and add the following text to the Module Class Suffix field:
- Click Save & Close at the top of the screen to save the module. The third tab is now configured.
Tab 4

The fourth tab is created as a placeholder for your additional content. To create this tab:
- Open your Module Manager as per the instructions above in the Module Placement section, and click on New.
- Select a Custom HTML module from the list of available module types to be taken to the configuration screen.
- Enter a title of your choice; this will not be shown on the frontpage, so give it a name that will help you identify the module, such as Frontpage - Tab 4 and set the Show Title option on the right to Hide.
- Copy and paste the following HTML code into the body of the custom HTML module:
<h2 class="gk-big-heading"><span class="gk-number-block">?</span></h2>
<p>Place your own content <br />in this tab</p>
- Click on the Position drop-down list and select the tab4 position under the gk_quark module positions.
- Click on the Advanced tab and add the following text to the Module Class Suffix field:
very-big-spaces clear dark-bg
- Click Save & Close at the top of the screen to save the module. The fourth tab is now configured.
Creating the Frontpage Tabs
Now that each of the tabbed content has been created we can assign the Tabs GK5 module to the frontpage and tell it to display the tabbed content.
To create this section:
- Open your Module Manager as per the instructions above in the Module Placement section, and click on New.
- Select the Tabs GK5 module from the list to be taken to the configuration screen.
- Enter a title of your choice; this will not be shown on the frontpage, so give it a name that will help you identify the module, such as Frontpage Tabs, and change the Show Title option on the right to Hide.
- Click on the Position drop-down list and select the bottom1 position under the gk_quark module positions.
- Click on the Menu Assignment tab at the top of the screen. You will see an option called Module Assignment with a drop-down list. Click on the drop-down list and select Only on the pages selected. You will see a list of available pages to assign the module to.
- If it isn't already marked, add a tick to the Main Menu → Home option, which points to the homepage. All other pages should be left unticked.
- Click on the Basic options tab and add the following text to the Module Suffix field:
transparent-tabs box-wide clear
- Click on the Tabs option tab. Here you can tell Tabs GK5 what to display, and what to call each tab. Click on Add new tab to expand the options.
- In the title field, write "Award-Winning. In the Content Type, select Module. Finally, in the Content drop-down field, select tab1 to assign the contents of the tab1 module position to that tab, then click Save.
- Repeat this process to add three more tabs, called "Unique technology", "Price Table" and "Custom", and assign the tab2, tab3 and tab4 content respectively.
- Open the Interface options tab and change the Prev/Next buttons option to Disabled.
- Open the Animation option tab and change the Auto-animation option to Disabled.
- Open the Advanced Settings tab and change the Add module wrappers option to Enabled, the Used JavaScript Framework option to jQuery, and the Use CSS option to Force disabled.
- Click on Save & Close at the top of the screen to save the module.
The Tabs section is now configured. Next up we'll configure Image Show GK4, that creates the slideshow on the frontpage.
Frontpage Slideshow
The frontpage slideshow offers an elegantly animated slide combined with a title and subtitle so you can promote your successes or important features.

To create this section:
- Open your Module Manager as per the instructions above in the Module Placement section, and click on New.
- Select the Image Show GK4 module from the list to be taken to the configuration screen.
- Enter a title of your choice; this will not be shown on the frontpage, so give it a name that will help you identify the module, such as Frontpage Slideshow, and change the Show Title option on the right to Hide.
- Click on the Position drop-down list and select the bottom2 position under the gk_quark module positions.
- Click on the Menu Assignment tab at the top of the screen. You will see an option called Module Assignment with a drop-down list. Click on the drop-down list and select Only on the pages selected. You will see a list of available pages to assign the module to.
- If it isn't already marked, add a tick to the Main Menu → Home option, which points to the homepage. All other pages should be left unticked.
- Click on the Basic tab and change the Module style option to gk_quark and add the following text to the Module suffix field:
slideshow
- Open the Your Slides options. Here you can add an edit the slide content, including the image, the title and the subtitle. Leave the Content type as Text, and click on Select in the Image option. For this tutorial we'll use the demo is_img1.jpg image, but if you have your own slide images prepared you may use them.
In the Title field, enter your preferred title; in the demo content this is:
Design for you. And what you do.
In the Content field, add your description text. In the demo, this is:
Lorem ipsum dolor sit amet, consectetur adipiscing elit.<br />
Proin consectetur dui at tempor elementum.
Finally, in the Url field, add the URL you want your slide to link to if clicked. In the demo, this is:
#1
...as a placeholder.
- Repeat the last step to add more slides; as before you may add your own slides or just use the placeholder demo content as in the last step until you have your content ready.
- Open the Advanced tab and set Generate thumbnails and Use style CSS to Disabled.
- Click Save & Close at the top of the screen to save the module.
The slideshow is now ready to go! The next step is to create the preview video block.
The Video Teaser
This section provides a unique, eye-catching way to frame your video content.

To create this section:
- Open your Module Manager and click on New.
- Select a Custom HTML module from the list of available module types to be taken to the configuration screen.
- Enter a title of your choice; this will not be shown on the frontpage, so give it a name that will help you identify the module, such as Frontpage Video Teaser.
- In the text editor of the Custom HTML module, switch to the Plain Text Editor by clicking on the Toggle editor button; this is to prevent the editor from removing important HTML tags.
- Copy and paste the following HTML code into the body of the custom HTML module:
<a href="#" class="gk-video-link gk-add-rotate-animation" data-url="//player.vimeo.com/video/88558878?color=ffffff&title=0&byline=0&portrait=0" data-width="1920" data-height="1080" data-sr="enter bottom and move 50px">Product landing page theme <i class="fa fa-play"></i> Play</a>
- Click on the Position drop-down list and select the bottom3 position under the gk_quark module positions.
- Click on the Menu Assignment tab at the top of the screen. You will see an option called Module Assignment with a drop-down list. Click on the drop-down list and select Only on the pages selected. You will see a list of available pages to assign the module to.
- If it isn't already marked, add a tick to the Main Menu → Home option, which points to the homepage. All other pages should be left unticked.
- Open the Options tab and click on the Select button in the Select a Background-Image option. If you have a background image in mind you may wish to choose it now, or you can use the video_teaser.jpg from the demo images folder as a placeholder.
- Open the Advanced tab and add the following text into the Module Class Suffix field:
very-big-spaces parallax-bg
- Click Save & Close at the top of the screen to save the module. The video teaser is now configured.
We can now create the testimonials section.
Testimonials
Testimonials are as simple way to display feedback from satisfied customers to encourage others to purchase.
To create this section:
- Open your Module Manager and click on New.
- Select a Custom HTML module from the list of available module types to be taken to the configuration screen.
- Enter a title of your choice; this will not be shown on the frontpage, so give it a name that will help you identify the module, such as Frontpage Testimonials.
- In the text editor of the Custom HTML module, switch to the Plain Text Editor by clicking on the Toggle editor button; this is to prevent the editor from removing important HTML tags.
- Copy and paste the following HTML code into the body of the custom HTML module:
<div class="gk-testimonials" data-sr="scale up 50%" data-amount="3">
<div>
<div>
<blockquote>
<img src="/images/docs/quark/joomla/install/demo/testimonials_avatar.png" alt="" />
<p>Lorem ipsum dolor sit amet, consectetur adipiscing elit. Phasellus lobortis dictum elit eu placerat. Nullam vel pellentesque tortor, nec ornare enim. Praesent vehicula dapibus diam non porttitor. Etiam vel elit ante. Phasellus eleifend sollicitudin odio a varius. Donec sit amet lacinia velit, ut dignissim diam. Aliquam erat volutpat.</p>
<strong>Garland Noah</strong>
</blockquote>
</div>
</div>
</div>
- Click on the Position drop-down list and select the bottom4 position under the gk_quark module positions.
- Click on the Menu Assignment tab at the top of the screen. You will see an option called Module Assignment with a drop-down list. Click on the drop-down list and select Only on the pages selected. You will see a list of available pages to assign the module to.
- If it isn't already marked, add a tick to the Main Menu → Home option, which points to the homepage. All other pages should be left unticked.
- Open the Advanced tab and add the following text into the Module Class Suffix field:
testimonials
- Click Save & Close at the top of the screen to save the module. The testimonials are now configured.
The next section we need to setup is a plain image and text area to promote shipping or other benefits.
Shipping
This section provides a simple image and title/subtitle layout to draw attention to a particular benefit; this could be shipping as in our demo example, or free gifts, discounts etc...

To create this section:
- Open your Module Manager and click on New.
- Select a Custom HTML module from the list of available module types to be taken to the configuration screen.
- Enter a title of your choice; this will not be shown on the frontpage, so give it a name that will help you identify the module, such as Frontpage Shipping.
- In the text editor of the Custom HTML module, switch to the Plain Text Editor by clicking on the Toggle editor button; this is to prevent the editor from removing important HTML tags.
- Copy and paste the following HTML code into the body of the custom HTML module:
<div class="gk-cols vertical-center" data-cols="2">
<div class="gk-text-center" data-sr="enter left and move 200px" >
<span class="big-text">Free Shipping on Orders over $25</span>
<p>Buy everyday free shipping products with free shipping<br />on orders over $35, low prices & product reviews</p>
</div>
<div class="gk-text-center" data-sr="enter right and move 200px" >
<img src="/images/docs/quark/joomla/install/demo/shipping_img.jpg" alt="" />
</div>
</div>
- Click on the Position drop-down list and select the bottom5 position under the gk_quark module positions.
- Click on the Menu Assignment tab at the top of the screen. You will see an option called Module Assignment with a drop-down list. Click on the drop-down list and select Only on the pages selected. You will see a list of available pages to assign the module to.
- If it isn't already marked, add a tick to the Main Menu → Home option, which points to the homepage. All other pages should be left unticked.
- Open the Advanced tab and add the following text into the Module Class Suffix field:
gray-bg
- Click Save & Close at the top of the screen to save the module. The section is now configured.
Next up is the social media counters!
Social Media Counters
The social media counters are an at-a-glance way to promote your social reach across Facebook, Twitter and Google+.

To create this section:
- Open your Module Manager and click on New.
- Select a Custom HTML module from the list of available module types to be taken to the configuration screen.
- Enter a title of your choice; this will not be shown on the frontpage, so give it a name that will help you identify the module, such as Frontpage Social Counters.
- In the text editor of the Custom HTML module, switch to the Plain Text Editor by clicking on the Toggle editor button; this is to prevent the editor from removing important HTML tags.
- Copy and paste the following HTML code into the body of the custom HTML module:
<div class="gk-cols vertical-center" data-cols="2">
<div class="gk-text-center" data-sr="enter left and move 200px" >
<span class="big-text">Free Shipping on Orders over $25</span>
<p>Buy everyday free shipping products with free shipping<br />on orders over $35, low prices & product reviews</p>
</div>
<div class="gk-text-center" data-sr="enter right and move 200px" >
<img src="/images/docs/quark/joomla/install/demo/shipping_img.jpg" alt="" />
</div>
</div>
- Click on the Position drop-down list and select the bottom6 position under the gk_quark module positions.
- Click on the Menu Assignment tab at the top of the screen. You will see an option called Module Assignment with a drop-down list. Click on the drop-down list and select Only on the pages selected. You will see a list of available pages to assign the module to.
- If it isn't already marked, add a tick to the Main Menu → Home option, which points to the homepage. If you have already setup your About Us page, then this should also be ticked.
- Open the Advanced tab and add the following text into the Module Class Suffix field:
small-spaces
- Click Save & Close at the top of the screen to save the module. The social counters are now ready.
Newsletter
It's important that you stay in touch with your clients and customers, and what better way to do it than via a newsletter. With this prepared form, you can have a clean, readable area ready for your chosen newsletter client.

To create this section:
- Open your Module Manager and click on New.
- Select a Custom HTML module from the list of available module types to be taken to the configuration screen.
- Enter a title of your choice; this will not be shown on the frontpage, so give it a name that will help you identify the module, such as Newsletter.
- In the text editor of the Custom HTML module, switch to the Plain Text Editor by clicking on the Toggle editor button; this is to prevent the editor from removing important HTML tags.
- Copy and paste the following HTML code into the body of the custom HTML module:
<form action="#"><small>Stay up-to-date with latest product</small> <input class="dark btn-border" type="submit" value="Subscribe" /> <input name="email" required="required" type="email" placeholder="Enter your e-mail..." /></form>
- Click on the Position drop-down list and select the bottom7 position under the gk_quark module positions.
- Click on the Menu Assignment tab at the top of the screen. You will see an option called Module Assignment with a drop-down list. Click on the drop-down list and select Only on the pages selected. You will see a list of available pages to assign the module to.
- If it isn't already marked, add a tick to the Main Menu → Home option, which points to the homepage. If you have already setup your About Us page, then this should also be ticked.
- Open the Advanced tab and add the following text into the Module Class Suffix field:
dark-bg newsletter small-spaces
- Click Save & Close at the top of the screen to save the module. The newsletter section is now ready.
Address Section
At the bottom of the frontpage is a small section that includes basic company contact details, including email, telephone number and address.

To create this section:
- Open your Module Manager and click on New.
- Select a Custom HTML module from the list of available module types to be taken to the configuration screen.
- Enter a title of your choice; this will not be shown on the frontpage, so give it a name that will help you identify the module, such as Contact Information.
- In the text editor of the Custom HTML module, switch to the Plain Text Editor by clicking on the Toggle editor button; this is to prevent the editor from removing important HTML tags.
- Copy and paste the following HTML code into the body of the custom HTML module:
<div class="gk-cols" data-cols="3"> <div>email: This email address is being protected from spambots. You need JavaScript enabled to view it.</div> <div class="gk-text-center">tel. 123.456.7890<br />fax: 098.654,3211</div> <div class="gk-text-right">Quaking Row, Kensington,<br />IN, 47699-9366, US</div> </div> - Click on the Position drop-down list and select the bottom8 position under the gk_quark module positions.
- Click on the Menu Assignment tab at the top of the screen. You will see an option called Module Assignment with a drop-down list. Click on the drop-down list and select Only on the pages selected. You will see a list of available pages to assign the module to.
- If it isn't already marked, add a tick to the Main Menu → Home option, which points to the homepage. If you have already setup your About Us and Contact pages, then these should also be ticked.
- Open the Advanced tab and add the following text into the Module Class Suffix field:
small-spaces small-text
- Click Save & Close at the top of the screen to save the module. The contact section is now ready.