Installation Default Restaurant Ecommerce
Introduction
If you've completed the Core Installation Guide, you now have the template, plugins and any additional extensions required by Quark Ecommerce installed and ready to use; all that's left is to match the demo layout. This layout can be broadly split into four categories, which this guide will deal with in order:
- Frontpage Modules - Covers the placement and configuration of the modules that make up the frontpage.
- Additional Modules & Elements - This section deals with the configuration of modules that are not part of the frontpage or additional pages, such as the shopping cart and copyright data.
- Newsletter Elements - Ecommerce makes use of the AcyMailing component to create newsletter pages and call-to-actions; this section covers how to create these elements.
- Menus - Explains how to create and set the menus used in the demo layout.
Once you've finished all of these steps you will have a base layout that matches the demo, ready for you to modify. Before starting, you should have some products and product categories prepared in your VirtueMart installation, whether your own content or the sample content provided with the VirtueMart install. This is because some elements of the Ecommerce layout rely on pulling data from product categories to showcase different products; without a source these modules will display an error.

Frontpage Modules
In order to develop a more vibrant and visually-impressive frontpage we use modules arranged in a range of positions to create the frontpage content. This approach allows for varied yet customizable layouts that can display a wide variety of media, from stylized text and images to powerful product previews via our News Show Pro module.
To match the frontpage layout, we will need to place and configure each module as per the demo; we will do this from top to bottom, starting with the Header position and moving down block by block until we reach the bottom of the page. One this section is complete, your frontpage will be ready to go.
Before we start, we recommend that when setting up or modifying the frontpage and additional modules you disable the WYSIWYG editor. This is because the editor will automatically clean up HTML code, removing things like empty tags. However, empty tags are required for some content, such as social icons, so to prevent any issues it's best to stick with the plain text editor. To disable the WYSIWYG editor, follow these steps:
- Click on Users → User Manager in the top menu of your Joomla backend to be taken to a list of your registered users.
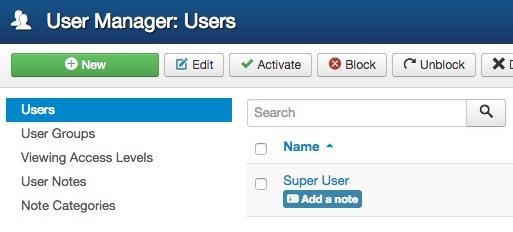
- Click on the username you will be logged in as when placing the modules to be taken to the Edit Profile screen.

- Click on the Basic Settings tab and change the Editor option from Use Default to Editor - None.
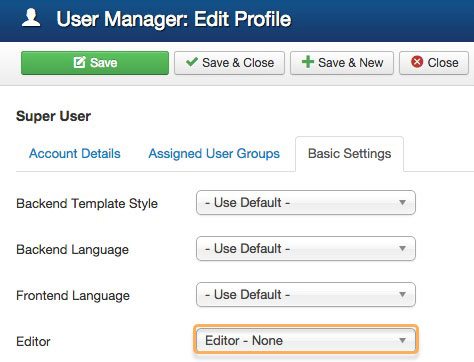
- Click on Save & Close at the top of the screen to save changes.
Now when you open a page, module or other area that requires an editor, you will see only the plain text editor. If once your frontpage is ready you would like to move back to using the standard editor, simply follow the same steps above but change the option to Use Default.
The Frontpage Header
The header area of the frontpage is likely to be the very first thing your visitors will see once your site loads, so it's important that it makes a good first impression. In Ecommerce, the header is created with a simple but effective custom HTML layout that provides an image with text block and a call-to-action button to immediately start driving sales.

To create this section we will need to use a Custom HTML module in the Header module position; to assign and configure this module, follow these steps:
- Navigate to your Module Manager in your Joomla backend as per the instructions in the Module Placement section of this guide, and click on New.
- In the list of module types, select the Custom HTML module by clicking on it; you will be taken to the module's main configuration screen.
- Enter a title that is easy for you to remember; this won't be shown on the frontpage so give it a name that will help you identify the module, such as Header.
- Copy and paste the following HTML code into the body of the custom HTML module:
<p><img class="parallax-img" src="/images/docs/quark/joomla/install/demo/ecommerce/header_bg.jpg" alt="" /></p>
<div class="gkStoreInfo">
<div class="gkStoreHeader"><small data-sr="enter top and move 50px and wait .25s">Ecommerce theme</small>
<h1 data-sr="enter top and move 50px and wait 0s">Quark store</h1>
<a class="dark btn-border" href="#" data-sr="wait .5s">Browse store</a></div>
<div class="gkStoreImage" data-sr="enter top and move 50px scale up 20% and wait .25s"><img src="/images/docs/quark/joomla/install/demo/ecommerce/header_img.png" alt="" /></div>
</div>
<div class="gkStoreInfoAdditional">Quaking Row, Kensington, IN, 47699-9366, US<br />Hours 11am – 11pm, daily</div>
- Click on the Position drop-down list and select the Header position under the gk_quark module positions; if you can't see the position in the list then you can just write it in manually into the Position field (use lower-case letters only) and it will work automatically.
- Click on the Menu Assignment tab at the top of the screen. You will see an option called Module Assignment with a drop-down list. Click on the drop-down list and select Only on the pages selected; this will open a list of available pages to assign the module to.
- If it isn't already marked, add a tick to the Main Menu → Home option, which points to the homepage. All other pages should be left unticked.
- No other options need to be changed here, so click Save & Close at the top of the screen to save the module. Your header is now ready.
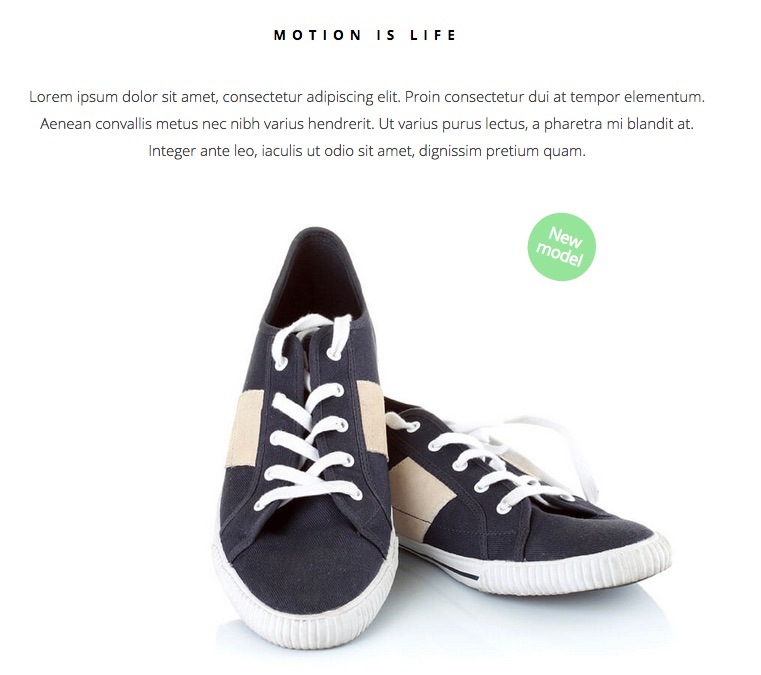
The "Motion is Life" Frontpage Mainbody
Directly underneath the header is another image and text block that's designed to be a clear yet stylish introduction to your product, whether you're focusing on offering a unique clothing style or cutting-edge tech devices.
Like the header, this section is created with a Custom HTML module and special CSS rules. To create this section:
- Open your Joomla admin area and navigate to the Module Manager section and click on New.
- Select the Custom HTML module from the list of module types; you will be taken to the module's main configuration screen.
- Enter a title in the title field; this won't be displayed on the actual site so just name it something that makes it easy to track for you, like Mainbody Content.
- Copy and paste the following HTML code into the body of the custom HTML module:
<div class="gk-desc">
<h2>Motion is life</h2>
<p>Lorem ipsum dolor sit amet, consectetur adipiscing elit. Proin consectetur dui at tempor elementum. Aenean convallis metus nec nibh varius hendrerit. Ut varius purus lectus, a pharetra mi blandit at. Integer ante leo, iaculis ut odio sit amet, dignissim pretium quam.</p>
<div class="gk-image-badge" data-sr="enter bottom and scale up 50% over .8s"><span class="gk-image-badge-green">New model</span> <img src="/images/docs/quark/joomla/install/demo/ecommerce/life_is_motion.jpg" alt="" /></div>
</div>
- Click on the Position drop-down list and select the Mainbody position under the gk_quark module positions; if the position isn't in the list then you can just write it in manually into the Position field (use lower-case letters only) and it will still work normally.
- Click on the Menu Assignment tab at the top of the screen. You will see an option called Module Assignment with a drop-down list. Click on the drop-down list and select Only on the pages selected; you will see a list of your pages that the module can be assigned to.
- If it isn't already marked, add a tick to the Main Menu → Home option, which points to the homepage. All other pages should be left unticked.
- No other options need to be changed here, so click Save & Close at the top of the screen to save the module, and the mainbody is ready.
The "Intelligent Shoe" Section
After the sleek, clean design of the header and mainbody blocks, things take a step up with the Intelligent Shoe section, which combines a left-aligned image & right-aligned text block with animated feature buttons that open pop-out images that can include more details on your product and its features, or provide more visual insight to your brand of style:
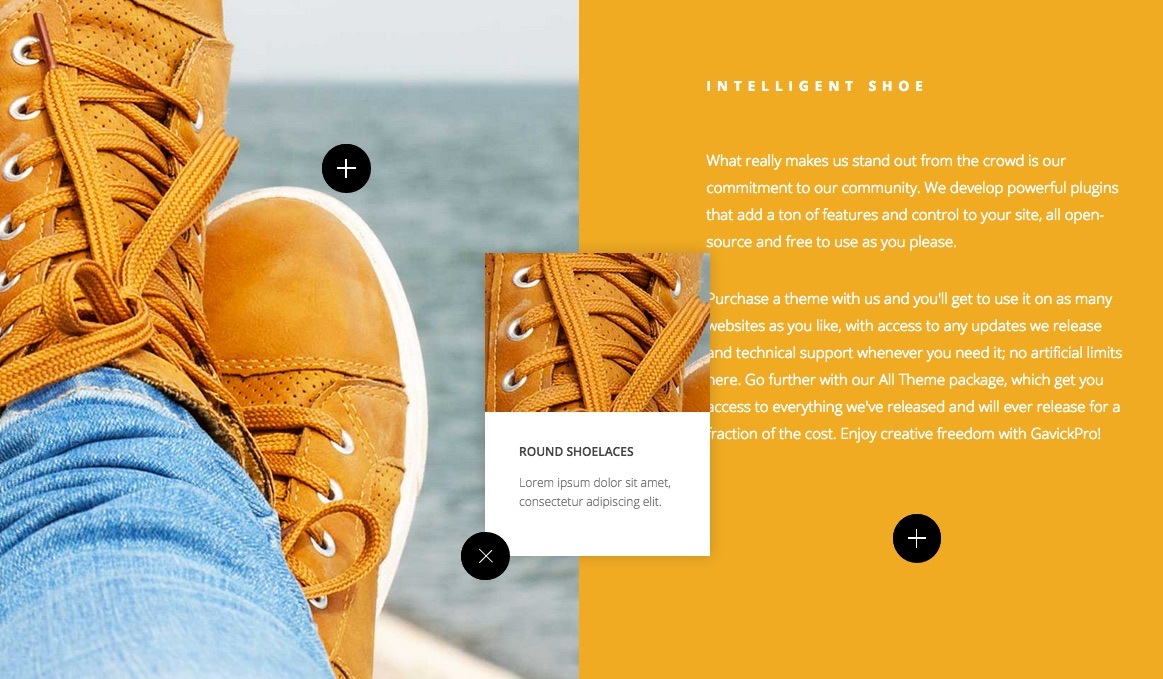
Complex though this section may look, it's created just as simply as the first two sections of the block, built with Custom HTML and nifty CSS tricks for a light yet impressive visual hook.
To create this section:
- Open your Joomla backend and navigate to the Module Manager section. Create a new module instance by clicking New.
- Select the Custom HTML module from the list of module types; you will see the module's main configuration screen.
- Enter a title to help you keep track of the section in the title field; like the other sections the title won't appear on the frontpage so just call it something memorable for you, such as Features Block, or any name that makes it easy to identify.
- Copy and paste the following HTML code into the body of the custom HTML module:
<div class="big-photo">
<div class="big-photo-img"><img src="/images/docs/quark/joomla/install/demo/ecommerce/shoes_bg.jpg" alt="" /> <span class="big-photo-button gk-overlay-button" style="top: 20%; right: 30%;" data-sr="scale up 30% over .75s and wait .5s"> <span class="big-photo-button-popup"> <img src="/images/docs/quark/joomla/install/demo/ecommerce/popup_img1.jpg" alt="" /> <strong>Free Powerliners</strong> <small>Lorem ipsum dolor sit amet, consectetur adipiscing elit. </small> </span> </span> <span class="big-photo-button gk-overlay-button" style="top: 70%; right: 10%;" data-sr="scale up 30% over .75s and wait .8s"> <span class="big-photo-button-popup"> <img src="/images/docs/quark/joomla/install/demo/ecommerce/popup_img2.jpg" alt="" /> <strong>Round Shoelaces</strong> <small>Lorem ipsum dolor sit amet, consectetur adipiscing elit. </small> </span> </span></div>
<div class="big-photo-desc">
<h2>Intelligent Shoe</h2>
<p>What really makes us stand out from the crowd is our commitment to our community. We develop powerful plugins that add a ton of features and control to your site, all open-source and free to use as you please.</p>
<p>Purchase a theme with us and you'll get to use it on as many websites as you like, with access to any updates we release and technical support whenever you need it; no artificial limits here. Go further with our All Theme package, which get you access to everything we've released and will ever release for a fraction of the cost. Enjoy creative freedom with GavickPro!</p>
<span class="big-photo-button" data-sr="scale up 30% over .75s and wait 1.1s"> <span class="big-photo-button-popup"> <img src="/images/docs/quark/joomla/install/demo/ecommerce/popup_img3.jpg" alt="" /> <strong>Eco Cowhide</strong> <small>Lorem ipsum dolor sit amet, consectetur adipiscing elit. </small> </span> </span></div>
</div>
- Click on the Position drop-down list and select the Bottom1 position under the gk_quark module positions; if the position isn't in the list then you can just write it in manually into the Position field (use lower-case letters only) and it will still work normally.
- Click on the Menu Assignment tab at the top of the screen. You will see an option called Module Assignment with a drop-down list. Click on the drop-down list and select Only on the pages selected; you will see a list of your pages that the module can be assigned to.
- If it isn't already marked, add a tick to the Main Menu → Home option, which points to the homepage. All other pages should be left unticked.
- Click on the Advanced tab at the top of the screen. In this section we can control some very specific options. We need to add the following classes to the Module Class Suffix field:
box-wide clear
Each of these classes, box-wide and clear, apply special CSS rules to control the special features and style of the section. Simply write the classes directly in the Module Class Suffix field, separating each class with space:
- No other options need to be changed here, so click Save & Close at the top of the screen to save the module, and the mainbody is ready.
The "Latest Products" Section
After the comfortable custom-HTML-based sections that created the first major sections of the template comes a more complex and customizable product display provided by our powerful News Show Pro GK5 module. An open-source module designed to provide an impressive array of display options from a range of sources, here it's used to highlight products from your Virtuemart selection, with flashy hover animations with addition call-to-action buttons that add flair to your frontpage:
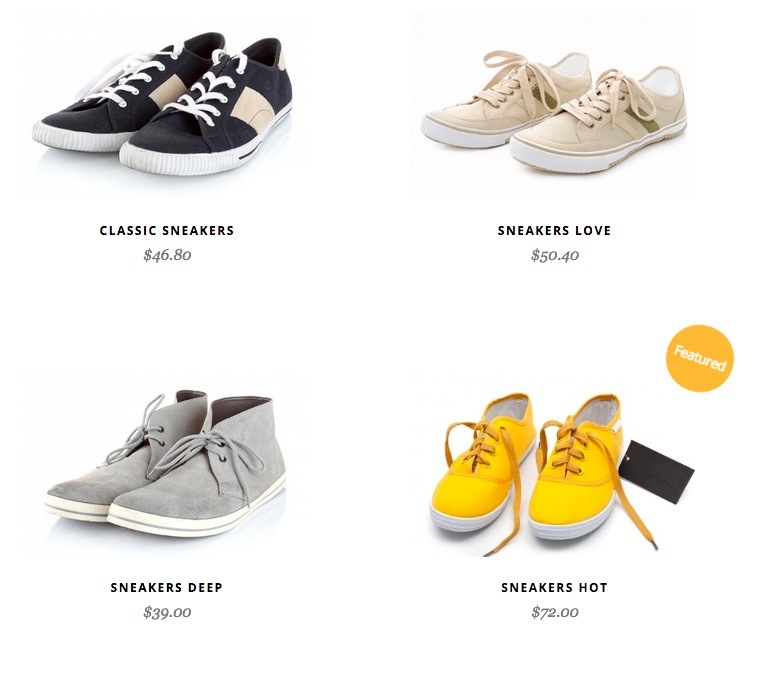
This section uses an instance of the NSP module to deliver its content; there are a wealth of different options that give you full control of how many products are displayed, which products are highlighted (including options for latest products from a specific category, from all products, from a selection of categories, or specific products as defined by you), and what elements the highlights consist of.
To create this section, we'll need to do a little bit more configuration than with the earlier sections due to the sheer amount of flexible options on offer:
- As before, open your Module Manager page and click on New.
- In the list of available modules, find and click on the News Show Pro GK5 module. If you can't see it in the list you may not have installed the package; head back to our Joomla Core Installation Guide and double-check you have followed the Install Plugins and Modules section.
- You will now see the configuration screen, which is made up of a set of options tabs on the left, with the selected tab's options appearing on the right:
- Enter a title into the title field (something memorable that makes it easy for you to track), and change the Show Title option to Hide.
- Click on the Position drop-down list and select the bottom2 position under the gk_quark heading; if you can't see this position in the list then you can write it in the Position field manually, just make sure to use lowercase characters.
- Now we can move to the next tab. Click on the Menu Assignment tab, set the Mdule Assignment drop-down list to Only on the pages selected, and make sure your Home menu item is ticked, just like with the other modules we've set up so far.
- Now we can start taking care of the NSP-specific options, which are contained in the second set of tabs starting from Basic Settings. Due to the sheer number of options on offer in NSP, for each tab we'll provide a screenshot of the demo settings, and provide details of which options must be changed from the default settings underneath the image.
- The Basic Settings Tab
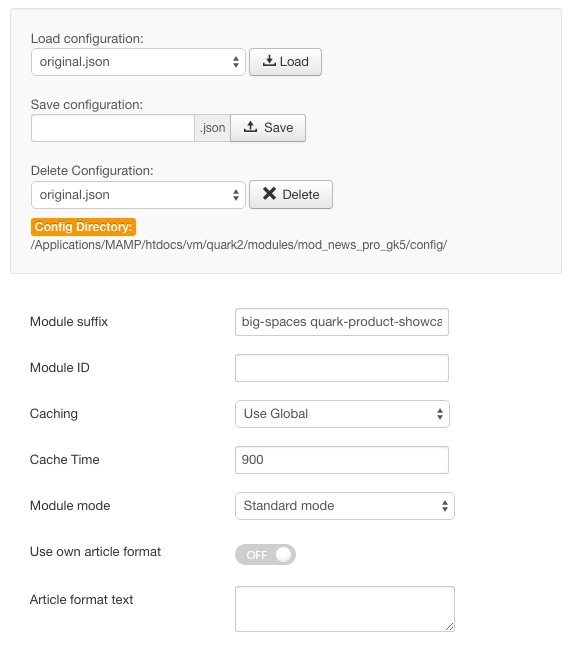
In the Module suffix field, add the following text:
big-spaces quark-product-showcase
- The Data Source Tab
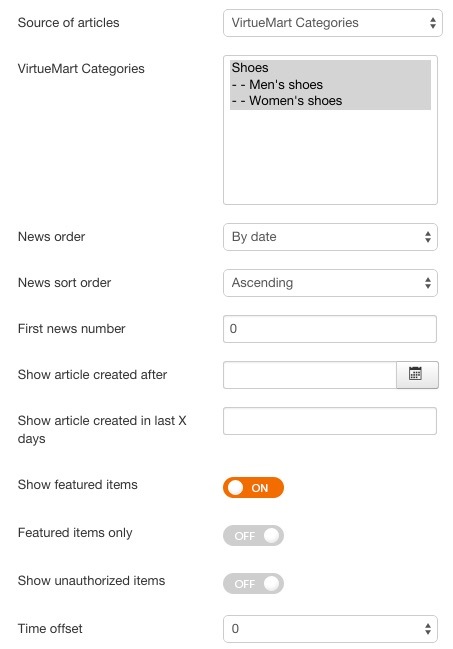
Leave all items as default except the Source of articles option; this should be changed to VirtueMart Categories. A new option allowing you to highlight the categories you wish to pull products from will appear; simply select whichever product category you wish. Alternatively, you can set the source to VirtueMart Products. A new VirtueMart Products field will appear, and you can enter the product IDs of the products you want to display into this field, separated by a comma.
Set the News Sort Order option to Ascending.
- VirtueMart Additional Settings Tab
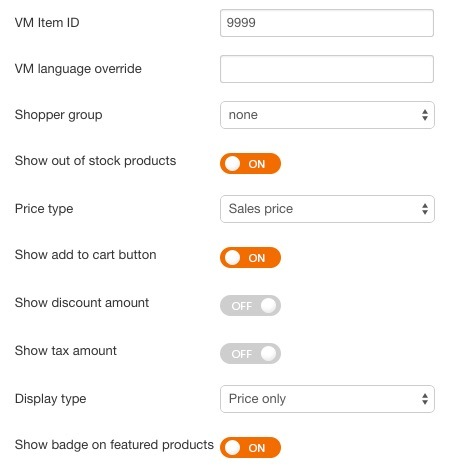
Change the Show add to cart button and Show badge on featured products options to On.
In the Display Type drop-down list, select Price Only.
- Article Layout Tab
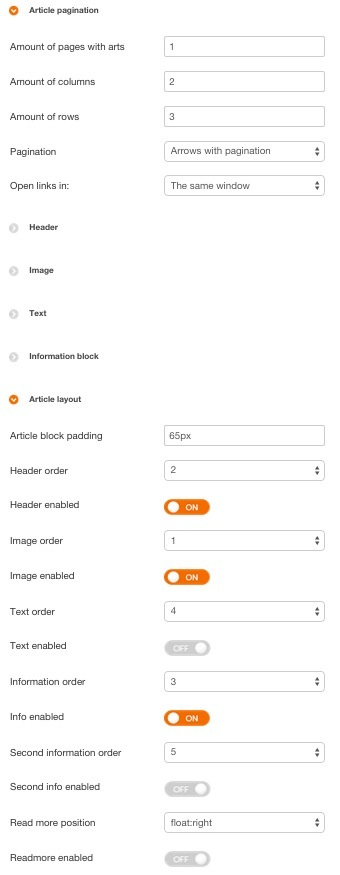
- Under the Article Pagination section, change the Amount of pages with arts option to 1, Amount of columns to 2, and Amount of rows to 3.
- Under the Header section, change the Header Position option to text-align:center.
- Under the Image section, change the Image Position option to text-align:center.
- Under the Information Block section, change the Information Position option to text-align:center and change the Info format option to the following text: %STORE
- Under the Article Layout section, change the Article block padding option to: 65px
- Still under the Article Layout section, change the Header Order option to 2, Image Order to 1 and Information Order to 3. Set the Text enabled, Second info enabled and Readmore enabled to Off. - Links Layout
Leave all the options in this section as default.
- Thumbnails Tab
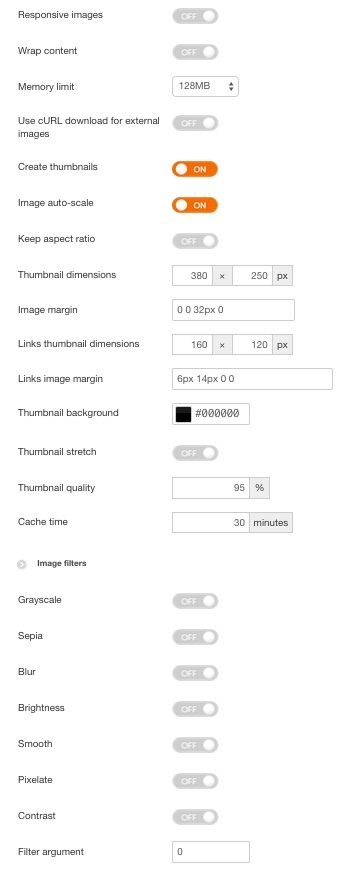
- Set Create Thumbnails to On.
- Set Thumbnail Dimensions to 380 x 250 px.
- Set Image Margin to 0 0 32px 0.
- Animation Tab
Leave all options in this section as default.
- External Files Tab
Leave all options in this section as default.
- The Basic Settings Tab
-
Click Save & Close at the top of the screen to save the module. Your latest products, which may be separated by categories, will automatically be displayed in this section as they are added, and your section is ready to go.
The Video Teaser Section
This section provides all the information-packed marketing power of a video and combines it with a sleek stylish delivery solution. Instead of just placing the video block (pulled from any of your favorite video upload sites such as Vimeo) on the page, a parallax background image is used with animated play button overlay that switches into the video player when clicked.

This section goes back to the earlier standard of using a Custom HTML module and CSS to provide the styling. Notably, this section's HTML also includes an icon, so it's important that you do not use anything except the plain text editor when modifying this block or your icon will be removed by the editor's HTML cleanup.
To create this section:
- Open your Joomla backend and navigate to the Module Manager section. Create a new module instance by clicking New.
- Select the Custom HTML module from the list of module types; you will see the module's main configuration screen.
- Add a title to the title field; use something simple to help you identify the block, such as Video Teaser. Then, change the Show Title option to Hide.
- Copy and paste the following HTML code into the body of the custom HTML module:
<a href="#" class="gk-video-link gk-add-rotate-animation" data-url="//player.vimeo.com/video/8432525?color=ffffff&title=0&byline=0&portrait=0" data-width="1280" data-height="720" data-sr="enter bottom and move 50px">Play <i class="fa fa-play"></i> video</a>
- Click on the Position drop-down list and select the Bottom3 position under the gk_quark module positions; if the position isn't in the list then you can just write it in manually into the Position field (use lower-case letters only) and it will still work normally.
- Click on the Menu Assignment tab at the top of the screen. You will see an option called Module Assignment with a drop-down list. Click on the drop-down list and select Only on the pages selected; you will see a list of your pages that the module can be assigned to.
- If it isn't already marked, add a tick to the Main Menu → Home option, which points to the homepage. All other pages should be left unticked.
- Click on the Options tab at the top of the screen to open a new set of options. Here, you need to set a background image from your Media Manager to be used as the parallax background. Click on the Select button and choose your image accordingly. For reference, the image included with the demo images (if you uploaded the folder) is called video_bg.jpg.
- Click on the Advanced tab at the top of the screen. In this section we can control some very specific options. We need to add the following text to the Module Class Suffix field:
very-big-spaces parallax-bg
This will assign classes that control the padding above and below the text and icon as well as create the parallax background effect.
- No other options need to be changed here, so click Save & Close at the top of the screen to save the module, and your video teaser is ready.
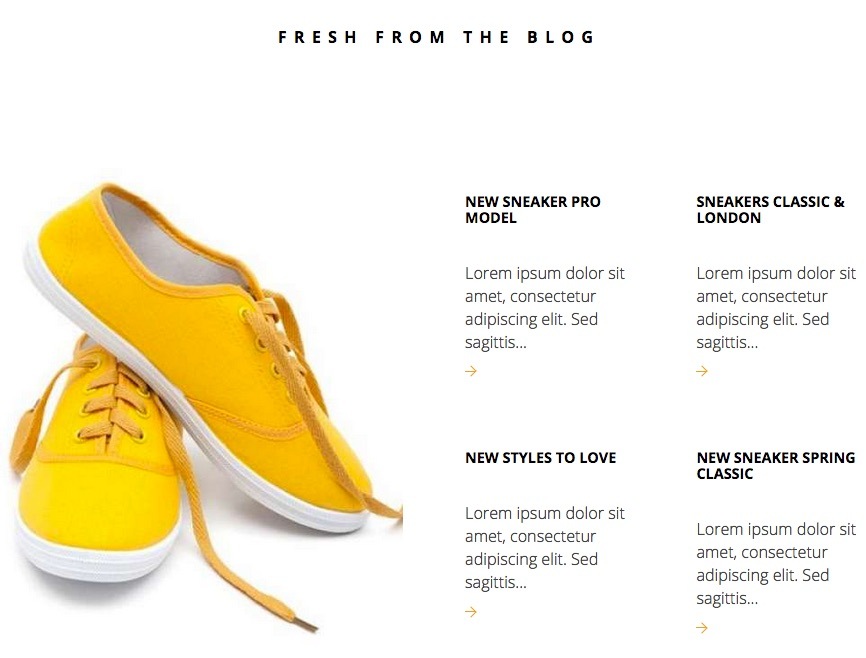
The Blog Preview Section
At the bottom of the Ecommerce frontpage is a section dedicated to highlighting the latest articles from your blog, which can be used to deliver content on new product lines, highlight interesting developments, or just connect with your community. Four of your latest articles are displayed, and highlighting each article's preview text will switch the left image for a dynamic, modern feel:
This is the second frontpage section to make use of our News Show Pro module, which requires some configuration but can be left to automatically update with new articles on its own once setup.
To configure this module:
- As before, open your Module Manager page and click on New.
- In the list of available modules, find and click on the News Show Pro GK5 module. If you can't see it in the list you may not have installed the package; head back to our Joomla Core Installation Guide and double-check you have followed the Install Plugins and Modules section.
- You will now see the configuration screen, which is made up of a set of options tabs on the left, with the selected tab's options appearing on the right:
- Enter a title into the title field; this will be displayed as a title to the section on the frontpage.
- Click on the Position drop-down list and select the bottom5 position under the gk_quark heading; if you can't see this position in the list then you can write it in the Position field manually, just make sure to use lowercase characters.
- Now we can move to the next tab. Click on the Menu Assignment tab, set the Module Assignment drop-down list to Only on the pages selected, and make sure your Home menu item is ticked, just like with the other modules we've set up so far.
- Now we can start taking
care of the NSP-specific options, which are contained in the second set of tabs starting from Basic Settings. Due to the sheer number of options on offer in NSP, for each tab we'll provide a screenshot of the demo settings, and provide details of which options must be changed from the default settings underneath the image.
- The Basic Settings Tab
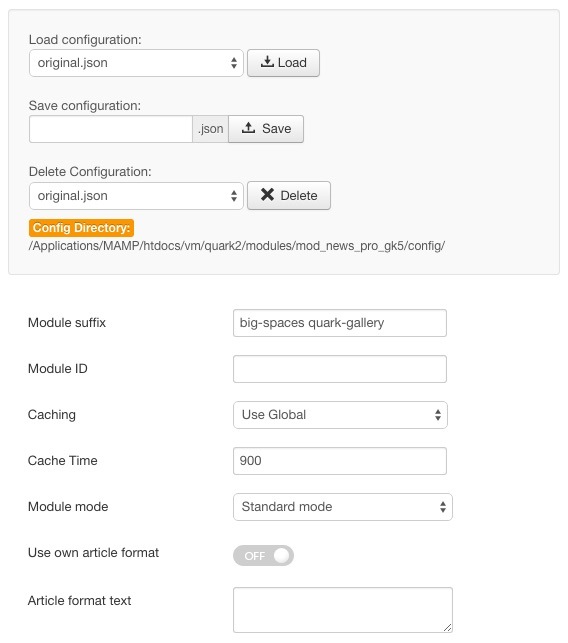
In the Module suffix field, add the following text:
big-spaces quark-gallery
- The Data Source Tab
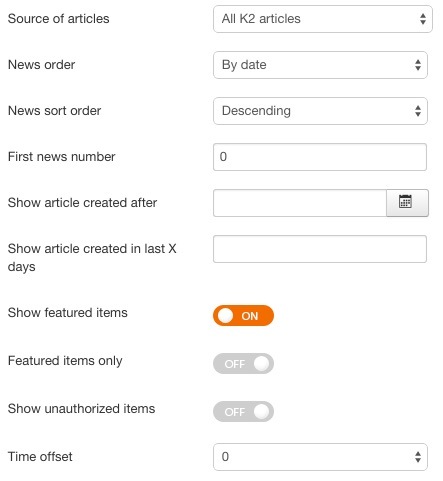
Leave all items as default except the Source of articles option; this should be changed to All K2 Articles or All Joomla! Articles, depending on your preferred article manager (we recommend that you use K2 for the additional styling included with Quark). This will cause the frontpage blog section to automatically pull the latest articles from your chosen manager, so you won't need to manually change the source as new content is posted.
- K2 Additional Settings Tab
Leave this section as default; no changes necessary.
- Article Layout Tab
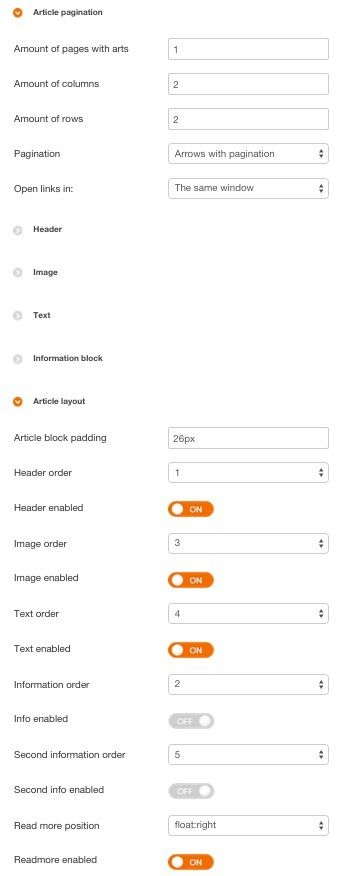
- Under the Article Pagination section, change the Amount of pages with arts option to 1, Amount of columns to 2, and Amount of rows to 2.
-Under the Article Layout section, change the Article block padding option to: 26px
- Still under the Article Layout section, set the Info Enabled, Second info enabled and Readmore enabled to Off. - Links Layout
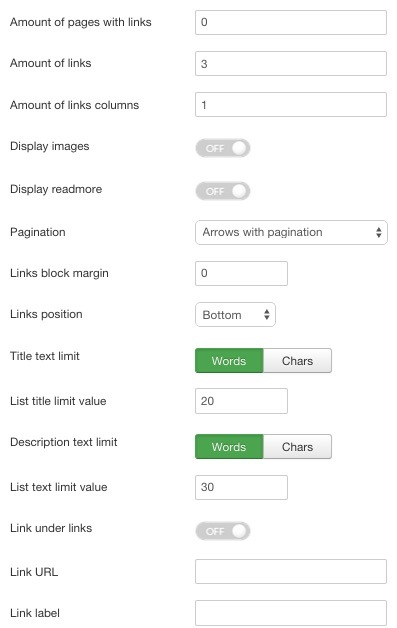
Change the Amount of pages with links option to 0.
- Thumbnails Tab
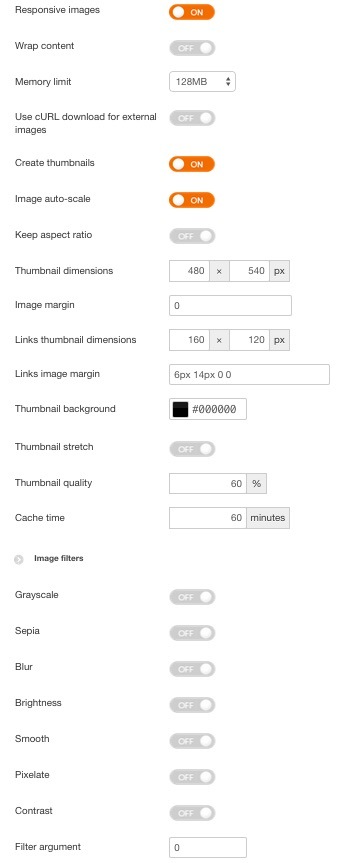
- Set Responsive Images to On.
- Set Create Thumbnails to On.
- Set Thumbnail Dimensions to 480 x 540 px.
- Set Image Margin to 0.
- Set Thumbnail Quality to 60%.
- Set Cache Time to 30 Minutes.
- Animation Tab
Leave all options in this section as default.
- External Files Tab
Leave all options in this section as default.
- The Basic Settings Tab
-
Click Save & Close at the top of the screen to save the module. Your latest K2 articles will be highlighted on your frontpage.
Additional Modules and Elements
There are some extra elements of the frontpage and other pages that are not covered by the frontpage, menu and newsletter sections, such as the copyright details on the right side of the footer and the like. Creation of these elements will be covered in this additional section.
Copyright and Social Icons in the Footer
In the footer area next to the footer menu in the demo is a set of social icons and copyright data for the template. This information is set not in a module or menu, as you might think, but in the Features tab of the Template Settings, where you may amend any copyright details.
To insert this information:
- In the Joomla admin area, click on Extensions → Template Manager to see a list of your installed templates, then click on the gk_quark entry to open the template settings.
- You will now see the template settings screen. Click on the Features tab at the top of the section.
- Find the Copyright field under the Footer elements heading and copy the following HTML code into this section:
<div class="gk-footer-social-icons">
<a href="#"><i class="gkicon-fb"></i></a>
<a href="#"><i class="gkicon-twitter"></i></a>
<a href="#"><i class="gkicon-gplus"></i></a>
<a href="#"><i class="gkicon-instagram"></i></a>
</div>


Joomla Template by <a href="https://www.gavick.com">GavickPro.com</a><br />Video used in the demo by Matt S (<a href="//vimeo.com/mattsfilms" rel="nofollow">vimeo.com/mattsfilms</a>).Video released under <a href="http://creativecommons.org/licenses/by/3.0/" rel="nofollow">CC BY 3.0</a> license.
- Click on Save & Close at the top of the screen to save changes; your icons and copyright information is now displayed and can be modified accordingly.
The Cart Module
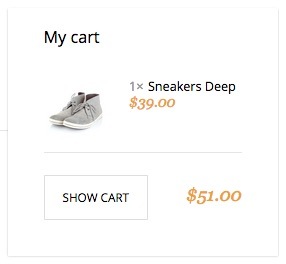
The cart module provides all the functionality that you'd expect from a shopping cart, with some added flair to allow for real-time cart updates. The module itself is very simple to configure:
- In your Joomla backend, click on Extensions → Module Manager to go to the Modules screen, and click New.
- In the list of available module types, click on VirtueMart Shopping Cart.
- Enter a title for your module; in the demo content we simply use Your Cart.
- Click on the Position drop-down list and select the cart position under the gk_quark heading; if you can't see this position in the list then you can write it in the Position field manually, just make sure to use lowercase characters.
- Leave all other items as default and click on the Save & Close button to save changes.
The shopping cart is now implemented and ready to go.
Off-Canvas Menu Social Icons
When using the Off-Canvas Menu in the demo layout you may notice that there are a set of social icons underneath the menu items; these are created with simple Custom HTML module added to a module position under the menu:
![]()
To create this section:
- Open your Module Manager and click on New.
- Select a Custom HTML module from the list of available module types to be taken to the configuration screen.
- Enter a title for the module to help you distinguish it from the others, such as Menu bottom.
- Copy and paste the following HTML code into the body of the custom HTML module:
<div class="gk-social-icons">
<a href="#"><i class="gkicon-fb"></i></a>
<a href="#"><i class="gkicon-twitter"></i></a>
<a href="#"><i class="gkicon-gplus"></i></a>
<a href="#"><i class="gkicon-pinterest"></i></a>
<a href="#"><i class="gkicon-behance"></i></a>
<a href="#"><i class="gkicon-dribbble"></i></a>
<a href="#"><i class="gkicon-instagram"></i></a>
<a href="#"><i class="gkicon-rss"></i></a>
<a href="#"><i class="gkicon-youtube"></i></a>
<a href="#"><i class="gkicon-vimeo"></i></a>
<a href="#"><i class="gkicon-linkedin"></i></a>
</div>
- Click on the Position drop-down list and select the menu_bottom position under the gk_quark module positions.
- Click Save & Close at the top of the screen to save the module.
Newsletter Elements
Quark Ecommerce includes some brand new effects and pages exclusive to this style, all designed help you increase newsletter subscriptions so that you have a core install base to market to whenever a new iteration of your product is released. These elements consist of a Subscriptions page where users can sign-up and specify which type of newsletters they wish to receive, a Mailing List Archive which provides access to older newsletters, and a newsletter popup which automatically displays in the bottom-right corner of the page after a specified wait-time. The functionalities of these elements are provided by the AcyMailing newsletter extension for Joomla; the installation of this extension is detailed in the Core Install Guide for Joomla.
The Newsletter Popup
The popup that you can see on most of the pages provides a unique way to drive newsletter sign-ups with a clear call-to-action and a simple sign-up email field for rapid completion.
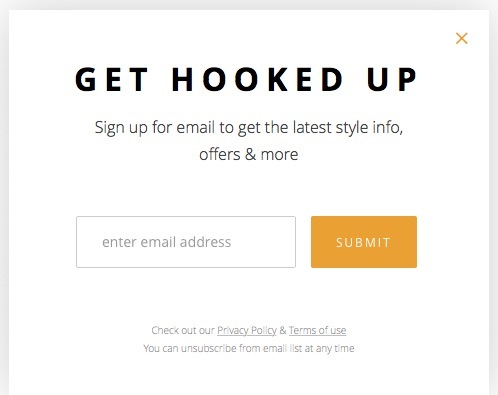
This section is created using a Custom HTML module much like the frontpage areas, but some features from AcyMailing will be used to provide the form functionality; bear in mind that you the base demo content provided in this section will be a placeholder only; you will need to add your own AcyMailing data to the form function in order for entered emails to be added to your subscription lists.
To create this section:
- Open your Joomla backend and navigate to the Module Manager section. Create a new module instance by clicking New.
- Select the Custom HTML module from the list of module types; you will see the module's main configuration screen.
- Add a title to the title field to help you identify the module; in our demo content we use Newsletter popup.
- Copy and paste the following HTML code into the body of the custom HTML module:
<h3>Get Hooked Up</h3> <p>Sign up for email to get the latest style info,<br /> offers & more</p> <form action="index.php?option=com_acymailing&ctrl=sub" method="post"><input id="user_email" name="user[email]" required="" type="email" placeholder="enter email address" /> <input id="gk-newsletter-submit" type="submit" value="Submit" /> <input name="acyformname" type="hidden" value="formAcymailing1" /> <input name="ctrl" type="hidden" value="sub" /> <input name="task" type="hidden" value="optin" /> <input name="option" type="hidden" value="com_acymailing" /> <input name="visiblelists" type="hidden" value="" /> <input name="hiddenlists" type="hidden" value="1" /> <input name="user[html]" type="hidden" value="1" /></form><!-- Configuration details: https://www.acyba.com/acymailing/248-acymailing-external-subscription-form.html --> <p><small> Check out our <a href="#">Privacy Policy</a> & <a href="#">Terms of use</a><br /> You can unsubscribe from email list at any time </small></p>
- Click on the Position drop-down list and select the newsletter position under the gk_quark module positions; if the position isn't in the list then you can just write it in manually into the Position field (use lower-case letters only) and it will still work normally.
- Click on the Menu Assignment tab at the top of the screen. You will see an option called Module Assignment with a drop-down list; make sure this is set to On all pages. This will make your popup appear on all pages of your site, but you are of course free to limit it if necessary.
- No other options need to be set for this module, so click Save & Close to save the module. Your newsletter popup is now set and ready to customize.
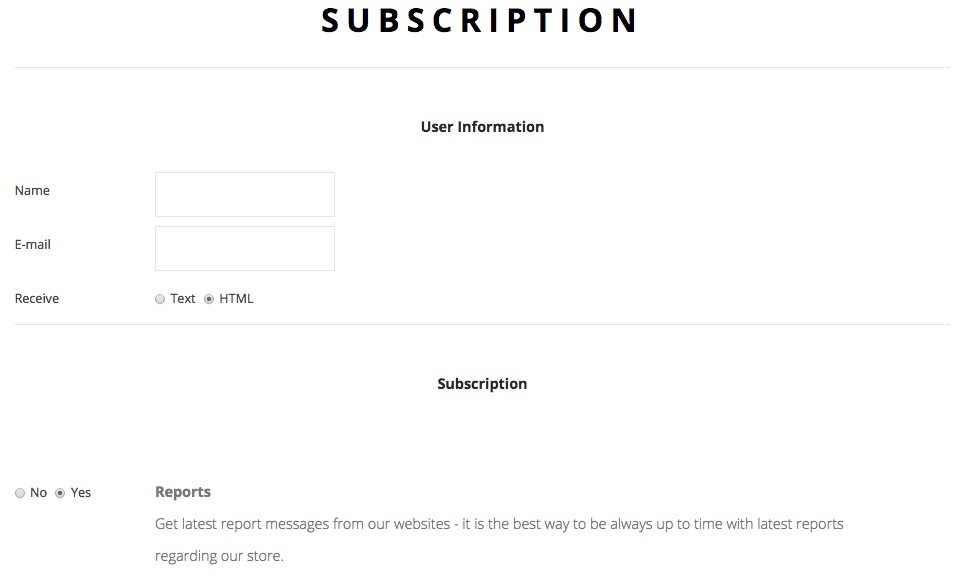
Creating Newsletter Archive and Subscription Pages
These additional pages provide more in-depth newsletter functions for your users, including a subscription page where sign-ups can detail which newsletters they wish to receive:
And a archive page where users can look up earlier newsletters that they either missed or have deleted from their email accounts:

Both of these elements are core pages included with the AcyMailing component. After you have created newsletter lists (that is, different lists for different users, such as separating your "Special Offers" and "Latest News" newsletters so users can choose the type of newsletters they receive) then all that needs to be done is for the menu items to be set using the following steps:
Mailing List Archive Page
- In your Joomla backend, click on Menus → Main Menu → Add New Menu Item; this will open the New Menu Item screen.
- In the Menu Item Type field, click on the Select button to bring up a list of different menu item types you can set.
- Click on AcyMailing to expand the newsletter-focused options, and then click on Mailing List Archive (Single).
- Click on the Options tab; you will see a drop-down list called List, where you may select which mailing list's archive you'd like to display, so pick your preferred list.
- Click on Save & Close at the top of the screen to save the new menu item.
User Subscription Page
- Click on Menus → Main Menu → Add New Menu Item in your Joomla backend, just like when adding the mailing list archive.
- Click on the Select button in the Menu Item Type field and select the Acymailing → User: subscribe/modify your subscription option in the list of available item types.
- Leave all other options as default and click on the Save & Close button to save changes.
Now the subscription and mailing list archive pages are created and reachable via your main menu.
Setup Menus
We've already added several items to the main menu over the course of this installation, but Ecommerce also has a few other menus added via modules to other areas of the template, including a Footer Menu that appears at the bottom of every page:
And a User Menu that allows logged-in users to manage their accounts.
We will need to manually create these menus and then assign them to a module in the required position. Since we are only looking to match the demo layout in this install guide we will just create placeholder elements that can then be renamed/redirected accordingly once you start to create your own content.
Footer Menu
At the bottom of the frontpage and many other pages is a basic menu that covers secondary information that users might be searching for, such as payment options, terms & conditions, that kind of thing.
To create the Footer Menu:
- In your Joomla backend, click on Menus → Menu Manager → Add New Menu to be taken to the Menu Details screen.
- Enter a name for the menu; in the demo we simply use Footer Menu. Now enter a Menu Type; this is the name the system will use to identify the menu; we used footmenu. Enter a description if you so desire.
- Click on Save & Close to save the changes. You will be taken back to Menu list and we can start adding items to the new footer menu.
- Click on Menus → Footer menu → Add New Menu Item to go to the Edit Menu Item screen.
- In the Title field, type Help. Click on the Select button in the Menu Item Type field and select External URL.
- Click Save & Close to save changes.
- Repeat steps 4 through 6 again multiple times to create 8 more menu items, called Gift Cards, Order Status, Cookies, Payment, Work @ Quark Store, Delivery, Student Discount and Cancellations & Returns.
The Footer menu is now ready, and we can create the user menu.
User Menu
The user menu provides all the options for users to manage their profile when logged-in.
To create this menu:
- In your Joomla backend, click on Menus → Menu Manager → Add New Menu to be taken to the Menu Details screen.
- Enter User Menu as the title, and mainemu as the Menu Type.
- Click on Save & Close to save the changes. You will be taken back to Menu list; now to add items.
- Click on Menus → User menu → Add New Menu Item to go to the Edit Menu Item screen.
- In the Title field, type Your Profile. Click on the Select button in the Menu Item Type field and select Users Manager → User Profile.
- Change the Access option on the right-hand side to Registered, then click Save & Close to save changes.
- Repeat steps 4 through 6, but this time name the menu item Edit Profile, and in the Menu Item Type field select Users Manager → Edit User Profile.
- Repeat step 4 to create a new item; type Create Article in the title field and select the Articles → Create Article menu item type before saving.
- Repeat step 4 to create a new item; type Submit a Web Link in the title field and select the Weblinks → Submit a Web Link menu item type before saving.
Make sure that each of these menu items are limited to access from registered users only to prevent issues. The User menu is now ready, and we can assign these menus to their proper positions.
Assigning the Menus
Now we have the menus, we just need to tell Joomla where it should display them. To do so:
- Click on Extensions → Module Manager in the main menu of your Joomla backend. To go to the list of modules.
- Click on the green New button at the top of the screen to start creating a new module.
- In the list of available module types, click on Menu. You will be taken to the module edit screen; enter Footer Menu in the Title field.
- In the Select Menu field, choose your Footer Menu, and change the Show Sub-menu Items to No.
- In the Position field on the right-hand side, select the footer_nav position, then click Save & Close to save the changes.
- Repeat steps 2 and 3 to create a new menu module, but this time enter User area as the title.
- In the Select Menu field, choose your User Menu from the list, but leave the Show Sub-menu Items as the default Yes.
- In the Position field, select the usermenu position, then click Save & Close to save the module.
Now there is one final step; creating the Social Icons that appear in the main menu under the menu links.