VirtueMart 3 and non-English language quickstart installation
Since adding multilanguage support VirtueMart uses separate tables for storing products, categories, manufacturers etc…in different languages. This has some knock-on effects on our Joomla quickstart packages that might cause some complications for non-English installations, so we’ve prepared this tutorial to guide you through installing our quickstarts that use VirtueMart 3 when you want to use a non-English language.
Joomla! 2.5
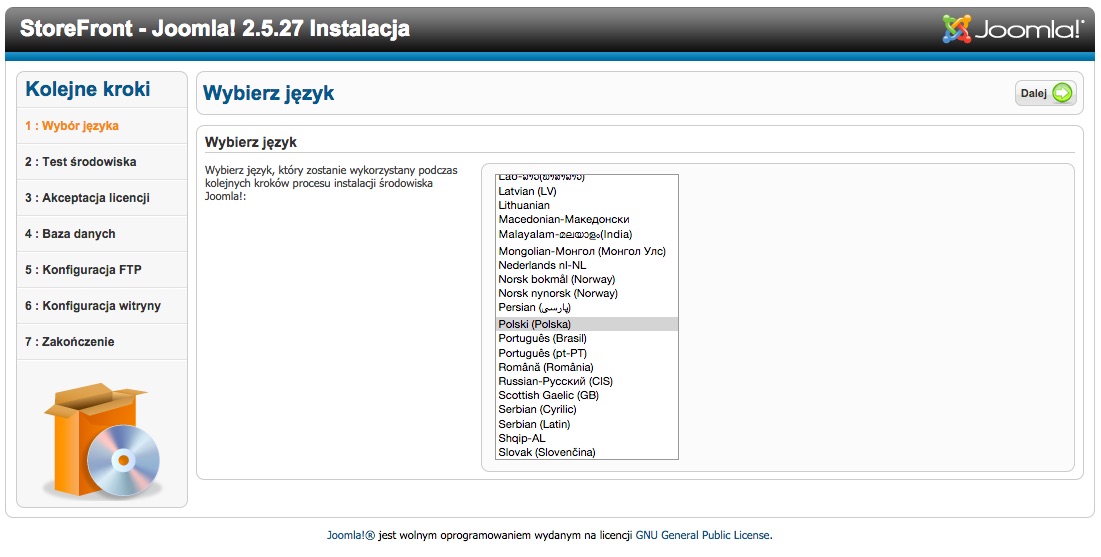
Step 1 – Please select your site’s language at the beginning of the quickstart installation process; this is very important because this language will be used as a suffix for the VirtueMart tables – if you select the wrong language the products won’t appear on your website.
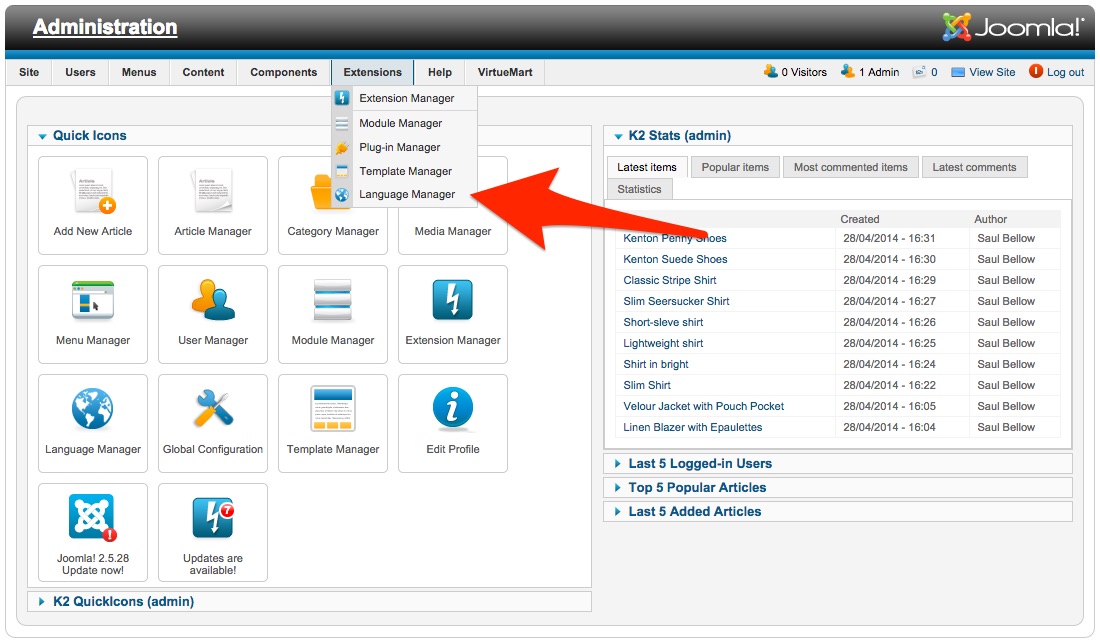
Step 2 – After quickstart installation completes click on the Joomla! Language Manager on the main menu:
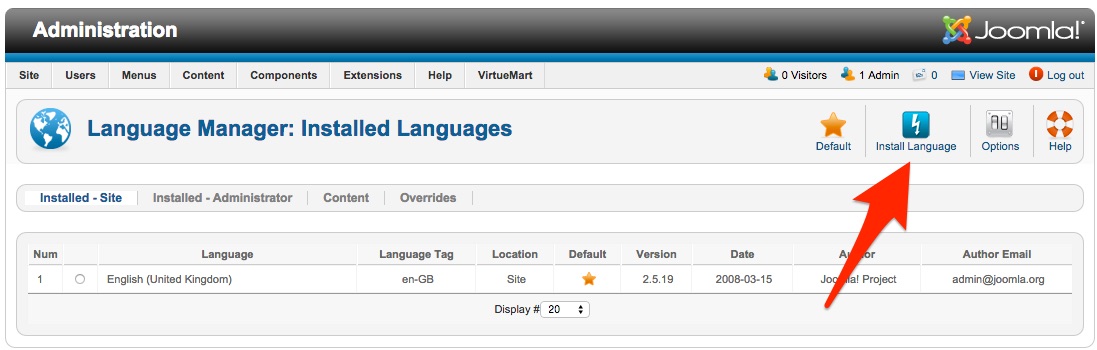
Step 3 – Next, go to the language installer by clicking on the “Install Language” button:
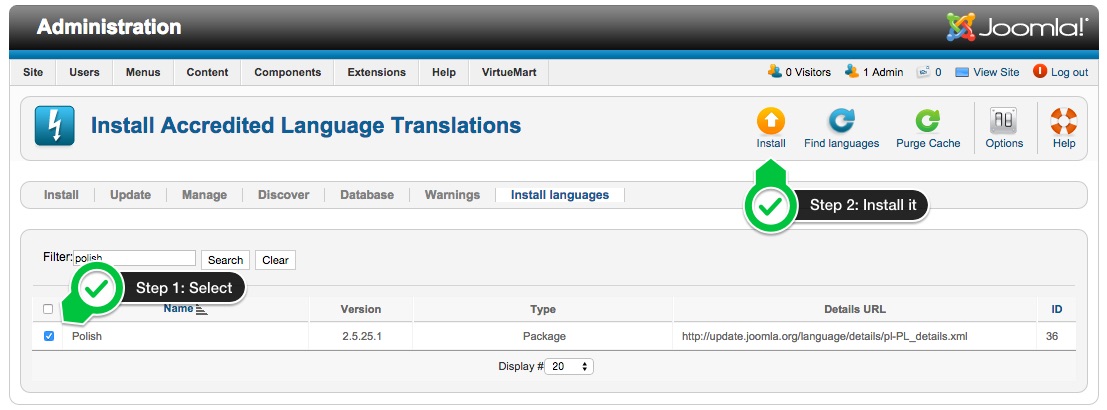
Step 4 – Find the language you chose during the quickstart installation; add a check to it and click the install button:
Step 5 – Now go back to the main Language Manager screen and set your newly-installed language as the default:
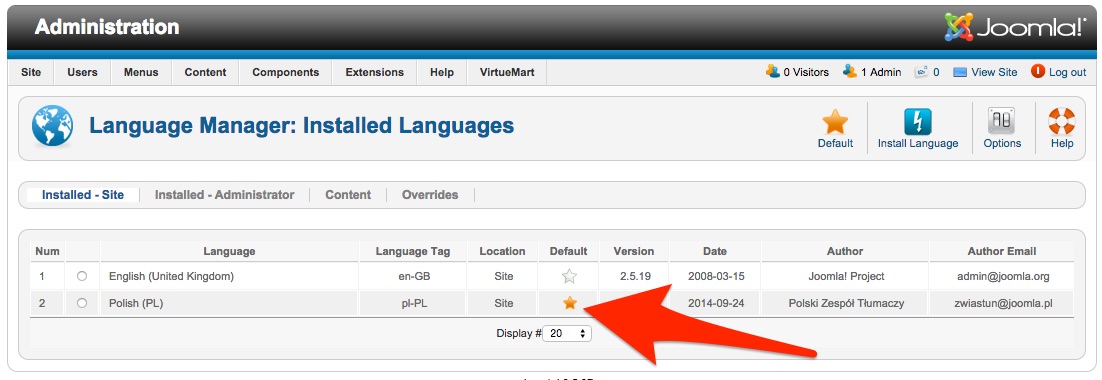
That’s all! After completing all the above steps all VirtueMart products should appear in your template and in the VirtueMart 3 back-end.
Joomla! 3.x
With Joomla! 3.x the entire process is much simpler than in Joomla! 2.5, because all steps are taken during the quickstart installation.
Step 1 – Please select your language at the beginning of the quickstart installation process. This step is really important as the selected language will be used as a suffix the VirtueMart tables – if you select a different language or make a mistake, the products won’t appear on your website:

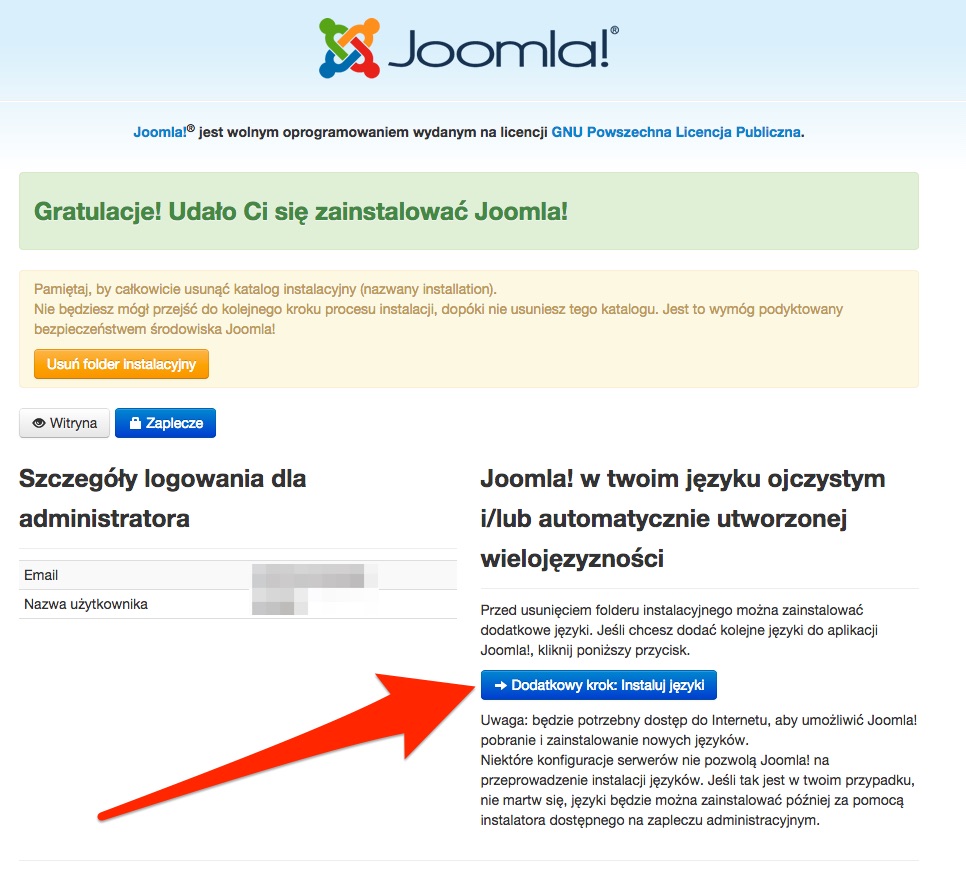
Step 2 – After the main install process completes and you are at the final page (where you are asked to remove the install folder etc…), click on the button for installing additional languages:
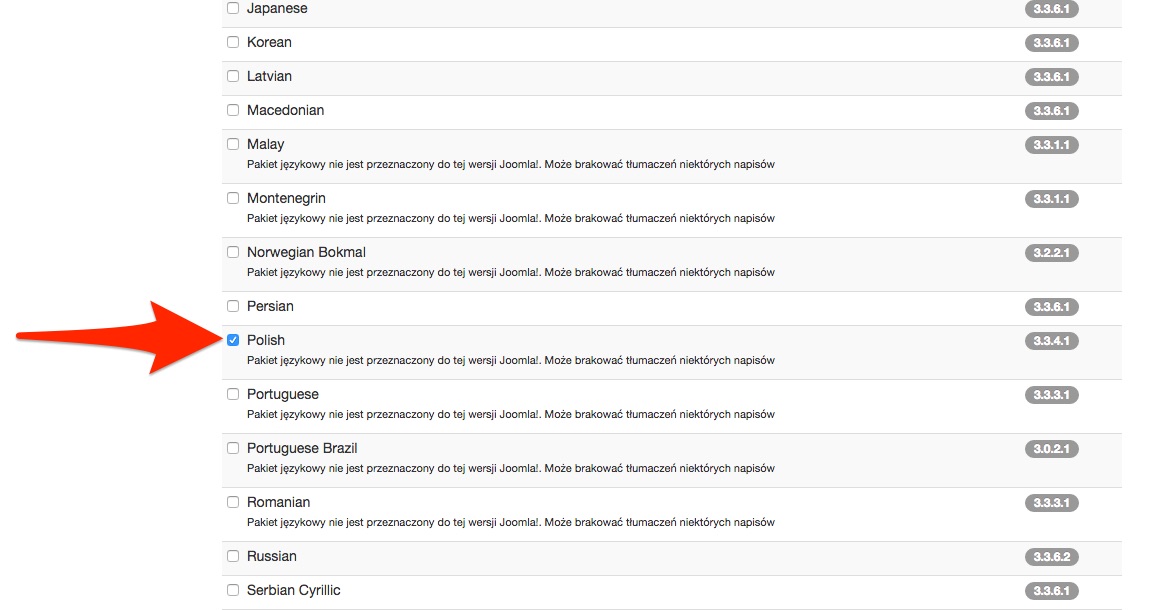
Step 3 – Find your language in the list, add a check to it and click the “Next” button:
Step 4 – Select the same language once again as the default for the back and front-end and click the “Next” button:

That’s all! After the installation process you should see all VirtueMart 3 products appearing as expected in our modules and the VirtueMart back-end.
This article was first published
