If you are new to using Joomla or WordPress, you may have heard FTP mentioned; it’s required to install our quickstart packages, to update a template files, or to add custom CSS to the theme via the override.css file. Using FTP may seem daunting at first, but it is very simple to use once you know how. In this article, we will be looking at what FTP is and how it works so that you may get the most from our themes.
What is FTP?
At this point we could go off on a long tangent about the origins of FTP, how it is older than dinosaurs and just as unfriendly, but that wouldn’t help a new user really understand what it’s about. Instead, let’s keep things simple.
FTP, or File Transfer Protocol, is exactly what the name implies; it’s a set of rules for how files should be transferred. When you drag and drop files on your local computer, all the changes are happening locally and nothing gets sent outside of your computer. However, a website isn’t on your local computer; it can be hundreds of miles away hidden in some hosting company’s server vaults, away from prying eyes. How then, do you move files from your computer to the server?
FTP is the answer to that question (not the only answer, but that’s another question!). An FTP program uses the rules defined by the protocol to act as the middleman between your computer and your server; sort of how a postman is the bridge between your mail and you. Of course, sending post is a much more complex operation than just giving it to your postman to deliver, and so is FTP, but the basics is all that’s needed to get things moving!
How does FTP work?
If you’ve got a server and some files that you want to put on it, such as our extracted quickstart package, then the whole process will boil down to something like this:
- Download and install an FTP program.
- Using this program, connect to your server.
- Find the files you want to upload, and the place you want to upload them to in the FTP program.
- Upload the files to the server.
- Disconnect from your server and admire your handiwork.
Let’s take a look at each step in closer detail.
Download and Install an FTP Client
There are many FTP clients available, but the differences between them are of very little consequence to the basic user who just wants to move files to and from a server. As you become more experienced you may wish to start playing around with alternatives to find one that exactly suits your needs, but for now it won’t do any harm to stick with the most popular options.
A common choice for all users, whether on Windows, OSX or Linux is FileZilla. This program was initially released in 2001 and remains a popular choice more than 10 years later.
To download, navigate to the FileZilla homepage linked above, and click on the Download FileZilla Client button.
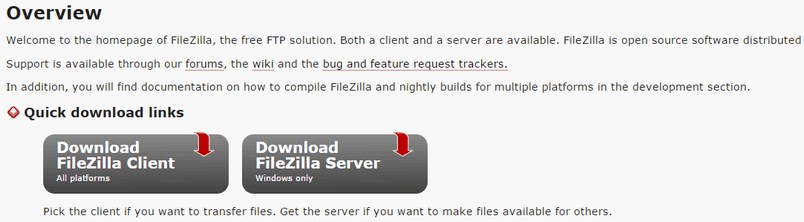
You will be taken to the download page. This usually defaults to showing only the download link for your current operating system, so you can simply click the green Download Now button under your operating system name. If the wrong operating system is listed, or you want to download a different OS’ client, then you should click on the Show additional download options text. The download will begin on its own after a few moments. Once downloaded, double-click the downloaded package to begin the install process. The program installs like any other on your system, but do be aware that there are some offers for free trials or other offers to be installed during the install process; if you do not wish to use these applications then the tickbox should be unmarked.
FileZilla is not the only option available; there are many other popular programs that you may prefer to use. For Windows, take a look at WinSCP or SmartFTP, and for Mac OSX, check out CyberDuck. If you’re a Firefox user, then FireFTP is a add-on for Firefox that lets you do all your FTP-ing from your browser.
Connect to Your Server
Now you have an FTP client, you need to use it to connect to your server; your client will act like a bridge between your computer and your server, allowing you to move files with ease. We’ll look specifically at using FileZilla in this case.
What You Need
You’ll need some information to connect to your server; this is usually provided by your host in their welcome email after you sign-up with them, or is available in your cPanel or Account page, depending on the host:
- Host – This is your domain name or site IP address.
- Username – This is your FTP account’s username.
- Password – Your FTP account password.
- Port – This will usually be 21.
The host name and port number should not cause any issues; the host is simply your website address, and the port number is almost always 21. The username and password will be different depending on your host.
Most larger hosts, such as Bluehost and HostGator, will email you your FTP credentials when you sign-up for a hosting account. If your host uses cPanel to manage your site, then the username and password are usually the same as your credentials for logging in to cPanel.
If you do not know your FTP credentials, check your host’s support information as most host’s provide such information in their documentation. Failing that, contact your host’s customer support team, who will certainly be able to assist you.
Connecting with FileZilla
Now you have your credentials, we can get started with connecting to your server. Start FileZilla; you will be taken to the main FileZilla page:
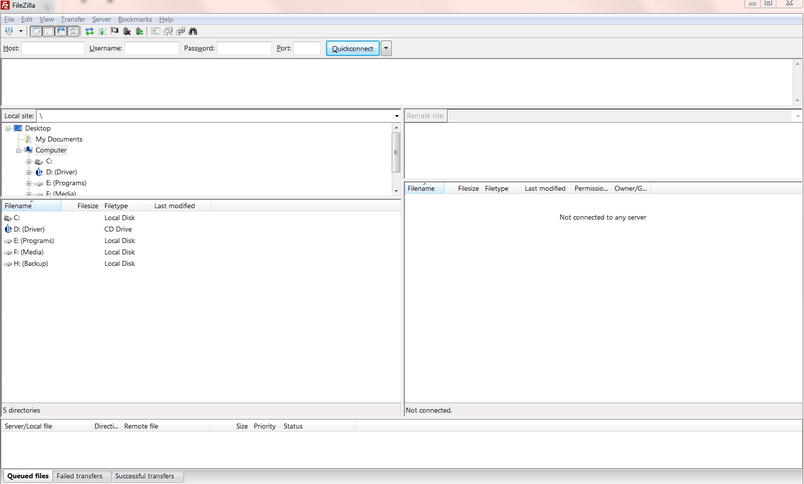
Don’t worry about all the information that appears around the page; we’ll look at that in the next section. Instead, focus on the top of the screen; you’ll see that there is a quick connect bar with four fields to be completed; Host, Username, Password and Port. Enter your details that you got during the previous section here.
![]()
Now all you need to do is click Quickconnect. Directly underneath the quickconnect fields you will see the various commands being executed by the program as it connects to your site. Once done, you should see a Directory listing successful message. You are now connected!
Find Your Files, and Your Upload Location
With the connection established, we need to figure out what files you want to upload, and where you want to upload them to. We’ll need to look at how the windows in FileZilla are arranged to help us get our bearings.
The main window of FileZilla is split into two sections; the left side displays information about your computer that you are working on now, and the right side displays information about the server you are connected to.
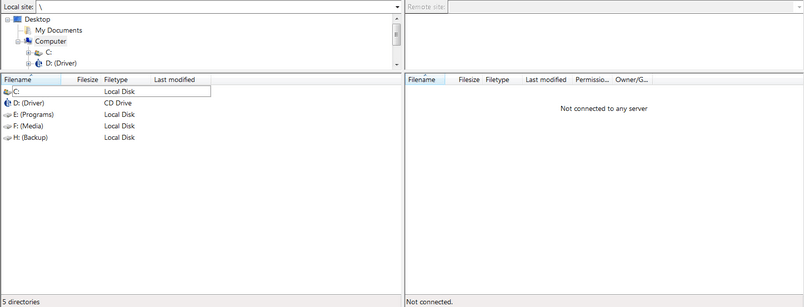
Both the left and right sections display the same information; the current location you are viewing, the folder hierarchy, and the files and folders in the currently selected location.
For example, after completing connection to your server, you may see the first level of your C drive in the left pane. The “Local Site” field will show where you are in the current hierarchy as text; you can enter a location on your computer manually in this field to navigate directly to it. Underneath will be a visual representation of your current location within the folder hierarchy; by clicking on a folder you can expand it to show the contents, then click on another folder to navigate to that location. Finally, underneath the folder structure is the main window that displays the files and folders in the currently selected folder in a list; again you can navigate to a new folder by double-clicking it.
The same information will be shown in the right pane, but for your server rather than your local computer. Where you start in your server’s file structure depends on your FTP account’s settings; if you have full access to the server then you will be taken to the root of your server, whereas an account that has access only to a specific subfolder will automatically open that location on login.
What we now need to do is navigate in the left pane to the files you wish to upload, and in the right pane, navigate to where you want to upload the files to. It works like a trade; a file in the left pane can be copied to the location on the right pane, and vice-versa.
If you’re looking to upload the quickstart files of one of our themes, then you should upload the files to the public root of your server; this is usually a folder called public_html or htdocs.
Upload the Files to the Server
This is the easy part; once you’ve navigated to the location of the files you want to upload in the left pane and set the right pane to where you want to upload the files, you just need to make the transfer.
There are a few ways to do this; just remember that transferring the files creates a copy, rather than moving the original. You can drag and drop files between panes to copy them across. Files can be dragged from the main window, but you may also drag folders from the folder hierarchy; this will allow you to transfer all files and subfolders in the folder across in one go. Alternatively, you can right-click on the file/folder you want to move across and click Upload in the list that appears.
Something to be aware of is though starting a file upload is easy, it can still take a lot of time depending on your internet connection and server capabilities; this wait is also compounded if there are lots of small files to be uploaded versus one big file. As a rough idea, our extracted quickstart packages will take between 20-40 minutes to upload on a basic hosting plan, though of course this can fluctuate.
And that’s done! Your files are now uploaded, so you can disconnect from the server and close FileZilla.
Don’t forget that you can also download files from the server in exactly the same way; by dragging from the right window to the left, or right-clicking on the files on the right etc…This is necessary when you want to, for example, add your own rules to the override.css file; the file must be downloaded, modified, and reuploaded; this will be covered more in-depth in a later article.
I hope that this article has helped you get a good grip on the basics, and we’ll look at how we can use these new powers for good later on.