Our News Show Pro widget for WordPress is a robust tool for creating article, product, or other custom post showcases and previews. It offers a wealth of options to help you define a unique layout that suits your site, whether for previewing your articles with titles, text snippets and images, or showing off your best or latest products from WooCommerce. You have full control over what posts are used, whether you want to display your latest articles, posts from a particular category, or specific posts or products.
However, since it’s a widget, you need to have an available widget area to actually use it. This was not an issue with our earlier themes, as their frontpages were built on widgets and provided a flexible canvas to apply your widgets to, but with the move to a page-based frontpage, first introduced in our Storefront theme, the widget-based frontpage has become obsolete. However, we still want our users to enjoy the full News Show Pro package as they did before, so we implemented the ability to embed News Show Pro as a shortcode, giving you the flexibility to place your showcases wherever you wish. As an additional benefit, this functionality will make it much easier to match our live demo, as the demo page content can be imported to give you a full frontpage within seconds, as you can see with our Storefront and Event themes.
Though it’s now possible to display News Show Pro as a shortcode, that doesn’t mean that it’s lost any of its functionality, but it does mean that actually implementing your chosen layout and options is different; we’ll cover how the shortcode works in the next few sections so you can give it a go!
News Show Pro shortcode – basic configuration
Using News Show Pro as a shortcode rather than a widget is easy as pie; you just add a new page in your WordPress backend and type the shortcode:
[gknsp]Believe it or not, that’s it! When you preview your page you’ll see that News Show Pro is already visible.
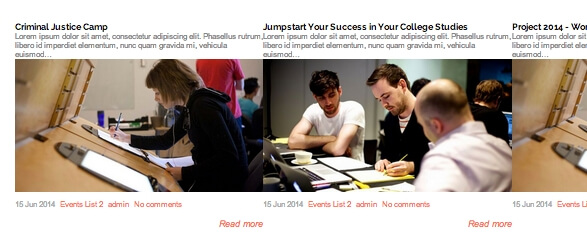
That’s not enough though; when you type the just the base shortcode, it creates a basic instance of News Show Pro with all of the settings set to default, so you’ll only see one article with a title, image; text, additional post information block and read more button all together.
Naturally, we’ll want to fix up the settings to give us more control of how the articles are displayed and what information is included. Almost every option present in the widget version of News Show Pro is available in the shortcode; we just need to add a parameter to the shortcode after the “gknsp” text but before the closing square bracket. Don’t forget that parameters that aren’t added to the shortcode will be left as default, so there’s no need to add
Let's start by changing something simple, like the basic layout. If we adjust the number of rows and columns we will indirectly change the number of articles displayed. Let’s go for 2 rows of 3 columns, which gives us 3 article previews per row for a total of 6. To do this, we’ll add two new parameters to the shortcode; article_cols for the column count, and article_rows for the row count:
[gknsp article_cols="3" article_rows="2"]
If you preview the page right after after changing the shortcode your page might not be displaying the expected 3 columns and 2 rows; this is because the default value for the widget’s cache is 60 minutes. This means that the News Show Pro will store the settings and won’t update them for a whole hour, which can be useful for users trawling through multiple pages of your site. For now, we can set the cache time to 0 so that our changes are displayed straight away, and change it back once we’re done. Let’s add the cache_time parameter to the shortcode and set it to 0:
cache_time="0"to disable the cache. Now our earlier changes should be visible after a quick page refresh:
You’ll likely want to further modify the article layout to make it unique by changing the image size, padding, margins etc…We’ll look at the various available article layout options at the end of this article.
News Show Pro data sources
By default, the shortcode will take your latest posts from all categories as its data source, but if you want to fine-tune this behavior we can easily tell it to use alternative sources or categories:
Display specific posts:
Let’s say that we want to specify the posts to display; maybe we have some important content or well-known articles that we want any visitors to see as soon as they arrive on the site. To lock News Show Pro to displaying only the posts you specify, then we’ll need to use the data_source_type attribute in the base shortcode. This parameter lets us tell the shortcode where it should look for its content, whether this is from categories, specific posts, or other plugins like WooCommerce or BuddyPress. To tell the shortcode to use specific posts, we’ll set this parameter to wp-post:
data_source_type="wp-post"
Once this parameter is added to the shortcode, we’ll also need to tell the shortcode which posts to specifically show; the attribute above only tells it that we want to specify a specific post without any additional details. To specify a post, we’ll also need to add a new attribute, data_source, to the shortcode:
data_source="x"
Where x is the post slug(s) you wish to display, with each slug separated by a comma. There’s no limit to the number of posts you can specify, but remember that NSP can only display the number that you have set in the layout options.
Displaying posts from a category
To display the latest posts from a particular category, we’ll again need to use the data_source_type and data_source as above, but with slightly different settings. To specify that NSP should take posts from categories, use the following attribute:
data_source_type="wp-category"
Then, to tell NSP exactly which category to take posts from, add this attribute:
wp_category_list="X"
Where x is the category ID you wish to display, separated by a comma if you wish to display posts from multiple categories.
Displaying latest woocommerce products
WooCommerce is a extremely popular ecommerce solution for WordPress, and NSP can display your latest WooCommerce products by specifying it as the source in the shortcode. Just set the data_source_type option as follows:
data_source_type="wp_woocommerce-wooc_latest"
And your latest products will be displayed automatically. The layout options we covered earlier still apply here, so play around to find a layout that works for you!
Displaying specific products only
So you’ve got some pretty special products that you want everyone to see? Just set News Show Pro to display the specific items, just like we did with our specific posts earlier in this article. To display only products that you specify, change the attribute from:
data_source_type="wp_woocommerce-wooc_latest"
to:
data_source_type="wp_woocommerce-wooc_post"
This tells NSP to use specific product articles as the source, but as with our specific posts, does not actually tell NSP which products to display. To do this, we’ll need to add the data_source attribute again:
data_source="sku-code1,sku-code2"
Where the ’sku-code’ is the SKU code for the product(s) in WooCommerce.
Displaying latest products from a category
To display the latest products from a specific category only, which is very useful if you want to have multiple tabs each with a different selection of products, you should change the data_source_type attribute to:
data_source_type="wp_woocommerce-wooc_category"
This will tell News Show Pro to take details from categories. To specify which categories, we’ll need to add a new attribute to the shortcode:
woocommerce_category_list="X"
Where ‘X’ is the category ID(s) (found in the category URL) from WooCommerce, separated by a comma if there is more than one. To find the category ID of your chosen category, click on Products>Categories in the left menu of your WordPress backend to be taken to the WooCommerce product category list, then click on the category you wish to display. Once on the category page in your backend, check the URL; you should see something like this:
http://www.yoursite.com/wp-admin/edit-tags.php?action=edit&taxonomy=product_cat&tag_ID=99&post_type=product
Notice that part of the URL is “ID=99”; the number that appears after the equals sign is the category ID
List of News Show Pro attributes
There’s a lot more options available in NSP; far too many for us to go in-depth with in such a short article! Why not give these a test and see what you can come up with?
- title = “widget title” – used to specify the widget title
- widget_css_suffix=”custom-css-class” – apply additional css classes for finer CSS styling
- cache_time=”0/30..” – tell NSP how long to store data in its cache
- use_css = "on/off" – use the default css styles for the widget
Data source attributes
data_source_type = "wp-latest/wp-category/wp-tag/wp-post/wp_woocommerce-wooc_latest/wp_woocommerce-wooc_category/wp_woocommerce-wooc_post
- data_source = "slug1,slug2" to display specific posts/products using the slug or ID
- wp_category_list = "22,23" to display posts from categories that have 22 and 23 as their IDs
- woocommerce_category_list = "3,9" display WooCommerce products from categories with 3 and 9 as their category IDs
- orderby="ID/date/title/modified/random" specify how items should be ordered (the default is ID)
- order = "ASC/DESC" order items by ascending or descending order (default: DESC)
- offset = "0/2/4…" – forces NSP to ignore the stated number of articles i.e. if set to 1, then the first article in a given list will be ignored and display will start from the second article (default is 0)
- data_source_blog = "2" when you are using multisite, this shortcode will dipslay posts from blog with an ID = 2.
- article_wrapper = "default" – Article wrappers offer more complex layout changes; we’ll cover these in-depth in a later article
Articles/links amount
- article_pages = "1/3/4.." – specify the number of pages (sets of articles available through pagination; the default is 1)
- articles_cols = "1/3/4.." – specify the number of columns (default is 1)
- articles_rows = "1/3/4.." – specify the number of rows with articles (default is 1)
- links_pages = "1/3/4.." – specify the number of pages of links (default is 0)
- links_rows = "1/3/4.." – specify the number of rows with links (default is 0)
Article layout
- article_pagination = "pagination/arrows/pagination_with_arrows"
- links_pagination = "pagination/arrows/pagination_with_arrows" to specify the type of article and links pagination available.
- article_title_state = "on/off" set whether the article title is visible or not
- article_title_len_type="words/chars" article title length unit
- article_title_len="10, etc.." 10 words or 10 chars depending on the setting of the above attribute
- article_title_order = "1, 2, etc" set the order that title should be displayed e.g. if set to first, then the title will appear at the top of the showcase, with other elements like images etc…underneath.
- article_text_state = "on/off" set whether article text is visible or not
- article_text_len_type="words/chars" article text length unit
- article_text_len="10, etc.." 10 words or 10 chars depending on the attribute above
- article_text_order = "1, 2, etc" the order that the text snippet should be displayed e.g. if set to 2 whilst title order is set to 1, then the text snippet will appear under the title
- article_image_state ="on/off" set whether the article’s image is displayed or not
- article_image_w = '"160" image width in pixels
- article_image_h = '"120" image height in pixels
- article_image_pos = "top/left" Image position – if you want to use image position left, make sure that image order is set to 1 and that image is set first in the display order
- article_image_order = "1" – image order position relative to other elements
- article_image_popup => "on/off" – when this option is enabled, when you click the image a poup is displayed; when disabled, you are redirected to the article page
- article_info_state = "on/off" set whether additional information is displayed or not
- article_info_format ="{DATE} {CATEGORY} {AUTHOR} {COMMENTS}" set which additional elements should be displayed; you can choose which elements to display by adding/removing them from the attribute
- article_info_date_format="d M Y" Set the date format; the available formats may be found here
- article_info_order = "1" – article info’s order position
- article_readmore_state = "on/off" set whether a read more button/link is displayed or not
- article_readmore_order = "1" read more button position
Paddings
- article_block_padding = "20px 0" padding around the article
- image_block_padding = "0" padding around the article image
In our future article we will look at some additional options not covered in this article, and go more in-depth with the other settings like article wrappers to aid you with creating a spectacular showcase!