ReCaptcha is an anti-spam filter, which verifies if a user that’s browsing your site is a human, or a dastardly bot looking to post useless get-rich-quick schemes and and tablets that supposedly enlarge or reduce areas of one’s body, depending on their goals. Even if you don’t recognize the reCaptcha name, I’m sure that you’ve had to retype words or numbers (nowadays, usually horribly-distorted ones) to complete actions like sending a contact form, posting comments to an article or logging-in to a website. Though reCaptcha is great for keeping your articles dating-website-link-free unless you’re writing about them, there can be a challenge; often the characters or words you are required to enter are so distorted that it becomes an exercise in frustration just to get a comment posted. Happily, this month a new version of reCaptcha – no Capcha, was introduced; it may well ease your pain.
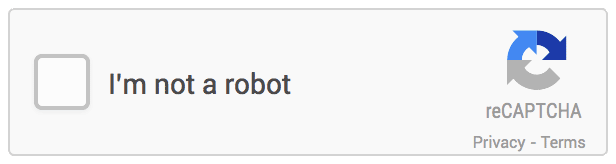
Google decided to help out folks on the web battling with getting through spam protection. This new version of reCAPTCHA is a much better, more user-friendly solution that in most cases will require much less effort to use. Essentially, instead of defaulting to the nigh-impossible to read hieroglyphics we see currently, Goggle will run a series of checks on the user to help determine if the user could be a bot (Google’s staying tight-lipped on the details, but one would imagine they would target a range of specific behaviors); if it doesn’t find anthing suspicious, then the security part of whatever process your attempting to complete will be limited to just clicking a checkbox that indicates you’re not a bot (so we’re safe till the bots become self-aware).
However, if the anti-span mechanism notices that the user is somehow suspicious, additional verification is needed. Unfortunately, this means that if you have bot-like qualities you’re going to be bombarded with the usual illegible characters or image matching (that is, picking images with a similar theme/concept). The second option is intended primarily for users of mobile devices, on which it is much easier to choose a picture than to read and enter characters (audio verification on the basis of output sound is also possible for those with limited eyesight or relying on a reader).
reCaptcha No Captcha basic implementation
Before we start to implement these new captcha features on our own site, we should make sure that we have private and public reCaptcha keys connected with the domain where we’re going to be using it, otherwise it just won’t work. We may get our keys for free at the following website: https://www.google.com/recaptcha.
The most important thing to do is actually display the no Captcha widget:

The easiest way is to add a link to the JavaScript code and add a div tag with the g-recaptcha class attached and the data-sitekey attribute with your public captcha key as a value. A link to the script should be added in the head section of our website:
<script src="https://www.google.com/recaptcha/api.js" async defer></script>
In WordPress themes the code may looks like:
if(is_page('contact_page_slug')) {
    wp_enqueue_script('re-captcha', 'https://www.google.com/recaptcha/api.js', array('other-scripts'), false, false);
}
I’ve added additional an condition, (is_page ( .. )), which loads the aforementioned script on specific pages only, such as the page with our contact form. Code should be usually added into functions.php or header.php (the same place as other scripts and css for our theme).
Whereas a div with the g-recaptcha class should be placed inside our form, in the place where we want to display the widget.
<div class="g-recaptcha" data-sitekey="Your public reCaptcha key"></div>
Our widget should be displayed properly now, so now we need to create a check to confirm that a user has completed the required fields for user verification in the reCaptcha form. Generally we have 3 methods to check if the user is a human. As an example, I’ll cover the method that uses POST parameter verification during the sending process of our form. For the purposes of the example I’ve added a $validated variable which is set to “false” if any of our contact form fields are not verified properly. (we may have other verification methods working in accordance with this one, such as checking for a correct email address etc…).
if ($_POST["g-recaptcha-response"]) {
$resp = $reCaptcha->verifyResponse(
                $_SERVER["REMOTE_ADDR"],
                $_POST["g-recaptcha-response"]
            );
} else {
            $validated = false;
            $errors['recaptcha'] = __("The reCAPTCHA code is incorrect. Please try again.", 'theme_domain');
}
The highlighted fragment of code checks the g-recaptcha-response field, if the verification requirements are passed, the $validated value will stay as “true” (starting value) and the form may be sent. If the verification fails (lines 7,8), the variable is changed and the error text (with the information that the captcha verification is not complete and you should try again) is displayed.
Change the No Captcha widget style
For complete control we can also add a data-theme attribute with the dark value from our code to change the widget color scheme or data-type attribute with an audio or image value to select the priority verification method.
<div class="g-recaptcha" data-sitekey="Your public reCaptcha key" data-theme="dark" data-type="audio"></div>
I hope this tutorial has been helpful, and if you’ve learned anything interesting about noCaptcha, why not let us know in the comments?