With a media manager implemented in our plugins, we can make our user’s life easier; instead of manually entering the address to their chosen image, they can just select it from the media manager and the hard work is taken care of. In this article, we’ll be looking at how you can implement this option into your plugin or theme.
Here’s a simplified set of steps that are required for the media manager implementation to work effectively:
- Assign an action that opens the media manager to the buttons that we want to use this functionality. The media manager should open when the button is clicked.
- Define the characteristics of the media manager window that our script uses.
- Add an action that facilitates selecting an image.
- Add an action that closes the manager.
As you can see, conceptually the idea does not seem that complicated, and luckily the majority of the required operations are performed on the script side of the media manager. We just have to take care of key actions such as selecting an image or closing the manager.
Let’s start with the base framework of our code:
var gk_media_init = function(selector, button_selector)  {
    var clicked_button = false;

    jQuery(selector).each(function (i, input) {
        var button = jQuery(input).next(button_selector);
        button.click(function (event) {
            event.preventDefault();
            var selected_img;
            clicked_button = jQuery(this);

            // check for existing media manager instances

            // configuration for new instance of the media manager

            // closing event for the media manager

            // selection event for the media manager

            // opening media manager window
       });
   });
};
The above function loads two arguments – a field selector that will be loading data from the media manager, and a button selector that will be placed next to the field; it will open the media manager on click.
After each click, we set two variables – one that stores the button clicked (clicked_button) and one for the selected image (selected_img). A clicked_button variable is required as we will be implementing the media manager functionality using a single instance of the media manager and, as a consequence, we’ll need to change the variable for the button clicked so that any functions defined once always refer to the appropriate button.
The code for checking whether an instance of media manager already exists should look as follows:
if(wp.media.frames.gk_frame) {
    wp.media.frames.gk_frame.open();
    return;
}
We are testing whether the gk_frame object (this is the name of our instance) in the wp.media.frames object exists. If it exists, we open the media manager window using the open method. We could say that it is an example of Singletone pattern use as we are using a media manager instance created only once instead of creating a new instance each time.
If a media manager instance does not exist, we have to create it:
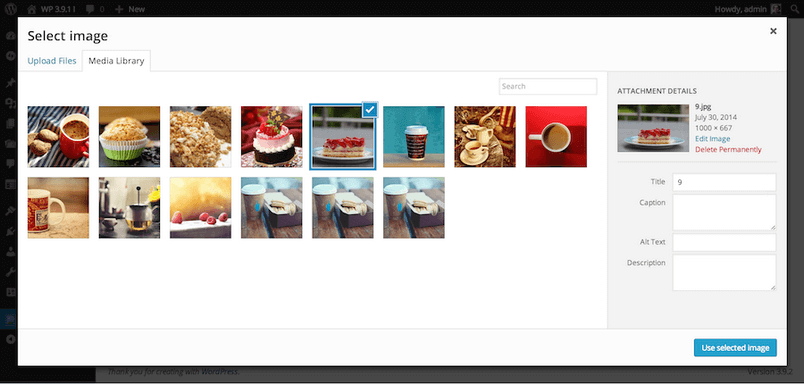
wp.media.frames.gk_frame = wp.media({
   title: 'Select image',
   multiple: false,
   library: {
      type: 'image'
   },
   button: {
      text: 'Use selected image'
   }
});
It is worth adding support for translations for the sequence of symbols used in the above code via the wp_localize_script function.
As you may have noticed, we request a wp.media constructor with an object including the configuration of the new media manager instance, where we specify a window title (title), the option for selecting multiple images at once (multiple), specify the range of media used (library object – in this case, there are images only) and we define the name of a button for returning a selection form (button object).
Now it’s time for us to specify how our code will react when an image is selected and the media manager is closed – we’ll start by creating a function that we will use for such events:
var gk_media_set_image = function() {
    var selection = wp.media.frames.gk_frame.state().get('selection');

    if (!selection) {
        return;
    }

    // iterate through selected elements
    selection.each(function(attachment) {
        var url = attachment.attributes.url;
        clicked_button.prev(selector).val(url);
    });
};
The above function performs three key operations:
- It intercepts a marked element or elements
- It loads a URL address to insert from the marked elements
- It inserts text to the text field next to the clicked button
We request this function while closing the media manager (this fragment is optional – in this case, if a user chooses an image, its URL will be set as the content of the text field next to the clicked button, no matter how the media manager window is closed):
wp.media.frames.gk_frame.on('close', gk_media_set_image);
and when selecting an image (clicking the Use selected image button):
wp.media.frames.gk_frame.on('select', gk_media_set_image);
To finish, we have to open a media manager window:
wp.media.frames.gk_frame.open();
The entire code for the media manager functionality will look as follows:
var gk_media_init = function(selector, button_selector)  {
    var clicked_button = false;

    jQuery(selector).each(function (i, input) {
        var button = jQuery(input).next(button_selector);
        button.click(function (event) {
            event.preventDefault();
            var selected_img;
            clicked_button = jQuery(this);

            // check for media manager instance
            if(wp.media.frames.gk_frame) {
                wp.media.frames.gk_frame.open();
                return;
            }
            // configuration of the media manager new instance
            wp.media.frames.gk_frame = wp.media({
                title: 'Select image',
                multiple: false,
                library: {
                    type: 'image'
                },
                button: {
                    text: 'Use selected image'
                }
            });

            // Function used for the image selection and media manager closing
            var gk_media_set_image = function() {
                var selection = wp.media.frames.gk_frame.state().get('selection');

                // no selection
                if (!selection) {
                    return;
                }

                // iterate through selected elements
                selection.each(function(attachment) {
                    var url = attachment.attributes.url;
                    clicked_button.prev(selector).val(url);
                });
            };

            // closing event for media manger
            wp.media.frames.gk_frame.on('close', gk_media_set_image);
            // image selection event
            wp.media.frames.gk_frame.on('select', gk_media_set_image);
            // showing media manager
            wp.media.frames.gk_frame.open();
        });
   });
};
In order to use this code, we have to create the appropriate structure, e.g.:
<input type="text" class="media-input" /><button class="media-button">Select image</button>
and request the gk_media_init function in the following way:
gk_media_init('.media-input', '.media-button');
We’ve now created the basic implementation of the media manager selection option for use in plugins and themes based on field and button selectors. We will look at extending this topic with more complex configuration of the media manager in a future article.