Our SteakHouse WordPress theme has been a popular addition to our catalogue, with many users taking advantage of its features to promote their bars & restaurants or other small, local businesses. Something we’ve noticed is that several of these users have been interested in expanding the frontpage functionality by replacing the static image in the header with a slideshow. In this article I'll look at how this may be done.
Introduction
As an example I'll use Easy Image Slider, but generally speaking you could use any slider which includes the ability to create the slideshow via shortcode. Our next few steps should be that first, we install and activate the plugin; we’re not going to get far without it! Next, we’ll create our slideshow in the Easy Image Slider menu, then add it to the header section via shortcode and disable the default header image. Finally, with the slideshow in place, we’ll add some custom CSS to blend the slideshow a bit better with the surroundings. Let’s look at each of these steps individually; I’m assuming that if you’re looking to make such an amendment that you’re already familiar with installing and activating a plugin from the plugin repository, so let’s jump straight to…
Creating your slideshow
Once the plugin has been installed and activated, have a look at your Easy Slider menu that’s now in your WordPress admin area, and click the Add New Slider button. Here, you’ll need to enter a title for your slideshow, and then we can start adding images by clicking the Add images button.
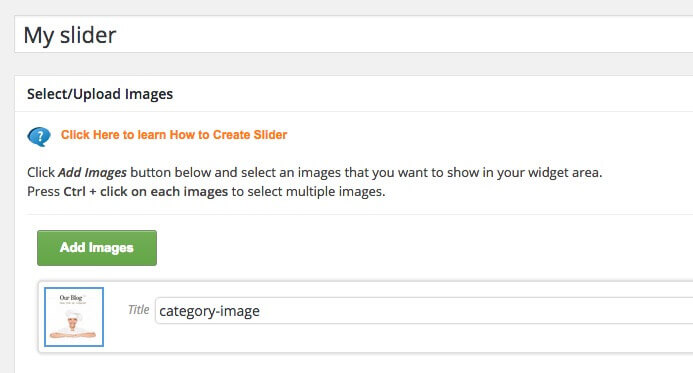
Here we can select our slides. For the best results you really should make sure the images you use all have the same dimensions, otherwise things will look a bit unprofessional. Under the slider there’s a settings section (slider delay, effect, style etc.); there’s no recommendation here; you can build your slider however you like. You can also add the slider’s height and width settings (you should set the height to the same value as your header). After that just save the slideshow and we can move to getting the it added to the header.
Adding the slideshow to your theme header
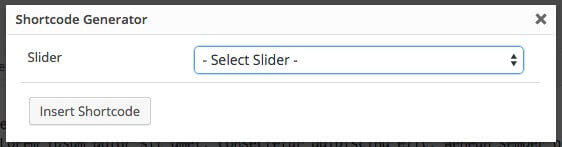
Now we can edit our frontpage header. Navigate to the Pages section of your WordPress install and edit the Frontpage page, or whatever page you have that’s using the frontpage template. You’ll see that a Easy Slider Lite button has been added to the editor next to the Add Media button, so click on it. A popup will open where we can select the slider we made earlier and add the shortcode into our page content by clicking the Insert Shortcode button.
Now we can start with some aesthetic changes. For some users this may be enough, the small slider will be displayed after the logo with the border and buttons to navigate and everything will look fine, but others might want to get the slider more integrated into the theme’s layout by moving the slider to the background with the logo and other info in the foreground; kind of like the default Steakhouse theme’s header layout, but with a slider in the background instead of a static image. For those that want further integration, we’ll need to follow the last few steps.
Disable default header image
Now things will get a little bit more fiddly, as these changes will require some additions to the theme code. So, you’ll need to have FTP access to your server so you can download the files, make the changes and upload the changed files back to your server. First, we’re going to disable to the Steakhouse header image, so load up your FTP client and get the Steakhouse/header-frontpage.php file open in your editor of choice, then change this line:
<header id="gk-header" role="banner" style="background-image: url('<?php header_image(); ?>');">to:
<header id="gk-header" role="banner">
and the header image should be removed and no longer visible in the header background.
Add custom CSS
Our WordPress themes include an override file for adding custom CSS; you can find out more about putting this to use in this blog article. Once you’re up to speed, we’ll need to add the following CSS code to our theme:
#ewic-con-612 {
  left:  0;
  position: absolute;
  top: 0;
  width: 100%;
  z-index: -1;
}
#gk-header-mod {
  background: none!important;
}
.bx-wrapper .bx-viewport {
	border: 0!important;
}
.bx-controls-direction {
	display: none;
}
So what does it do? The first part of the code (lines from 1 to 7) are for the main wrapper of the slider, the number 612 in the #ewic-con-612 CSS selector is the id of the slider we’re using; if you’re using a different plugin for your slider the selector will need to be different. If you’re comfortable with that, you can find it using Firebug or Google Web Developer Tools to inspect the element; if not, stick with the Easy Slider till you’re ready. The code then positions the slider absolutely with 100% width and the z-index property takes the container to the background; this way the buttons and other elements will be overlaid on the slider to make them visible and clickable.
The next bit of code, lines 8-10, removes dark header overlay which is visible when you are scrolling the page. Then, the next selector removes the border around the slider, and the final selector removes the navigation buttons from the slider, so you’re left with an auto-rotating image slideshow with no other stuff getting in the way. And there you go; you’re slider is now integrated into the background and looks suitably impressive; give yourself a pat on the back!
If you are interested in learning about the general customization of the Steakhouse theme you can check out the official customization guide as well as add a video header background with these other articles on our blog.